Why Is My Coffee Pot Not Brewing And How To Fix It
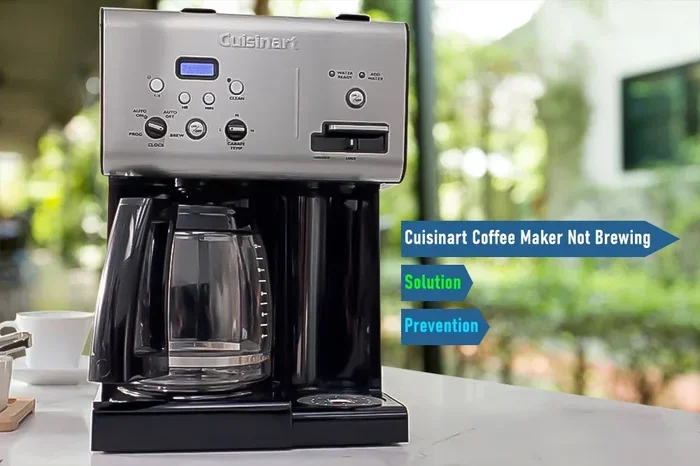
A coffee pot that won’t brew is frustrating, but most causes are easy to fix at home. From clogged filters and mineral buildup to faulty heating elements and water reservoir issues, there are several reasons your coffee pot not brewing might stop working. This guide walks you through every common problem and shows you exactly how to solve it yourself.
There is nothing worse than waking up, filling your coffee pot, pressing the button, and… nothing happens. You wait. You listen. Still no gurgling, no dripping, no rich aroma filling your kitchen. Your coffee pot not brewing has officially ruined your morning.
Before you panic or rush to buy a new machine, take a breath. Most of the time, the reason a coffee pot stops brewing is something simple and fixable. Whether you own a drip coffee maker, a single-serve pod machine, or a classic percolator, the troubleshooting steps are similar. This guide covers every common reason your coffee maker not working and gives you clear, step-by-step fixes you can do right now.
We will walk through the most common coffee pot problems, show you how to diagnose the issue, and give you practical tips to keep your machine running smoothly. No fancy tools needed. No confusing jargon. Just real, helpful advice you can use today.
Key Takeaways
- Mineral buildup is the #1 cause: Hard water deposits can block your coffee pot and stop it from brewing properly.
- Simple fixes solve most problems: Descaling, cleaning the filter, and checking the water reservoir often restore your coffee maker to full working order.
- Know when to repair vs. replace: Some issues are cheap and easy to fix, while others mean it is time for a new machine.
- Regular maintenance prevents breakdowns: A little cleaning goes a long way in keeping your coffee pot running smoothly.
- Electrical problems need professional help: If the base or wiring is damaged, do not try to fix it yourself.
- Compare similar appliance issues: Troubleshooting a coffee maker shares similarities with fixing other kitchen appliances.
- Act fast when problems start: Early intervention prevents small issues from becoming expensive repairs.
📑 Table of Contents
- Common Reasons Your Coffee Pot Won’t Brew
- How To Troubleshoot Your Coffee Maker Step by Step
- Coffee Pot Maintenance Tips To Prevent Future Problems
- When To Replace Your Coffee Pot Instead Of Repairing
- Comparing Coffee Pot Troubleshooting With Other Kitchen Appliances
- Quick Tips To Remember
- Common Mistakes People Make With Their Coffee Pots
- Expert Insight: How Long Should a Coffee Pot Last?
- Final Thoughts On Fixing Your Coffee Pot
Common Reasons Your Coffee Pot Won’t Brew
When your coffee machine not brewing, the cause usually falls into one of several categories. Understanding what is behind the problem helps you fix it faster. Here are the most common reasons your coffee pot not brewing might stop working.
Clogged Water Lines and Mineral Buildup
This is the number one reason coffee pots stop brewing. Over time, minerals from hard water build up inside the tubing and heating element. These deposits act like a blockage, preventing water from flowing through the system. If your coffee tastes strange or brews very slowly, mineral buildup is likely the culprit.
The fix is simple. Run a mixture of white vinegar and water through your machine. Use equal parts vinegar and water. Let the machine run a full brew cycle without coffee grounds. Then run two to three cycles with plain water to rinse out any vinegar taste. Do this once a month to keep your coffee maker running strong.
Dirty or Clogged Filter
The filter in your coffee pot catches grounds and keeps them out of your cup. But over time, coffee oils and fine particles can clog the filter. When this happens, water cannot pass through properly, and brewing slows down or stops entirely.
Check your filter after every few uses. If it looks dark or feels greasy, it is time to clean or replace it. For reusable filters, wash them with warm soapy water after each use. For paper filters, simply toss them after brewing. A clean filter makes a huge difference in coffee pot performance.
Faulty Heating Element
Your coffee pot needs a working heating element to boil water and brew your coffee. If the heating element burns out, your machine will still turn on, but no water will heat up. You might hear the machine running, but nothing drips into the carafe.
Testing a heating element requires a bit of electrical knowledge. If you are not comfortable working with electronics, it is best to call a professional. For many machines, a replacement heating element is affordable and easy to find online. However, if the element is built into the base, replacing the entire machine might make more sense.
Water Reservoir Issues
Sometimes the problem is as simple as water not getting into the machine properly. Check the water reservoir for cracks, leaks, or misalignment. If the reservoir is not seated correctly, the machine will not draw water. Also, make sure the water level is above the minimum line.
Some coffee pots have a float valve inside the reservoir. If this valve gets stuck, the machine thinks there is no water and will not start brewing. Remove the reservoir and check for any debris or blockages. A quick rinse usually solves this problem.
Thermal Fuse or Thermal Sensor Failure
Many modern coffee pots have a thermal fuse that shuts off the machine if it overheats. This is a safety feature. If the thermal fuse blows, the machine will not brew even if everything else looks fine. Unfortunately, replacing a thermal fuse is not always straightforward.
Check your owner’s manual for guidance. Some thermal fuses are user-replaceable, while others require professional service. If your coffee pot overheated recently, this could be the reason it will not start.
How To Troubleshoot Your Coffee Maker Step by Step
Now that you know the common causes, let us walk through a systematic troubleshooting process. Think of this like a checklist. Work through each step in order until you find the problem.
Step One: Check the Power Supply
Sounds obvious, but it is the first thing to check. Make sure the coffee pot is plugged in securely. Check the outlet by plugging in another device. If you have a power strip, make sure it is turned on and working. Some machines have a reset button on the bottom or back. Press it and see if that helps.
If the outlet works but the machine still does not turn on, the power cord might be damaged. Look for frayed wires or burn marks. A damaged cord is a safety hazard and should be replaced immediately.
Step Two: Inspect the Water Reservoir
Remove the water reservoir and check for any visible damage or blockages. Make sure the reservoir is clean and free of coffee stains. Fill it with fresh water and reinsert it properly. Listen for a clicking sound when you press the brew button. That clicking often means the machine is trying to draw water but cannot.
Step Three: Run a Cleaning Cycle
Even if your coffee pot looks clean on the outside, the inside may need attention. Run a descaling cycle using vinegar and water. This removes mineral buildup from the heating element and tubing. After the vinegar cycle, run two to three plain water cycles to flush everything out.
Regular descaling is one of the best things you can do for your coffee pot maintenance. It keeps water flowing freely and helps your machine brew at the right temperature.
Step Four: Check the Filter and Grounds Basket
Remove the filter and grounds basket. Look for clogs, coffee buildup, or damage. Clean the basket thoroughly with warm water and mild soap. If the filter is paper, replace it with a new one. If it is a reusable mesh filter, scrub it gently to remove any oily residue.
Step Five: Test the Heating Element
If all the above steps fail, the heating element might be the problem. Fill the reservoir with water and turn on the machine. Wait a few minutes and carefully touch the outside of the machine near the base. Does it feel warm? If not, the heating element may have failed. This is when you should consider professional repair or replacement.
Coffee Pot Maintenance Tips To Prevent Future Problems
Prevention is always better than cure. A little regular care keeps your coffee maker working reliably for years. Here are simple maintenance habits that make a big difference.
Clean After Every Use
After each brew, empty the grounds basket and rinse the carafe. Wipe down the outside of the machine. This prevents coffee oils from building up and causing clogs. A quick 30-second cleanup after every pot of coffee saves you hours of troubleshooting later.
Descale Monthly
Hard water is the enemy of coffee pots. Mineral deposits build up fast, especially in areas with hard water. Descaling once a month keeps your machine running efficiently. Use a descaling solution or a simple vinegar and water mix. Your coffee will taste better, and your machine will last longer.
Replace Filters Regularly
Do not wait until the filter looks terrible to replace it. For paper filters, use a fresh one every time. For reusable filters, replace them every three to six months. A worn-out filter affects water flow and coffee quality.
Use Clean, Filtered Water
The water you put into your coffee pot affects everything. Tap water with high mineral content accelerates buildup. Using filtered water reduces mineral deposits and improves the taste of your coffee. It is a small change with big results.
Store Your Coffee Pot Properly
When not in use, keep your coffee pot in a dry, cool place. Moisture can cause mold and mildew to grow inside the machine. If you travel frequently, unplug the machine and store it with the reservoir empty.
When To Replace Your Coffee Pot Instead Of Repairing
Sometimes fixing a coffee pot not brewing is not worth the cost or effort. Here are signs that replacement is the better choice.
Age: Most coffee pots last five to ten years with proper care. If yours is older than that, frequent repairs add up fast. A new machine is often more cost-effective than repeated fixes.
Repeated Breakdowns: If you have already repaired your coffee pot multiple times, it might be time to let go. A machine that keeps breaking down is a frustration, not a convenience.
Electrical Damage: If you notice burning smells, sparks, or visible damage to the cord or base, stop using the machine immediately. Electrical problems are not worth the risk. Compare the cost of repair against buying a new coffee maker and make a smart decision.
Inconsistent Brewing: If your coffee pot brews inconsistently, even after cleaning and repairs, the internal components are likely wearing out. A new machine gives you reliable results every time.
Comparing Coffee Pot Troubleshooting With Other Kitchen Appliances
Troubleshooting kitchen appliances often follows similar patterns. Whether you are dealing with a coffee pot not brewing or an oven that will not heat, the approach is the same. Start with the simplest explanations and work your way up to more complex issues.
For example, the process of diagnosing why a gas oven not igniting shares similarities with fixing a coffee pot that will not brew. Both involve checking the power source, inspecting key components, and ruling out simple causes before diving into repairs. In fact, many homeowners find that understanding one appliance’s troubleshooting process helps them fix others more easily.
Similarly, knowing how to fix gas oven not lighting gives you a mindset for appliance repair in general. You learn to check connections, clean components, and identify worn parts. These skills transfer across different kitchen machines, from ovens to coffee makers to toasters.
Even something as unrelated as understanding what the drawer under the oven is for teaches you about kitchen appliance design and function. The more you know about how your kitchen equipment works, the better you can maintain it and troubleshoot problems when they arise.
The same principle applies to appliance care. Regular cleaning, proper use, and timely maintenance keep all your kitchen tools working well. A well-maintained coffee maker performs just as reliably as a well-maintained oven or toaster. The habits are the same.
Quick Tips To Remember
- Always use fresh, cold water for the best brewing results.
- Never run your coffee pot empty without water in the reservoir.
- Descale regularly to prevent mineral buildup.
- Clean the carafe daily to remove coffee oils and stains.
- Replace worn parts promptly to avoid bigger problems later.
- Read your owner’s manual for machine-specific troubleshooting tips.
- Unplug the machine before cleaning any internal parts.
Common Mistakes People Make With Their Coffee Pots
Even careful coffee lovers make mistakes that shorten their machine’s lifespan. Here are the most common errors and how to avoid them.
Using the wrong grind size: Too fine a grind can clog the filter and slow brewing. Too coarse and the coffee tastes weak. Use a medium grind for drip coffee makers for the best results.
Overfilling the machine: Adding too much water or too many grounds stresses the system. Follow the markings on the reservoir and the guidelines in your manual. Less is often more when it comes to coffee making.
Ignoring warning signs: A coffee pot that brews slowly or makes unusual noises is trying to tell you something. Ignoring these signs leads to bigger problems. Address small issues early to avoid costly repairs.
Skipping maintenance: It is tempting to ignore cleaning when the machine seems to work fine. But buildup happens silently. A monthly cleaning routine prevents most coffee pot problems before they start.
Expert Insight: How Long Should a Coffee Pot Last?
A quality coffee pot should last between five and ten years with proper care. The key factors that determine lifespan include how often you use it, the quality of water you use, and how consistently you maintain the machine. Machines used multiple times daily wear out faster than those used occasionally.
Investing in a good brand and following a regular maintenance routine pays off. You get better-tasting coffee, fewer breakdowns, and a longer machine life. Think of maintenance as an investment in your daily comfort and your morning routine.
If you are shopping for a new machine, look for models with removable parts and easy cleaning access. Machines with built-in water filters also reduce mineral buildup. A little research before buying saves headaches down the road.
Final Thoughts On Fixing Your Coffee Pot
A coffee pot not brewing does not have to mean a ruined morning or a trip to the store for a new machine. Most of the time, the problem is something simple that you can fix in minutes. Start with the basics. Check the power. Clean the filter. Descale the machine. Work through the troubleshooting steps in order, and you will likely find the answer.
Remember that coffee pot maintenance is the best defense against brewing problems. A little care goes a long way. Clean regularly, use good water, and replace parts when needed. Your coffee maker will reward you with perfect cups day after day.
If you have tried everything and your machine still will not work, it might be time for a replacement. But before you give up, consider that troubleshooting is often the fastest and cheapest path to a working coffee pot again. You have got this. Your next cup of coffee is just a few simple fixes away.
For more tips on keeping your kitchen appliances in top shape, check out our guide on appliance troubleshooting and learn how the same problem-solving approach works across different kitchen machines. Understanding how your appliances work makes you a smarter, more confident home cook.
And if you ever wonder about the different types of kitchen equipment available, our overview of what an air fryer toaster oven is might give you ideas for expanding your kitchen setup. The more you know about your appliances, the better you can care for them.
Frequently Asked Questions
Why did my coffee pot suddenly stop brewing?
The most common reason is mineral buildup or a clogged filter. Hard water deposits block the tubing and prevent water from flowing. Try running a vinegar and water cleaning cycle first. If that does not work, check the heating element and water reservoir for damage or blockages.
How do I know if my coffee pot heating element is broken?
Fill the reservoir with water and turn on the machine. Wait a few minutes and check if the base feels warm. If the machine turns on but stays cold, the heating element may have failed. You can also test for continuity with a multimeter if you are comfortable with basic electrical testing.
Can I use vinegar to clean my coffee pot?
Yes, vinegar is one of the best and most affordable ways to descale a coffee pot. Mix equal parts white vinegar and water, run a full brew cycle, then follow up with two to three plain water cycles to rinse out any vinegar taste. Do this once a month for best results.
How often should I descale my coffee pot?
Descale your coffee pot at least once a month if you use it daily. If you live in an area with hard water, you may need to descale more often. Signs that descaling is needed include slow brewing, strange tastes, or visible white deposits near the water outlet.
Is it worth repairing an old coffee pot?
It depends on the age and the repair cost. If your coffee pot is less than five years old and the repair is affordable, fixing it makes sense. If the machine is over ten years old or the repair costs more than half the price of a new one, replacement is usually the better choice.
What is the best way to prevent my coffee pot from clogging?
Use filtered water, clean the filter after every use, and descale the machine monthly. Avoid using very finely ground coffee in drip machines. These simple habits prevent most clogging issues and keep your coffee pot running smoothly for years.
=== CONCLUSION ===
A coffee pot not brewing is a common frustration, but it is almost always fixable. The reasons range from simple mineral buildup to more serious electrical failures. By working through the troubleshooting steps in this guide, you can identify and solve most problems yourself. Start with the easiest fixes and work your way up. Clean your machine regularly, use good water, and pay attention to warning signs. Your coffee pot will serve you well for years when you take care of it properly. Now go enjoy that fresh cup of coffee.