How To Make Coffee Beans Into Fresh Coffee Grounds
Making coffee beans into fresh grounds is easier than you think and it transforms your daily brew. You can use a burr grinder, blade grinder, or even manual methods to get the perfect texture. Fresh grounds unlock richer aroma, better flavor, and a smoother cup of coffee every morning.
Key Takeaways
- Fresh grounds taste better: Grinding beans right before brewing preserves flavor and aroma.
- Choose the right grinder: Burr grinders give consistent results, while blade grinders are budget-friendly.
- Grind size matters: Different brewing methods need coarse, medium, or fine grounds.
- Store grounds properly: Airtight containers keep your fresh grounds tasting great longer.
- Manual methods work too: Mortar and pestle or rolling pin can grind beans without electric tools.
- Clean your equipment: Regular cleaning prevents stale buildup and keeps coffee tasting fresh.
📑 Table of Contents
- How To Make Coffee Beans Into Fresh Coffee Grounds
- Why Fresh Grounds Make a Big Difference
- Tools You Need To Grind Coffee Beans
- Step-by-Step Guide To Grinding Coffee Beans
- How To Store Your Fresh Grounds
- Common Mistakes To Avoid
- Tips for the Best Fresh Coffee Grounds Every Time
- Drying and Roasting Coffee Beans at Home
- Cleaning Up After Grinding
- Final Thoughts on Making Fresh Coffee Grounds
How To Make Coffee Beans Into Fresh Coffee Grounds
There is nothing quite like the smell of fresh coffee grounds filling your kitchen. Making coffee beans into fresh grounds at home is one of the simplest ways to improve your daily cup. Whether you use a machine, a French press, or a pour-over setup, the grind you start with makes all the difference.
Many people buy pre-ground coffee and never think twice about it. But pre-ground coffee loses flavor fast. Whole beans stay fresh much longer, and grinding them yourself gives you control over texture, strength, and taste. This guide walks you through every method, tool, and tip you need to make the perfect fresh coffee grounds right at home.
You do not need expensive equipment to get great results. Even a simple manual method can produce wonderful grounds for your morning brew. Let us dive in and explore the best ways to turn whole beans into the ideal grind for your favorite coffee maker.
Why Fresh Grounds Make a Big Difference
Coffee beans start losing their flavor the moment they are ground. Oxygen, light, and moisture all work against coffee freshness. When you buy pre-ground coffee from a store shelf, it has likely been sitting there for weeks or even months. By the time it reaches your cup, much of the aroma and taste has faded.
Grinding your own beans just before brewing locks in the natural oils and compounds that give coffee its rich character. The result is a cup that tastes brighter, smoother, and more complex. You will notice the difference right away, especially if you have been using pre-ground coffee for a while.
The Science Behind Fresh Grinding
When coffee beans are whole, the oils and aromatic compounds stay sealed inside. Grinding breaks open the cells and releases those oils. These oils interact with hot water during brewing and create the flavor and aroma you love. But they also evaporate quickly once exposed to air. That is why grind size and timing matter so much. The finer the grind, the faster the flavor escapes. This is why making fresh coffee grounds right before you brew is the gold standard for home coffee lovers.
Tools You Need To Grind Coffee Beans
You have several options when it comes to grinding coffee beans. Each method has its own strengths. Let us look at the most popular tools so you can pick the one that fits your needs and budget.
Burr Grinder
A burr grinder is the best tool for making consistent coffee grounds at home. It uses two rotating surfaces to crush beans evenly. You can adjust the setting to get coarse, medium, or fine textures. This consistency matters a lot for brewing. Uneven grounds lead to some flavors being over-extracted and others under-extracted.
Burr grinders come in both electric and manual versions. Electric models are fast and convenient. Manual ones give you more control and are often more affordable. Either way, a burr grinder is the top choice for anyone serious about their morning coffee.
Blade Grinder
A blade grinder uses a spinning blade to chop beans into pieces. It is the most common and affordable option. You can find one at most kitchen stores for a low price. The downside is that it does not produce a uniform texture. Some pieces will be finer and some coarser. This can lead to an uneven brew.
However, a blade grinder still works well for everyday coffee making. If you are on a tight budget or just starting out, it is a perfectly fine choice. Pulse the grinder in short bursts to avoid overheating the beans and to get a more even result.
Manual Grinding Methods
Not everyone wants to use electric tools. Some people prefer a hands-on approach. Manual methods can produce excellent fresh coffee grounds with a little effort. Here are two simple options:
- Mortar and Pestle: This classic kitchen tool works great for small batches. You press and grind the beans in a circular motion. It gives you full control over the texture.
- Rolling Pin: Place beans in a zip-lock bag and roll over them with a rolling pin. This method breaks beans into smaller pieces. It is not perfect, but it works in a pinch.
Both methods take a bit more time, but they get the job done. They are also great options if you are traveling or do not have access to electric grinders.
Step-by-Step Guide To Grinding Coffee Beans
Now that you know your tools, let us walk through the process of making fresh coffee grounds. The basic steps are simple and easy to follow.
Step 1: Measure Your Beans
Start by measuring how many beans you need. A good rule of thumb is two tablespoons of whole beans per six ounces of water. Adjust this amount based on how strong you like your coffee. Measuring first makes the process smoother and more consistent.
Step 2: Choose Your Grind Size
Grind size is one of the most important factors in great coffee. Different brewing methods need different textures. Here is a quick guide:
- Coarse grind: Best for French press and cold brew. The grounds look like sea salt.
- Medium grind: Perfect for drip coffee makers and pour-over devices. Think of the texture of sand.
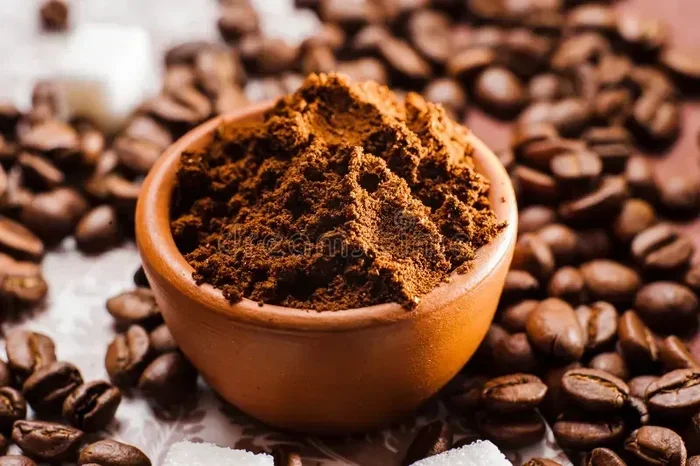
- Fine grind: Ideal for espresso machines. The texture is similar to table salt or flour.
Getting the right grind size can take a little practice. Start with the recommended setting for your brewer and adjust from there. Taste the result and tweak the size until you find what you like best.
Step 3: Grind the Beans
Add your measured beans to the grinder. If you are using a blade grinder, pulse it in short bursts of three to five seconds. This prevents the beans from overheating and keeps the texture more even. For a burr grinder, simply set your desired size and let the machine do the work.
Watch the process and stop grinding when you reach the right texture. Over-grinding can make the coffee taste bitter. Under-grinding can lead to a weak, watery cup.
Step 4: Use the Grounds Right Away
The best time to use fresh coffee grounds is immediately after grinding. The flavors are at their peak right after the beans are broken open. If you cannot brew right away, store the grounds in an airtight container. But keep in mind that the flavor will start to fade within minutes of grinding.
How To Store Your Fresh Grounds
Storing fresh coffee grounds properly helps preserve their flavor and aroma. Here are the best practices:
- Use an airtight container: Oxygen is the biggest enemy of fresh grounds. A sealed container slows down flavor loss.
- Keep it in a cool, dark place: Heat and light break down the oils in coffee. A pantry or cupboard works well.
- Avoid the fridge or freezer: Moisture from the fridge can ruin the texture and taste. If you must freeze them, use a sealed bag and only take out what you need.
- Grind in small batches: The best way to keep grounds fresh is to only grind what you will use right away.
Following these simple storage tips can extend the life of your coffee grounds by a day or two. But nothing beats grinding a small batch fresh every morning.
Common Mistakes To Avoid
Even experienced coffee makers can make mistakes when grinding beans. Here are the most common ones and how to fix them:
Grinding Too Far in Advance
Grinding beans hours before brewing is a common habit. But fresh coffee grounds lose their best flavors within minutes. Try to grind right before you brew for the best taste.
Using the Wrong Grind Size
Using a fine grind for a French press or a coarse grind for espresso will ruin your cup. Always match your grind size to your brewing method. If your coffee tastes too bitter, it might be too fine. If it tastes weak, it might be too coarse.
Overloading the Grinder
Putting too many beans in the grinder at once leads to uneven texture. Work in small batches for the best results. A burr grinder handles larger amounts better than a blade grinder, but even then, less is more.
Neglecting to Clean the Grinder
Old coffee oils build up inside grinders over time. This can make your fresh grounds taste stale or rancid. Clean your grinder regularly. A quick brush and wipe-down after each use goes a long way. If you have ever cleaned the bottom tray of a toaster oven, you know how satisfying a good cleaning session can be. The same care applies to your coffee grinder.
Tips for the Best Fresh Coffee Grounds Every Time
Here are some expert tips to help you get the most out of your coffee beans and grinder:
- Buy whole beans in small quantities: Fresh beans make the best grounds. Look for roast dates on the bag and buy only what you will use within two weeks.
- Experiment with grind sizes: Everyone’s taste is different. Try adjusting the grind size slightly each time until you find your perfect cup.
- Preheat your brewer: A warm brewer helps extract flavor from the grounds more evenly. This small step makes a big difference.
- Use filtered water: The water you use affects the taste just as much as the grounds. Clean, filtered water brings out the best in your coffee grounds.
- Keep a grinding journal: Write down your settings and results. This helps you replicate your perfect cup every time.
These tips may seem small, but they add up. Over time, you will develop a routine that produces consistently great coffee. The key is paying attention to the details and enjoying the process.
Drying and Roasting Coffee Beans at Home
Some coffee enthusiasts like to take things a step further. Roasting your own beans at home gives you complete control over the flavor profile. You can experiment with different roast levels, from light and fruity to dark and bold. Drying beans properly before roasting is an important first step.
Similar to how you might dry basil in the oven for herbs, you can use a low oven temperature to dry green coffee beans before roasting them. The process requires patience and a gentle hand. Keep the temperature low, around 200°F, and spread the beans in a single layer on a baking sheet. Stir them occasionally to ensure even drying.
Once dried, you can roast the beans in the oven or a dedicated coffee roaster. After roasting, let the beans cool completely before grinding them into fresh coffee grounds. The result is a truly custom cup of coffee that reflects your personal taste preferences.
If you are curious about other drying techniques in the kitchen, you might enjoy learning how to dry lions mane mushroom in the oven. The principles of low-heat drying apply across many ingredients, and understanding this process helps with coffee too.
Cleaning Up After Grinding
Keeping your grinding area clean is just as important as the grinding process itself. Coffee oils can go rancid and affect the taste of your next batch. Here is how to keep things tidy:
- Wipe down the grinder after each use: A quick cloth wipe removes loose grounds and oils.
- Deep clean weekly: Remove any removable parts and wash them with warm soapy water. Dry thoroughly before reassembling.
- Use a small brush: A soft brush helps get into tight spaces where grounds can accumulate.
- Clean your workspace: Grounds can scatter during grinding. A quick sweep of your counter keeps things fresh and ready for the next session.
If you also use a toaster oven for other kitchen tasks, keeping it clean is essential for good results. Just as you would clean the bottom tray of a toaster oven, regular maintenance of your coffee equipment ensures the best flavor every time.
Final Thoughts on Making Fresh Coffee Grounds
Making fresh coffee grounds at home is a simple habit that elevates your daily coffee ritual. You do not need fancy equipment or years of experience. A basic grinder, whole beans, and a little attention to detail are all you need. The difference in taste between fresh grounds and old pre-ground coffee is remarkable.
Start small if you are new to this. Try grinding a small batch of beans tomorrow morning and taste the difference. Once you experience the richer flavor and brighter aroma of fresh coffee grounds, you will never go back to pre-ground coffee again. It is one of those small changes that makes a big impact on your daily routine and your morning cup.
The best part is that this skill works with any type of coffee bean you enjoy. Light roasts, dark roasts, flavored blends, or single-origin beans all benefit from being ground fresh. Explore different beans, adjust your grind size, and find what works best for you. Your taste buds will thank you.
So the next time you reach for that bag of whole beans, remember that the journey from bean to cup starts right at your grinder. Take your time, enjoy the process, and savor every sip of the fresh coffee grounds you create with your own hands.
Frequently Asked Questions
Can I use a blender to grind coffee beans?
A blender can work in a pinch, but it is not ideal. The blades are designed for liquids and soft foods, not dry beans. If you must use a blender, pulse it in short bursts and do not overfill. The results will be less consistent than a dedicated grinder.
How long do fresh coffee grounds stay good?
Fresh coffee grounds are best used within 15 minutes of grinding. If you must store them, an airtight container in a cool, dark place can preserve flavor for up to 24 hours. After that, the aroma and taste start to decline noticeably.
Is a burr grinder really better than a blade grinder?
Yes, a burr grinder produces much more consistent grounds. This consistency leads to a better extraction and a more balanced cup of coffee. Blade grinders are cheaper and work fine for casual coffee drinkers, but a burr grinder is the clear winner for quality.
Can I grind coffee beans without any electric tools?
Absolutely. A mortar and pestle or a rolling pin can grind coffee beans by hand. These methods take more time and effort, but they produce usable grounds. They are great backup options when you do not have access to electric grinders.
What is the best grind size for a drip coffee maker?
A medium grind works best for drip coffee makers. The texture should resemble sand or kosher salt. Too fine and the coffee will be bitter and slow to drip. Too coarse and it will be weak and watery.
Should I wash my coffee grinder after every use?
You do not need to wash it after every use, but you should wipe it down. A quick brush removes loose grounds and oils. A deeper clean with warm soapy water once a week keeps the grinder in top shape and prevents stale buildup from affecting your fresh grounds.
=== SEO TITLE ===
How To Make Coffee Beans Into Fresh Coffee Grounds
=== META TITLE ===
How To Make Coffee Beans Into Fresh Coffee Grounds
=== URL SLUG ===
/how-to-make-coffee-beans-into-fresh-coffee-ground