How To Use Hyperchiller Iced Coffee Maker Like A Pro
The Hyperchiller iced coffee maker is a game-changer for anyone who loves ice cold coffee without the wait. This guide walks you through every step, from setup to your first perfect cup. You will learn how the freezing chamber works, how to brew the best coffee concentrate, and how to clean and maintain your device for long-lasting performance.
If you are a coffee lover, you know the struggle. You brew a hot cup of coffee, drop in a few ice cubes, and watch your drink get watered down before you even take the first sip. It is frustrating, right? Well, there is a better way. The Hyperchiller iced coffee maker was designed to solve this exact problem. It chills hot coffee instantly without diluting it, giving you a smooth and refreshing drink every single time.
In this guide, we will show you exactly how to use the Hyperchiller like a pro. Whether you are new to this device or have been using it but want to get better results, you are in the right place. We will cover everything from the basics of setup to advanced tips that will take your iced coffee game to the next level. By the end of this article, you will know how to make the perfect iced coffee at home with ease.
Key Takeaways
- Fast Chilling: The Hyperchiller uses a freezing chamber to cool hot coffee in under 60 seconds.
- No Dilution: Unlike traditional ice cubes, the Hyperchiller chills coffee without watering it down.
- Easy to Use: The device has a simple design with no complicated buttons or settings.
- Versatile: You can use it for cold brew, espresso, and even iced tea or other beverages.
- Easy Cleaning: Regular maintenance keeps the Hyperchiller working at its best for years.
- Portable Design: The compact size makes it perfect for home use or taking on the go.
- Cost Effective: Making iced coffee at home saves money compared to buying drinks at cafés.
📑 Table of Contents
- What Is the Hyperchiller Iced Coffee Maker?
- What Comes in the Box
- How to Set Up the Hyperchiller for First Use
- How to Use the Hyperchiller Step by Step
- Tips for the Best Iced Coffee with the Hyperchiller
- Cleaning and Maintenance Tips
- Common Mistakes to Avoid
- Hyperchiller vs Traditional Iced Coffee Methods
- Final Thoughts
What Is the Hyperchiller Iced Coffee Maker?
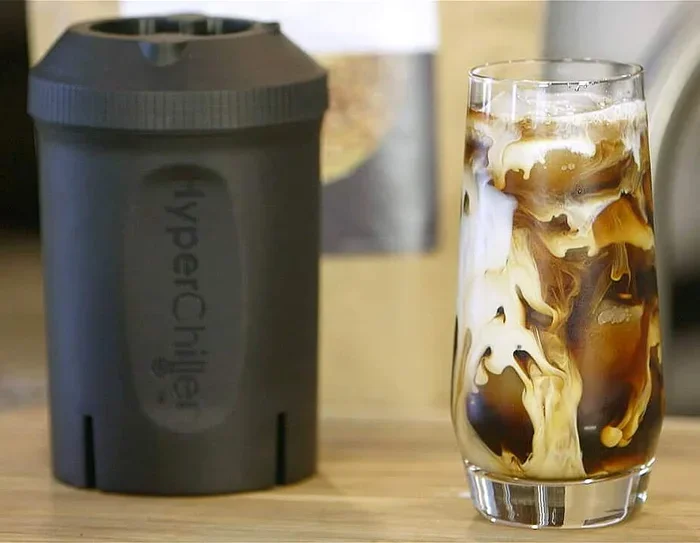
The Hyperchiller is a handheld coffee chilling device. It works by using a special freezing chamber filled with non-toxic cooling liquid. You pour hot coffee into the chamber, and the device rapidly drops the temperature. In just 60 seconds or less, your hot brew becomes ice cold. The best part? No ice is involved, so your coffee stays strong and full of flavor.
This device is different from a regular cold brew maker. Cold brew takes hours to prepare. The Hyperchiller gives you the same cold, smooth result in under a minute. It is perfect for busy mornings when you need your caffeine fix fast. Think of it as a shortcut between your hot coffee maker and your perfect iced drink.
The Hyperchiller is made with food-grade stainless steel, which makes it durable and easy to clean. It also has a compact design that fits comfortably in your hand. You can find it on most kitchen counters without taking up much space. If you already own a kitchen appliance like a toaster oven or air fryer, the Hyperchiller fits right in alongside those tools as another handy gadget in your collection.
What Comes in the Box
Before you start using the Hyperchiller, it helps to know what is included. Unboxing the device is straightforward. Here is what you will typically find inside the package:
- The Hyperchiller unit: This is the main body with the freezing chamber inside.
- A stainless steel funnel: This helps you pour coffee into the chamber without spills.
- A silicone sleeve: This fits over the device for a comfortable, non-slip grip.
- A measuring cap: This cap doubles as a measuring tool for your coffee grounds.
- Instruction manual: Basic setup and usage guide included for reference.
Once you have everything out, give all the parts a quick rinse with warm water. This removes any dust or residue from shipping. After rinsing, let the parts air dry completely before you move on to the next step.
How to Set Up the Hyperchiller for First Use
Setting up the Hyperchiller for the first time is simple. However, there is one important step you cannot skip. The freezing chamber needs to be pre-frozen before you can use it. Here is how to get started:
Step 1: Clean All Parts
Wash the main chamber, funnel, and silicone sleeve with warm soapy water. Rinse thoroughly and dry with a clean towel. This ensures no factory residue gets into your first batch of coffee.
Step 2: Freeze the Chamber
Place the empty freezing chamber in your freezer. Make sure it is standing upright. Leave it in the freezer for at least 2 hours before your first use. For the best results, let it freeze overnight. The cooling liquid inside needs enough time to reach the proper freezing temperature.
Step 3: Prepare Your Coffee
While the chamber is freezing, brew your coffee. Use a strong brew since the cold temperature will mellow out some of the flavors. A good starting point is to use double the amount of coffee grounds you would normally use for hot coffee. This creates a concentrated brew that stays flavorful even after chilling.
Setting up a new kitchen device can feel overwhelming sometimes. If you have ever struggled with setting up a brand new oven for the first time, you know that reading the manual and following the prep steps makes all the difference. The same applies here. Taking those extra 10 minutes to properly prep the Hyperchiller will pay off with better results every time.
How to Use the Hyperchiller Step by Step
Now that your Hyperchiller is set up, let us get to the fun part. Using the device is quick and easy once you know the process. Here is a detailed walkthrough of each step.
Step 1: Remove the Chamber from the Freezer
Take the freezing chamber out of the freezer. It should feel very cold to the touch, almost like it is sweating. If there is any frost buildup inside, wipe it off with a clean cloth. This ensures smooth operation and the best chilling results.
Step 2: Brew Your Coffee
Brew a fresh pot of coffee using your preferred method. A drip coffee maker, French press, or pour-over all work great. Make sure the coffee is hot and freshly brewed. The hotter the coffee, the better the Hyperchiller can work its magic. Aim for a temperature of at least 160 degrees Fahrenheit for optimal chilling.
Step 3: Pour the Coffee into the Chamber
Place the funnel into the top of the freezing chamber. Slowly pour the hot coffee through the funnel. Do not overfill. Leave about half an inch of space at the top to allow for expansion as the coffee cools. The chamber is cold, so you may feel a burst of steam when you pour. That is completely normal and a sign that the device is working.
Step 4: Stir and Wait
Give the coffee a gentle stir with the funnel or a clean spoon. Then, let the chamber sit undisturbed for 60 seconds. During this time, the cooling liquid inside the walls of the chamber rapidly pulls heat from the coffee. You will notice the coffee temperature dropping quickly.
Step 5: Pour and Enjoy
After 60 seconds, remove the funnel and pour the now ice cold coffee into your favorite glass over fresh ice if you like. The coffee will be smooth, bold, and perfectly chilled. No dilution, no bitterness, just pure coffee flavor. Add milk, cream, or sweetener to taste and enjoy your creation.
The speed of this process is what makes the Hyperchiller so special. Traditional methods of making iced coffee either require hours of cold brewing or result in a watered-down drink. The rapid cooling technology in the Hyperchiller gives you the best of both worlds: speed and flavor.
Tips for the Best Iced Coffee with the Hyperchiller
Anyone can use the Hyperchiller, but making it work like a pro takes a few extra tips. Here are some expert recommendations to help you get the most out of your device every single time.
Use the Right Coffee Grind
A medium to medium-fine grind works best for the Hyperchiller. If your grind is too coarse, the coffee may taste weak after chilling. If it is too fine, it can clog the funnel and make pouring difficult. Think of a texture similar to table salt for the ideal grind size.
Chill Your Coffee Concentrate
For an even colder result, try chilling your brewed coffee in the refrigerator for 10 minutes before pouring it into the Hyperchiller. This reduces the temperature gap, and the device can chill the coffee even faster. The result is a drink that is closer to freezer temperature, which feels incredibly refreshing on a hot day.
Experiment with Coffee-to-Water Ratios
Everyone has different taste preferences. Start with a standard ratio of 1 tablespoon of coffee grounds per 6 ounces of water. Then adjust based on your liking. If you prefer a stronger iced coffee, use more grounds. If you like it milder, use less. The Hyperchiller works with any ratio, so feel free to experiment.
Try Different Coffee Beans
Not all coffee beans behave the same way when chilled. Dark roasts tend to produce a rich, bold iced coffee that tastes great with the Hyperchiller. Medium roasts offer a balanced flavor profile that works well for adding milk or cream. Light roasts can produce a brighter, more acidic iced coffee that some people love. Try a few different beans and see which one you prefer.
Keep a Second Chamber Ready
One of the best tricks is to have two chambers. While you drink your first batch, the second one can be freezing in the freezer. This way, you never have to wait for the chamber to prep before making another round. It is a small investment that saves a lot of time if you drink multiple cups throughout the day.
Add Flavors Before Chilling
If you enjoy flavored iced coffee, add syrups, spices, or extracts directly to the hot coffee before you pour it into the Hyperchiller. Vanilla extract, caramel syrup, cinnamon, or even a dash of cocoa powder all work wonderfully. The hot coffee helps the flavors dissolve and mix evenly before the rapid cooling locks everything in.
Cleaning and Maintenance Tips
Keeping your Hyperchiller clean is essential for great tasting coffee and long-lasting performance. A well-maintained device will serve you for years without any issues. Here is everything you need to know about cleaning and care.
After Every Use
Rinse the chamber and funnel with warm water immediately after each use. Do not let coffee residue sit inside the device, as it can build up and affect the taste of your next batch. A quick rinse takes only a few seconds and makes a big difference.
Deep Clean Once a Week
Once a week, give the Hyperchiller a more thorough cleaning. Wash all removable parts with warm water and mild dish soap. Use a soft brush or cloth to clean the inside of the chamber. Avoid using abrasive scrubbers or harsh chemicals, as these can damage the stainless steel and the cooling liquid lining.
Proper cleaning of kitchen appliances is important for hygiene and performance. If you have ever dealt with a messy toaster oven bottom tray, you know how quickly grease and residue can build up. The same principle applies to the Hyperchiller. Regular cleaning prevents buildup and keeps your drinks tasting fresh and clean every time.
Store Properly
When not in use, store the Hyperchiller in a cool, dry place. Make sure the chamber is completely dry before putting it back in the freezer. Moisture can cause frost buildup, which reduces the efficiency of the cooling system over time. Keeping the device in its original box or a designated storage spot helps protect it from dust and damage.
Replace the Cooling Liquid When Needed
The cooling liquid inside the Hyperchiller has a long lifespan, but it will eventually lose its effectiveness. If you notice that the device is not chilling coffee as quickly as it used to, the cooling liquid may need to be replaced. Contact the manufacturer for replacement instructions and guidance. This is a rare occurrence, but it is good to know about just in case.
Common Mistakes to Avoid
Even with a simple device like the Hyperchiller, there are a few common mistakes that can ruin your results. Here are the pitfalls to watch out for and how to avoid them.
- Skipping the pre-freeze step: Never use the Hyperchiller without freezing the chamber first. The cooling liquid needs to be frozen to work properly. Skipping this step means lukewarm coffee at best.
- Overfilling the chamber: Pouring too much coffee can cause spills and reduce the chilling efficiency. Always leave room at the top for the coffee to expand as it cools.
- Using cold or room temperature coffee: The Hyperchiller works best with hot coffee. The greater the temperature difference, the faster and more effective the chilling process. If you pour room temperature coffee in, the results will be disappointing.
- Using low-quality coffee beans: Since the Hyperchiller preserves the full flavor profile of your coffee, using stale or low-quality beans will result in a poor-tasting drink. Always use fresh, quality beans for the best results.
- Neglecting regular cleaning: Coffee oils build up over time and can turn rancid. This affects the taste of every future batch. Stick to the cleaning routine and your Hyperchiller will keep making delicious drinks.
Hyperchiller vs Traditional Iced Coffee Methods
It is always helpful to understand how the Hyperchiller compares to other ways of making iced coffee. Here is a quick comparison of the most popular methods:
- Hot brew over ice: Fast and easy, but the ice dilutes the coffee as it melts. The Hyperchiller eliminates this problem entirely.
- Cold brew: Produces a smooth, low-acidity coffee. However, it requires 12 to 24 hours of steeping time. The Hyperchiller gives you similar smoothness in under two minutes.
- Japanese iced coffee: A method where hot coffee is brewed directly onto ice. It is fast but still involves some dilution. The Hyperchiller avoids this by chilling the coffee before it hits the ice.
- Iced coffee from a drip machine: Convenient but often weak and watery when poured over ice. The Hyperchiller concentrates the flavor and chills it instantly.
Each method has its fans, but the Hyperchiller offers a unique combination of speed, flavor, and convenience that is hard to beat. It is especially great for people who want to enjoy high-quality iced coffee at home without the long wait times.
Final Thoughts
The Hyperchiller iced coffee maker is one of the best investments you can make for your morning routine. It is simple to use, easy to clean, and delivers incredible results every time. Whether you are a casual coffee drinker or a dedicated coffee enthusiast, this device will change the way you enjoy iced coffee.
By following the steps in this guide, you now know how to set up, use, and maintain the Hyperchiller like a pro. Remember to pre-freeze the chamber, use hot and freshly brewed coffee, and experiment with different beans and ratios to find your perfect cup. Keep the device clean, store it properly, and it will serve you well for many years to come.
So go ahead and give it a try. Brew your favorite coffee, pour it into the Hyperchiller, and experience the magic of instant chilling. Once you taste the difference, you will never go back to traditional iced coffee again. Your mornings will never be the same.
Frequently Asked Questions
How long does the Hyperchiller take to freeze before first use?
The freezing chamber needs at least 2 hours in the freezer before its first use. For the best results, leave it in overnight. The cooling liquid inside needs enough time to reach a solid frozen state so it can rapidly chill your hot coffee.
Can I use the Hyperchiller for beverages other than coffee?
Yes, absolutely. The Hyperchiller works great with iced tea, cold chocolate, fruit juices, and even cocktails. Any hot beverage can be rapidly chilled using the same simple process. Just make sure to rinse the chamber between different drinks to avoid flavor mixing.
How many cups of iced coffee can I make with one freeze cycle?
A single freeze cycle typically produces about 2 to 3 cups of iced coffee, depending on the size of your chamber. Each cup is approximately 6 to 8 ounces. If you drink more than that, simply put the chamber back in the freezer for another 2 hours and repeat the process.
Is the Hyperchiller difficult to clean?
Not at all. Cleaning the Hyperchiller is very simple. After each use, just rinse the chamber and funnel with warm water. For a deeper clean, wash all parts with mild soap and warm water once a week. The stainless steel construction makes it easy to wipe down and keep spotless.
Can I use pre-brewed coffee from the fridge with the Hyperchiller?
You can, but the results will not be as effective. The Hyperchiller works best with hot coffee because the temperature difference drives the rapid cooling process. If you use cold or room temperature coffee, the chilling will be slower and less dramatic. For the best results, always brew fresh hot coffee before using the device.
Does the Hyperchiller remove caffeine from coffee?
No, the Hyperchiller does not remove caffeine. It only chills the coffee rapidly without changing its chemical composition. Your iced coffee will have the same caffeine content as your hot brew. If you want decaf iced coffee, simply use decaf beans in the same way you would for regular coffee.