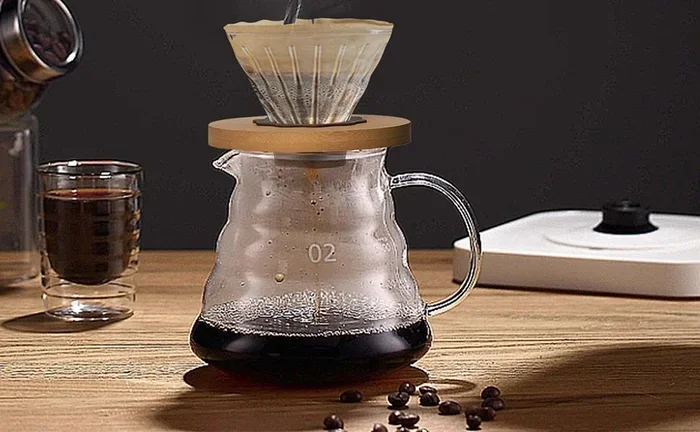
How To Make Coffee With A Filter Cone The Right Way
Making coffee with a filter cone is one of the simplest and most rewarding ways to brew a great cup at home. This guide walks you through everything you need to know, from choosing the right filter and grind size to mastering the pour. You will learn the exact steps, common mistakes to avoid, and pro tips that elevate your daily routine. Whether you are new to manual brewing or looking to refine your technique, this guide has you covered.
There is something deeply satisfying about brewing a perfect cup of filter cone coffee in the morning. The gentle dripping, the rich aroma that fills your kitchen, and the smooth, clean taste all come together to create a ritual that many coffee lovers cherish. Unlike electric machines that can feel impersonal, a filter cone puts you in control of every variable. You decide the grind, the water, and the pace.
Whether you have been drinking drip coffee for years or you are just starting to explore manual brewing, the filter cone method offers a world of flavor waiting to be unlocked. It is affordable, portable, and incredibly easy to master. In this guide, we will walk you through every step of the process so you can brew café-quality coffee right at home.
The beauty of filter cone coffee lies in its simplicity. You do not need expensive equipment or years of experience. With the right approach and a little practice, you will be making cups that rival your favorite coffee shop. Let us dive into everything you need to know.
Key Takeaways
- Right Equipment Matters: A quality filter cone, fresh grounds, and hot water make all the difference.
- Grind Size Is Critical: A medium-fine grind produces the best extraction and flavor.
- Pour With Purpose: The blooming phase and steady pour control the brewing time and taste.
- Avoid Common Mistakes: Using boiling water or the wrong ratio leads to bitter or weak coffee.
- Clean Your Cone Regularly: Proper maintenance keeps your coffee tasting fresh every time.
- Filter Type Changes Flavor: Paper and reusable filters each bring unique qualities to your cup.
📑 Table of Contents
What Is A Filter Cone And Why Use One?
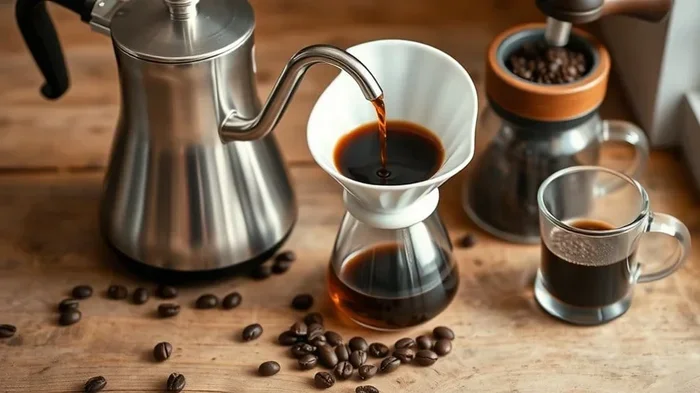
A coffee filter cone is a cone-shaped device that holds a filter and sits on top of your mug or carafe. Hot water is poured over ground coffee, and it drips through the filter and into your cup below. This simple design has been around for decades and remains one of the most popular brewing methods in the world.
The filter cone works by using gravity and a paper or metal filter to separate the liquid from the grounds. This produces a clean, sediment-free cup that highlights the natural flavors of the beans. Compared to a French press, which leaves fine particles in your coffee, a cone filter delivers a smoother and brighter taste.
Many coffee enthusiasts prefer the filter cone because it gives them full control over the brewing process. You can adjust the grind size, water temperature, pour speed, and coffee-to-water ratio. This level of customization means you can fine-tune every cup to match your personal preference. It is this hands-on approach that makes manual brewing so rewarding.
Another big advantage is convenience. A filter cone is lightweight, affordable, and requires no electricity. It is perfect for travel, camping, or simply a quick brew at home. If you have ever wondered how to get better coffee without spending a fortune on equipment, the filter cone is your answer.
What You Need To Get Started
Before you start brewing, you need a few essential items. The good news is that none of them are expensive, and most are easy to find. Here is a simple checklist of everything you need for great filter cone coffee.
The Filter Cone
Your coffee filter cone is the centerpiece of the setup. These come in different materials, including ceramic, glass, stainless steel, and plastic. Ceramic and glass cones retain heat well, which helps maintain a consistent water temperature during brewing. Stainless steel cones are durable and long-lasting. Plastic cones are budget-friendly but may not retain heat as effectively.
Make sure your cone is the right size for your mug or carafe. Most standard cones fit 8 to 12 ounce mugs. Some cones are designed to sit on top of a carafe, which is great if you are brewing for multiple people.
The Filter
You will need a paper filter or a reusable filter that fits your cone. Paper filters are the most common choice. They produce a clean, bright cup and are disposable, which means no cleanup. Look for unbleached paper filters if you want a more environmentally friendly option.
Reusable filters are typically made from stainless steel or cloth. They allow more of the natural oils from the coffee to pass through, which can result in a fuller-bodied cup. However, they require regular cleaning and may let fine sediment through.
Fresh Coffee Grounds
The quality of your coffee grounds matters enormously. Always use fresh, whole beans and grind them just before brewing. Pre-ground coffee loses its flavor quickly, often within days of opening the bag. A burr grinder gives you the most consistent grind size, which is essential for even extraction.
Hot Water
You will need clean, hot water for your brew. The ideal water temperature for filter cone coffee is between 195 and 205 degrees Fahrenheit. Water that is too hot will over-extract the coffee and make it bitter. Water that is too cool will under-extract it and leave you with a weak, sour cup.
If you do not have a thermometer, bring your water to a boil and then let it sit for about 30 seconds. This brings it close to the ideal range. Also, the quality of your water matters. Filtered water tastes better and avoids the chlorine taste that can ruin a good cup of coffee.
Step-By-Step Guide To Making Filter Cone Coffee
Now that you have everything ready, let us walk through the actual brewing process. Follow these steps carefully and you will be rewarded with a delicious, well-balanced cup every time.
Step 1: Prepare Your Filter
Place your paper filter into the cone and rinse it with hot water. This removes any papery taste and preheats the cone and your mug. Discard the rinse water before adding your coffee grounds. This small step makes a noticeable difference in the final coffee taste.
Step 2: Measure Your Coffee
A good starting coffee ratio is two tablespoons of ground coffee for every six ounces of water. You can adjust this based on your strength preference. If you like stronger coffee, add a little more grounds. If you prefer a milder cup, use a bit less.
For the most consistent results, use a kitchen scale. Measuring by weight is far more accurate than measuring by volume. A standard ratio is about 15 grams of coffee for every 250 milliliters of water.
Step 3: Grind Your Beans
Grind your beans to a medium-fine consistency. This is slightly finer than table salt but coarser than espresso powder. The right grind size is crucial because it affects how quickly the water passes through the grounds. Too fine and the coffee will be over-extracted and bitter. Too coarse and it will be weak and sour.
If you do not have a burr grinder, a blade grinder works but produces less consistent results. Try to pulse the grinder rather than running it continuously to avoid overheating the beans.
Step 4: Bloom The Coffee
Place the cone on your mug or carafe, add the grounds, and start your timer. Pour just enough hot water to saturate the grounds, about twice the weight of the coffee. Wait 30 to 45 seconds. You will see the grounds bubble and expand. This is called the coffee bloom.
The bloom releases carbon dioxide trapped in the freshly roasted beans. Allowing the coffee to bloom before the full pour ensures more even extraction and a cleaner, more flavorful cup. Skipping this step can lead to uneven brewing and a less satisfying coffee taste.
Step 5: Pour The Water
After the bloom, slowly pour the remaining hot water over the grounds in a circular motion. Start from the center and work your way outward. Avoid pouring directly on the filter paper, as this can cause channeling and uneven extraction.
Try to complete the pour within three to four minutes total brewing time. A steady, controlled pour is key. Do not rush it. The slower and more deliberate you are, the better the results. If you are new to this, practice a few times until you find a comfortable rhythm.
Step 6: Serve And Enjoy
Once all the water has passed through the grounds, remove the cone and discard the filter and used grounds. Your coffee is ready to drink. Serve it immediately while it is hot for the best flavor experience.
If you are not drinking it right away, transfer it to a thermal carafe. Leaving brewed coffee on a hot plate or in a heated mug can cause it to taste burnt and bitter within minutes.
Tips For The Perfect Cup Every Time
Even after you master the basic steps, there are always ways to improve your brew. Here are some proven tips that will help you get the most out of your filter cone coffee.
- Use fresh beans. Coffee tastes best when brewed within two to four weeks of the roast date. Check the bag for the roast date rather than the expiration date.
- Store beans properly. Keep your beans in an airtight container away from light, heat, and moisture. Do not store them in the freezer, as moisture can damage the flavor.
- Preheat your mug. Rinsing the cone with hot water also preheats your mug. A cold mug can drop the brewing temperature and affect extraction.
- Experiment with ratios. The 2:6 ratio is a great starting point, but everyone’s palate is different. Adjust the coffee-to-water ratio until you find your perfect coffee strength.
- Keep your water consistent. Use the same water source and temperature every time. Changes in water quality can noticeably alter the flavor of your brew.
- Practice your pour. A steady, even pour makes a huge difference. If you struggle with control, try using a gooseneck kettle for more precision.
These tips may seem small, but they add up to a significant improvement in flavor. Once you make them habits, you will taste the difference in every cup.
Common Mistakes To Avoid
Even experienced coffee makers sometimes make mistakes that hurt the quality of their brew. Here are the most common errors and how to avoid them.
- Using boiling water. Water that is at a full rolling boil is too hot and will scorch the coffee grounds, resulting in a bitter taste. Let your water cool slightly before pouring.
- Grinding too fine or too coarse. The wrong grind size is the number one cause of bad-tasting cone coffee. If your brew is bitter, your grind is too fine. If it is weak and sour, it is too coarse.
- Skipping the bloom. The bloom phase is not optional. It prepares the grounds for even extraction and significantly impacts the final flavor.
- Using stale grounds. Old coffee grounds lose their flavor and aroma quickly. Always grind fresh beans right before brewing for the best results.
- Pouring too fast. Rushing the pour can cause channeling, where water finds gaps in the grounds and passes through without extracting properly. Slow and steady wins the race.
- Not cleaning your cone. Oils from coffee can build up in your cone over time and turn rancid. Clean your equipment after every use to keep your coffee tasting fresh.
Avoiding these mistakes alone can transform your morning cup from mediocre to outstanding. Pay attention to each step, and you will notice the difference immediately.
Filter Cone Vs Other Brewing Methods
There are many ways to brew coffee, and each method has its own strengths. Here is how the filter cone compares to some popular alternatives.
| Method | Flavor Profile | Ease of Use | Cleanup | Equipment Cost |
|---|---|---|---|---|
| Filter Cone | Clean, bright, and smooth | Very easy | Minimal | Low |
| French Press | Rich, full-bodied, and bold | Easy | Moderate | Low |
| Espresso Machine | Intense, concentrated, creamy | Moderate to hard | Moderate | High |
| AeroPress | Clean but bold, versatile | Easy | Easy | Low to moderate |
| Drip Machine | Mild, consistent, familiar | Very easy | Moderate | Low to moderate |
The filter cone stands out for its balance of simplicity and flavor control. It produces a cleaner cup than a French press and is far more affordable than an espresso machine. It also offers more hands-on involvement than a standard drip machine, which appeals to coffee enthusiasts who enjoy the ritual of brewing.
If you have ever tried how to make coffee without filter or machine, you know that those methods can be messy and inconsistent. The filter cone provides a structured, repeatable process that delivers reliable results every time. It is the best middle ground between convenience and quality.
Compared to the AeroPress, the filter cone produces a larger single serving and a cleaner cup with less sediment. The AeroPress is more portable and faster, but the filter cone offers a more traditional and satisfying brewing experience.
Maintenance And Cleaning Tips
Keeping your coffee filter cone clean is essential for great-tasting coffee. Residual oils and fine grounds can build up over time and affect the flavor of your next brew. Here is how to keep your equipment in top shape.
After every use, remove the paper filter and used grounds. Rinse the cone with warm water to wash away any remaining particles. If you use a reusable metal or cloth filter, wash it thoroughly with soap and warm water after each use. Let it air dry completely before storing it.
For a deeper clean, wash your cone with warm, soapy water once a week. This removes built-up oils that can go rancid and taint the flavor of your coffee. If you notice any stains or residue that will not come out, try soaking the cone in a mixture of baking soda and warm water for 30 minutes.
Just like maintaining other kitchen tools, regular cleaning extends the life of your equipment. If you want to learn more about keeping your kitchen gear in great shape, check out how to clean the bottom tray of your toaster oven for more kitchen maintenance tips that apply broadly.
Store your cone in a dry place when not in use. Moisture can promote mold growth and affect the material over time. A clean, well-maintained cone will serve you well for years and continue to deliver excellent coffee every morning.
Final Thoughts
Making filter cone coffee is one of the simplest yet most rewarding skills you can develop in the kitchen. It requires minimal equipment, no electricity, and just a few minutes of your time. The result is a clean, flavorful cup that you can customize to your exact taste.
By following the steps outlined in this guide, you now have everything you need to brew excellent coffee at home. Remember to focus on the grind size, water temperature, coffee ratio, and the blooming phase. These four elements are the foundation of a great cup.
Do not be afraid to experiment. Try different beans, adjust your ratios, and find your perfect pour technique. The beauty of the filter cone is that it rewards curiosity and practice. Every cup you brew teaches you something new about your own taste preferences.
Start tomorrow morning with a fresh bag of beans, a clean cone, and hot water. You will be amazed at how a simple change in your routine can elevate your daily coffee experience. Happy brewing.
Frequently Asked Questions
What type of filter cone is best for beginners?
A simple ceramic or glass filter cone with a paper filter is the best choice for beginners. It is easy to use, affordable, and produces a clean, consistent cup of coffee. You do not need anything fancy to get started.
Can I reuse a paper filter in my filter cone?
It is not recommended. Paper filters are designed for single use. Reusing them can lead to clogging, poor filtration, and a gritty cup of coffee. Stick with fresh paper filters or invest in a reusable metal or cloth filter instead.
How long does the brewing process take with a filter cone?
A typical brew cycle takes about three to four minutes from start to finish. This includes the blooming phase, which takes about 30 to 45 seconds, followed by the main pour. The total time can vary based on your grind size and pour speed.
What is the best grind size for filter cone coffee?
A medium-fine grind works best for filter cone brewing. It is similar in texture to table salt. This size allows water to flow through the grounds at the right speed for balanced extraction. Adjust slightly finer or coarser based on your taste preference.
Does the type of coffee bean matter for filter cone brewing?
Yes, it does. Medium roast beans tend to work best with the filter cone method because they produce a balanced flavor profile. However, you can use any roast you enjoy. Lighter roasts bring out more acidity and floral notes, while darker roasts offer bolder, richer flavors.
How do I know if my water temperature is correct?
The ideal temperature is between 195 and 205 degrees Fahrenheit. If you do not have a thermometer, boil your water and let it sit for about 30 seconds before pouring. This brings it close to the optimal range for brewing filter cone coffee.
=== CONCLUSION ===
Brewing coffee with a filter cone is a skill anyone can learn and enjoy. It offers a perfect blend of simplicity, control, and flavor that keeps coffee lovers coming back day after day. From choosing the right grind size and water temperature to mastering the pour and avoiding common mistakes, every step matters. The result is a clean, rich, and satisfying cup that sets the tone for your entire day.
Remember that great coffee is about consistency and attention to detail. Use fresh beans, measure your coffee grounds carefully, and take your time with the process. The more you practice, the better your cups will become. Share what you have learned with friends and family, and spread the joy of great filter cone coffee.