How To Clean A Jenn Air Oven And Keep It Sparkling
Keeping your Jenn Air oven clean ensures better cooking results, safer operation, and a longer appliance lifespan. This guide walks you through how to clean a Jenn Air oven using proven methods, from the self-clean cycle to natural DIY solutions. You will learn practical steps, common mistakes to avoid, and expert tips that make oven maintenance effortless and fast.
There is nothing worse than opening your Jenn Air oven and getting hit with a wave of burnt food smell. Grease splatters, charred drips, and baked-on residue build up over time, making every meal taste a little off. The good news is that how to clean a Jenn Air oven does not have to be a dreaded weekend chore.
With the right approach and a few household ingredients, you can restore your oven to like-new condition in under an hour. Whether you own a sleek electric range or a gas model, this guide covers everything you need. We will walk you through the self-clean cycle, natural cleaning solutions, and simple habits that keep your oven sparkling all year long.
A clean oven also cooks more evenly. Built-up grease and food debris can affect heat distribution, which means your meals may not turn out the way you expect. Regular oven maintenance protects your investment and keeps your kitchen smelling fresh every time you cook.
Key Takeaways
- Use the self-clean cycle wisely: Jenn Air ovens have a built-in self-clean feature that handles heavy grease, but you should prepare properly before starting it.
- Natural cleaners work great: Baking soda, vinegar, and dish soap create a powerful, safe cleaning solution for your oven interior without harsh chemicals.
- Clean oven racks separately: Soaking racks in hot water with dish soap removes baked-on grease far more effectively than cleaning them inside the oven.
- Avoid common mistakes: Using abrasive pads, skipping the door seal, or cleaning while the oven is still hot can damage your appliance or cause injury.
- Maintain regularly: Wiping down your oven after each use and running a quick steam clean keeps buildup under control between deep cleans.
- Know your model: Different Jenn Air oven models have specific features, so always check your owner’s manual before starting any cleaning method.
📑 Table of Contents
- Why Regular Oven Cleaning Matters
- Understanding Your Jenn Air Oven’s Cleaning Features
- How To Clean A Jenn Air Oven Step By Step
- Natural Cleaning Solutions For Jenn Air Ovens
- Common Mistakes To Avoid When Cleaning Your Oven
- Keeping Your Jenn Air Oven Sparkling Between Deep Cleans
- When To Call A Professional For Oven Cleaning
- Final Thoughts On Cleaning Your Jenn Air Oven
Why Regular Oven Cleaning Matters
Many people only think about cleaning their oven when there is a visible mess. But oven maintenance goes far beyond appearances. Grease buildup inside your oven can create smoke during cooking, which leaves odors on your food and in your kitchen. Over time, this residue can become a fire hazard, especially around heating elements.
When you clean a Jenn Air oven regularly, you also protect the appliance’s internal components. Grease can coat the temperature sensors and heating elements, causing your oven to run hotter or cooler than the setting you chose. This leads to unevenly cooked food and wasted energy.
Health Benefits of a Clean Oven
Burnt food particles inside your oven can release smoke and odors every time you cook at high temperatures. This affects the air quality in your kitchen and can trigger allergies or respiratory irritation. A clean oven interior means cleaner air while you prepare meals for your family.
Additionally, old food debris that builds up in corners and on the oven floor can harbor bacteria. When you cook at high temperatures, some of this bacteria may not be fully eliminated, especially if the debris is thick. Regular cleaning eliminates this risk entirely.
How Often Should You Clean Your Jenn Air Oven?
For most home cooks, a deep clean every one to three months works well. However, if you use your oven frequently or cook messy dishes like roasted meats and baked casseroles, you may need to clean more often. A quick wipe-down after spills cool down helps prevent stubborn buildup from forming.
Here is a simple schedule to follow:
- After each use: Wipe up any spills once the oven cools to a safe temperature.
- Monthly: Check the oven floor and walls for grease spots and wipe them down.
- Every three months: Perform a full deep clean using one of the methods in this guide.
- Before special occasions: Run the self-clean cycle or do a thorough scrub before hosting guests.
Understanding Your Jenn Air Oven’s Cleaning Features
Jenn Air ovens come with some impressive cleaning features designed to make your life easier. Before you reach for any cleaning products, it helps to understand what your oven can do on its own. Knowing your appliance’s capabilities saves time and prevents damage.
The Self-Clean Cycle Explained
Most modern Jenn Air ovens include a self-clean cycle that uses high heat to burn off food residue and grease. During this cycle, the oven reaches temperatures around 900 degrees Fahrenheit, reducing everything inside to ash. You simply wipe away the ash with a damp cloth when the cycle finishes.
This feature is incredibly effective for heavy buildup. However, the self-clean cycle works best when you use it as a supplement to regular cleaning, not a replacement. If you wait until there is a thick layer of baked-on grime, the cycle may take longer and produce more smoke.
Steam Clean Feature
Some Jenn Air models also include a steam clean option. This feature uses water and lower heat to loosen grease and food particles without the extreme temperatures of the self-clean cycle. Steam cleaning is faster, uses less energy, and produces less odor. It works well for light to moderate soil.
If your model has this feature, use it after every few cooking sessions to keep the interior fresh. It is a simple way to maintain your oven between deeper cleans.
Porcelain Interior Coating
Many Jenn Air ovens feature a porcelain interior coating that resists sticking and makes cleanup easier. This smooth surface prevents food from bonding to the oven walls, which means spills wipe away more readily. However, even porcelain-coated interiors benefit from regular maintenance.
Be careful not to scratch the porcelain surface during cleaning. Avoid abrasive scrubbers and harsh chemical cleaners that can damage the coating over time. Stick to soft cloths, sponges, and gentle cleaning solutions.
How To Clean A Jenn Air Oven Step By Step
Now let us get into the practical steps. Whether you are using the self-clean cycle or a manual method, following a clear process ensures the best results. Here is everything you need to know about oven cleaning for your Jenn Air appliance.
Step 1: Remove the Oven Racks
Start by pulling out all oven racks, the temperature probe, and any other removable parts. These items should be cleaned separately because they need more attention than the oven interior can provide during a self-clean cycle. Removing them also gives you full access to every surface inside the oven.
Step 2: Choose Your Cleaning Method
You have two main options for cleaning the oven interior. The first is the self-clean cycle, which works best for heavy grease buildup. The second is a manual deep clean using natural or commercial cleaning solutions, which gives you more control and works well for regular maintenance.
For the self-clean method, simply close the oven door, select the self-clean setting, and let the oven do the work. For a manual clean, apply your chosen cleaning solution and let it sit before scrubbing. We will cover both approaches in detail below.
Step 3: Clean the Oven Door Glass
The oven door glass is one of the most visible parts of your appliance, and it tends to collect grease and grime quickly. A buildup on the glass makes it harder to monitor your food while cooking and can obscure your view.
Make a paste of baking soda and water, spread it on the glass, and let it sit for 15 to 20 minutes. Then wipe it away with a damp cloth. For stubborn spots, spray a mixture of vinegar and water and scrub gently with a non-abrasive sponge.
Step 4: Wipe Down the Interior
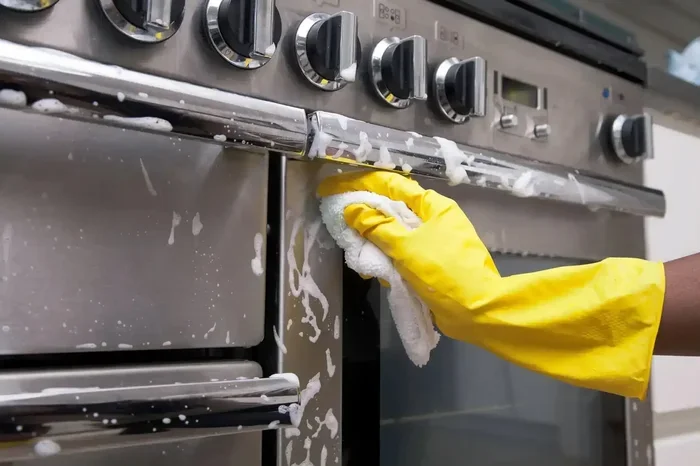
After the self-clean cycle finishes or after your manual cleaning solution has had time to work, use a damp cloth to wipe down the entire interior. Remove all ash residue, cleaning solution, and loosened grime. Rinse the cloth frequently and repeat until no residue remains.
Pay special attention to corners, crevices, and the area around the oven door seal. These spots collect grease quickly and are easy to miss. A small brush or old toothbrush works well for getting into tight spaces.
Step 5: Clean the Oven Racks
Soak your oven racks in a bathtub or large sink filled with hot water and a generous amount of dish soap. Let them soak for at least one hour, preferably overnight for heavy buildup. After soaking, scrub them with a non-abrasive pad and rinse thoroughly.
For baked-on grease that will not budge, make a paste of baking soda and hydrogen peroxide. Apply it to the racks, let it sit for 30 minutes, then scrub and rinse. Your racks will look and smell like new.
Step 6: Clean the Oven Door Seal
The door seal, also called the gasket, is a critical part of your oven that many people forget to clean. A dirty seal can let heat escape, reducing cooking efficiency and raising your energy bills. Wipe the seal with a damp cloth and a mild cleaning solution. Use a cotton swab to reach into the folds of the gasket.
Never use sharp objects or abrasive tools on the door seal. The rubber or silicone material can tear easily, and a damaged seal needs professional replacement.
Step 7: Clean the Oven Vent
Your Jenn Air oven has a vent that helps regulate airflow and temperature. Grease can accumulate around the vent opening, which affects oven performance. Use a damp cloth or a soft brush to clean the vent area. If your vent has a removable filter, wash it with warm soapy water and let it dry completely before replacing it.
Natural Cleaning Solutions For Jenn Air Ovens
Many homeowners prefer natural cleaning solutions because they are safe, effective, and affordable. You probably already have the ingredients for most oven cleaning recipes in your kitchen pantry. These methods work well for regular maintenance and light to moderate grease buildup.
Baking Soda Paste Method
Baking soda is one of the most versatile and effective natural cleaners for ovens. It is a gentle abrasive that cuts through grease without scratching surfaces. To use it, mix three parts baking soda with one part water to form a spreadable paste.
Spread the paste generously over the oven interior, avoiding the heating elements. Let it sit for at least 12 hours or overnight. The paste will break down grease and food residue while you sleep. The next morning, wipe it away with a damp cloth and rinse thoroughly.
Vinegar and Baking Soda Combo
For extra cleaning power, use vinegar and baking soda together. After applying the baking soda paste and letting it sit, spray white vinegar over the paste. The chemical reaction creates fizzing bubbles that help lift stubborn grime. Wipe everything away with a clean damp cloth once the fizzing stops.
Dish Soap and Hot Water Soak
A simple mixture of dish soap and hot water works wonders for oven racks and removable parts. Add a few drops of dish soap to a basin of hot water and let your racks soak for several hours. The hot water softens grease, and the dish soap breaks it down so you can easily scrub it away.
Lemon and Water Steam Clean
For a fresh-scented alternative, place lemon halves in a baking dish filled with water. Put the dish on the lowest oven rack and heat the oven to 200 degrees Fahrenheit for 30 minutes. The steam loosens grease and leaves a pleasant citrus smell behind. Afterward, wipe the interior with a damp cloth.
Comparison: Homemade vs Commercial Oven Cleaners
When it comes to oven cleaning solutions, you have two main choices: homemade remedies and commercial products. Each has its pros and cons, and the right choice depends on your needs and preferences.
| Factor | Homemade Cleaners | Commercial Cleaners |
|---|---|---|
| Cost | Very affordable (pennies per use) | Moderate to high ($5-$15 per bottle) |
| Effectiveness | Great for light to moderate grease | Excellent for heavy buildup |
| Safety | Non-toxic and safe around food | Contains harsh chemicals; requires ventilation |
| Convenience | Requires soaking and scrubbing time | Fast-acting but needs careful rinsing |
| Oven Interior Safety | Very gentle on porcelain and coatings | May damage surfaces if overused |
| Environmental Impact | Eco-friendly and biodegradable | Chemical runoff can harm the environment |
For most households, a combination approach works best. Use homemade cleaners for regular maintenance and reserve commercial products for occasional deep cleans when heavy buildup has accumulated. This keeps your oven clean while minimizing exposure to harsh chemicals.
Common Mistakes To Avoid When Cleaning Your Oven
Even with the best intentions, it is easy to make mistakes when cleaning your oven. Some of these errors can damage your Jenn Air appliance, while others simply make the job harder. Knowing what to avoid saves you time, money, and frustration.
Using Abrasive Cleaners or Pads
Steel wool, abrasive scouring pads, and harsh chemical cleaners can scratch and damage your oven’s interior coating. Once the coating is scratched, food and grease bond more easily to the surface, making future cleaning even harder. Stick to soft cloths, sponges, and gentle cleaning solutions.
Skipping the Oven Door Seal
The door seal is one of the most overlooked parts of oven cleaning. A dirty seal affects oven performance, energy efficiency, and cooking consistency. Make it a habit to clean the seal every time you do a deep clean of your oven interior.
Starting the Self-Clean Cycle Without Preparation
Before running the self-clean cycle, remove all oven racks, the temperature probe, and any large food debris. The extreme heat can damage removable parts, and large pieces of food can create excessive smoke. Also, make sure your kitchen is well-ventilated, as the self-clean cycle produces smoke and odors.
Cleaning a Hot Oven
Never attempt to clean your oven while it is still hot. The surfaces retain heat long after you turn off the oven, and touching them can cause burns. Always wait until the oven has cooled to room temperature before starting any cleaning project.
Using Too Much Water
While moisture is necessary for cleaning, using excessive water can damage electrical components and the oven’s heating elements. Use damp cloths rather than soaking surfaces, and never spray liquid directly into the oven. Wring out cloths well before wiping down the interior.
Keeping Your Jenn Air Oven Sparkling Between Deep Cleans
The secret to an always-clean oven is building simple daily habits that prevent buildup in the first place. You do not need to spend hours scrubbing if you take a few minutes after each cooking session to maintain the interior.
Wipe Spills Immediately
As soon as your oven cools to a safe temperature, wipe up any spills or splatters. Use a damp cloth and mild dish soap for best results. The longer food sits on oven surfaces, the harder it becomes to remove.
Use Oven Liners
Oven liners are inexpensive sheets that sit on the bottom rack and catch drips and spills before they reach the oven floor. They are especially useful for people who roast meats or bake greasy dishes frequently. Simply replace the liner when it becomes heavily soiled.
Cover Food While Cooking
Using foil or oven-safe lids when cooking helps contain splatters and spills. This simple habit keeps your oven interior much cleaner between deep cleans. Just make sure the foil does not touch the heating elements, as this can cause damage or create a fire risk.
Run a Quick Steam Clean Monthly
If your Jenn Air model has a steam clean feature, use it once a month to keep the interior fresh. Even if your oven does not have this feature, you can place a oven-safe dish of water on the bottom rack and heat it to 250 degrees Fahrenheit for 15 minutes. The steam loosens light grease and food particles, making your next deep clean much easier.
Store Your Oven Empty When Not in Use
Leaving items inside your oven when it is not in use can lead to accidental spills and odors. Keep the oven empty except for the racks and any items you are actively using. This prevents buildup and keeps your oven smelling fresh.
Schedule Seasonal Deep Cleans
Set a reminder to perform a thorough deep clean of your Jenn Air appliance at the start of each season. Seasonal cleaning ensures that heavy buildup does not have time to accumulate. It also gives you a chance to inspect the door seal, vent, and heating elements for any signs of wear or damage.
When To Call A Professional For Oven Cleaning
Most oven cleaning tasks are perfectly manageable at home with the methods described in this guide. However, there are situations where professional help is the right choice. If your oven has persistent odors that do not go away after cleaning, it could indicate a problem with the ventilation system or internal components that require professional diagnosis.
Similarly, if you notice damage to the heating elements, a malfunctioning self-clean cycle, or a door seal that is visibly torn or worn, contact a qualified appliance technician. Attempting to repair these issues yourself can void your warranty and create safety risks.
For homeowners who prefer not to handle oven cleaning at all, professional cleaning services are widely available. These specialists have commercial-grade equipment and cleaning solutions that can tackle even the most stubborn buildup. Scheduling a professional cleaning once or twice a year is a great complement to your regular maintenance routine.
Final Thoughts On Cleaning Your Jenn Air Oven
How to clean a Jenn Air oven is a skill that every home cook should have in their toolkit. With the right techniques, a little patience, and consistent habits, keeping your oven spotless becomes second nature. Whether you rely on the self-clean cycle, natural DIY solutions, or a combination of both, the methods in this guide will help you achieve excellent results every time.
Remember that oven cleaning is not just about appearances. A clean oven cooks better, lasts longer, and keeps your kitchen safe and healthy. By following the steps and tips outlined above, you invest in the performance and longevity of one of your most-used kitchen appliances.
Start today. Pull out those racks, grab some baking soda, and give your Jenn Air oven the care it deserves. Your future self, and your next meal, will thank you. A sparkling oven makes every cooking experience more enjoyable, and maintaining it does not have to be a chore. With these simple habits, your oven will stay in top condition for years to come.
Frequently Asked Questions
What is the best way to clean a Jenn Air oven?
The best way to clean a Jenn Air oven depends on the level of buildup. For heavy grease, use the self-clean cycle. For regular maintenance, a baking soda paste applied overnight works wonderfully. Always remove racks before cleaning and wipe the interior with a damp cloth afterward.
Can I use commercial oven cleaner on my Jenn Air oven?
Yes, you can use commercial oven cleaners on your Jenn Air oven, but choose a non-abrasive formula and follow the manufacturer’s instructions. Always rinse the interior thoroughly after using commercial cleaners to remove all chemical residue before cooking again.
How long does the Jenn Air self-clean cycle take?
The self-clean cycle typically takes between two and four hours, depending on the level of soil inside the oven. The oven heats to very high temperatures to burn off food residue and grease, then cools down before you can wipe away the remaining ash.
Is it safe to use vinegar to clean my oven?
Yes, vinegar is safe and effective for oven cleaning. It cuts through grease, removes odors, and is gentle on oven surfaces. Mix equal parts white vinegar and water in a spray bottle and apply it after using a baking soda paste for the best results.
How do I clean baked-on grease in my Jenn Air oven?
For baked-on grease, apply a thick layer of baking soda paste and let it sit for at least 12 hours. The paste breaks down the hardened grease over time. For tough spots, spray vinegar on the paste after it has sat to create a fizzing reaction that lifts the residue.
How often should I clean my Jenn Air oven?
A deep clean every one to three months is recommended for most households. If you cook frequently or prepare greasy dishes, you may need to clean more often. Wiping up spills immediately after cooking helps reduce the need for deep cleans significantly.