How To Deep Clean A Coffee Machine And Remove Stains
Deep cleaning your coffee machine removes built-up stains, mineral deposits, and coffee residue that affect taste and performance. This guide shows you exactly how to deep clean a coffee machine using simple household items like vinegar and baking soda. You will learn step-by-step methods to restore your machine and keep it running smoothly for years.
There is nothing better than a fresh cup of coffee brewed in a clean machine. But over time, coffee residue, mineral deposits, and stains build up inside your coffee maker. This affects the taste of your drink and the overall performance of your machine. Learning how to deep clean a coffee machine is one of the best things you can do for your daily brew routine.
A dirty coffee machine can harbor bacteria and mold. It can also leave behind a bitter or rancid taste that ruins even the best quality coffee beans. Regular cleaning keeps your coffee tasting great and your machine running smoothly for years. This guide will walk you through the entire deep cleaning process from start to finish. You will learn what supplies you need, the step-by-step cleaning method, and how to remove tough stains effectively.
Whether you own a drip coffee maker, an espresso machine, or a single-serve pod machine, the core principles remain the same. We will cover everything from daily maintenance habits to deep cleaning techniques that tackle the toughest buildup. By the end of this guide, you will feel confident tackling any coffee machine cleaning job. Let us get started.
Key Takeaways
- Regular deep cleaning removes mineral buildup and coffee stains: Descaling and scrubbing keeps your machine performing at its best.
- Household items like vinegar and baking soda work wonders: You do not need expensive products to clean your coffee maker effectively.
- Cleaning removable parts is essential: Just like you would clean the bottom tray of a toaster oven, you must clean all coffee machine parts.
- Daily and weekly habits prevent heavy staining: Simple routines make deep cleaning less frequent and easier.
- Never skip the rinse cycle after cleaning: Residual cleaning agents can affect the taste of your next brew.
- Hard water causes the most stubborn stains: Using filtered water reduces buildup and extends machine life.
📑 Table of Contents
Why Deep Cleaning Your Coffee Machine Matters
The Hidden Build-Up Inside Your Machine
Every time you brew a cup of coffee, natural oils from the grounds leave a thin residue inside the machine. Over days and weeks, this residue builds up along the walls of the water reservoir, the tubing, and the brewing components. Mineral deposits from hard water add another stubborn layer of buildup on top of that. Together, these create a breeding ground for bacteria and mold that you cannot see with the naked eye.
This hidden buildup does not just affect hygiene. It directly impacts the flavor of your coffee. A machine coated in old coffee oils will produce cups that taste flat, sour, or slightly rancid. The oils go stale over time, and every new brew picks up those off-flavors. Regular coffee machine cleaning prevents this problem from getting out of hand and keeps every cup tasting fresh.
How Often Should You Deep Clean?
A quick rinse of the carafe and filter basket after each use is a good daily habit. But a true deep clean should happen at least once a month for most users. If you use your machine frequently or live in an area with hard water, you may need to clean it every two weeks instead.
Here are clear signs that your machine needs a deep clean right away:
– A stale or off taste in your coffee even with fresh beans
– Visible staining or discoloration inside the water reservoir
– Slower brewing times than usual
– Unusual smells coming from the machine during the brewing cycle
– White or chalky deposits around the water outlet
If you notice any of these signs, it is time to give your machine a thorough cleaning. Think of it the same way you would self-clean a gas oven when it starts looking and smelling dirty inside. Regular maintenance prevents the problem from worsening.
What You Will Need For A Deep Clean
Essential Cleaning Supplies
You do not need fancy or expensive products to deep clean a coffee machine. Most of what you need are common household items that you probably already have in your kitchen. Here is what you should gather before you start the cleaning process:
– White vinegar: This is your best friend for descaling and removing mineral buildup. It breaks down limescale naturally and safely without damaging internal components. It is also incredibly affordable and available at any grocery store.
– Baking soda: Great for scrubbing away stubborn coffee stains and neutralizing odors. Its mild abrasive quality lifts stains without scratching surfaces.
– Warm water: You will need plenty of it for rinsing and mixing cleaning solutions. Always use warm water for best results.
– Soft cloths or microfiber towels: These are perfect for wiping down surfaces without scratching or leaving lint behind.
– A soft-bristled brush: Useful for reaching into small crevices and cleaning the coffee pot or carafe thoroughly.
– Mild dish soap: A small amount of gentle dish soap helps clean removable parts thoroughly without leaving behind chemical residues.
Optional but Helpful Tools
While not necessary, a few extra tools can make the job easier and more thorough:
– A toothpick or small pin: Great for clearing out coffee residue from tiny holes in the brew basket or shower head.
– A cotton swab: Perfect for cleaning hard-to-reach areas around the machine base and tight corners.
– A dedicated cleaning brush: Some coffee machine brands sell small brushes designed specifically for this purpose. They work well but are not required for a successful clean.
Step By Step Deep Cleaning Process
Step One: Prepare Your Machine
Start by unplugging the machine from the wall outlet. Safety always comes first when cleaning any electrical appliance. Remove any remaining coffee grounds or used pods from the holder. Take out all removable parts, including the carafe, the filter basket, the permanent filter, and any water reservoirs that detach from the main unit.
Wash all removable parts with warm soapy water. Use a soft sponge to avoid scratching any surfaces. Rinse each piece thoroughly under running water and set them aside on a clean towel to air dry. This step alone removes a significant amount of surface grime and fresh coffee oils that have accumulated since your last brew.
While the parts are drying, take a moment to wipe down the inside of the water reservoir with a damp cloth. You will be surprised how much residue comes off with just a simple wipe. This prepares the machine for the deeper cleaning steps that follow.
Step Two: Run The Cleaning Cycle
Fill the water reservoir with a mixture of equal parts white vinegar and water. For a standard drip coffee maker, use about four cups of vinegar and four cups of water. This solution will help descale the coffee maker and break down mineral deposits inside the tubing and heating elements.
Place a clean filter in the basket if your machine uses paper filters. Then run a full brewing cycle with the vinegar solution. Let the machine run halfway through, then turn it off and let the solution sit inside the machine for 30 minutes. This pause gives the vinegar time to dissolve mineral buildup and loosen stubborn deposits.
After 30 minutes, turn the machine back on and let it finish the brewing cycle. The vinegar smell might be strong during this process, but do not worry. It will rinse out completely in the next step. This method is one of the most effective ways to descale a coffee maker without using harsh chemicals.
Step Three: Scrub The Internal Components
After the vinegar cycle is complete, check the inside of the water reservoir and the brew head for any remaining residue. Use a soft brush or cloth to gently scrub away any visible stains or buildup. A cotton swab works well for small openings and tight crevices where buildup tends to hide.
If your coffee machine has a removable brew group or filter holder, take it out and clean it separately. Soak it in warm soapy water for 15 minutes, then scrub gently with a soft brush. Pay special attention to any small holes or openings where coffee grounds can get trapped. This is similar to how you would clean the bottom tray of a toaster oven, where you remove the tray and scrub it separately to remove all the debris.
Also take this time to clean the coffee pot or carafe more thoroughly. Fill it with warm water and add a tablespoon of baking soda. Let it soak for at least 30 minutes, then scrub the inside with a soft sponge. For glass carafes with dark staining, the baking soda paste method works especially well.
Step Four: Rinse And Dry Thoroughly
Now it is time to rinse out all the cleaning solution. Fill the reservoir with clean, fresh water and run two to three full brewing cycles. This flushes out all the vinegar and any loosened debris from the internal components. After each cycle, empty the carafe completely.
Check the water that comes out after each cycle. If you still smell or taste vinegar, keep running rinse cycles. You want the water to come out completely clean and odor-free. This step is critical because any remaining cleaning solution will affect the taste of your next pot of coffee.
Once the rinsing is done, reassemble all the parts. Make sure every piece is completely dry before putting the machine back together. Moisture left inside can lead to mold growth and unpleasant odors. Leave the machine open and uncovered for a few minutes to let everything air dry completely.
How To Remove Stains From Your Coffee Machine
Dealing With Hard Water Stains
Hard water stains are one of the most common problems coffee machine owners face. These white or chalky deposits build up from the mineral content in tap water. They can clog small openings, reduce water flow, and affect the machine’s overall performance over time.
The best way to remove hard water stains is through regular descaling. Use the vinegar and water method described in the cleaning cycle section above. For tougher stains that have built up over a long time, you can let the vinegar solution sit for a full hour before running the cycle. Some people also use lemon juice as a natural alternative to vinegar. It works well for descaling and leaves a fresh, pleasant scent behind.
If your machine has a built-in descaling indicator light, pay attention to it. This feature is designed to tell you exactly when descaling is needed. Ignoring the light can lead to permanent mineral buildup that is much harder to remove later.
Removing Coffee Residue And Discoloration
Dark staining inside the carafe and the water reservoir is usually caused by coffee oils that have oxidized over time. These stains can be stubborn, but they respond very well to baking soda treatment.
Make a thick paste with baking soda and a small amount of water. Apply it directly to the stained areas inside the reservoir and let it sit for 15 to 20 minutes. Then scrub gently with a soft cloth or sponge. The mild abrasive quality of baking soda lifts stains without scratching or damaging surfaces.
For the coffee pot, fill it with warm water and add two tablespoons of baking soda. Let it soak for at least one hour, then wash it out normally. For extremely discolored glass carafes, you can also try placing a few uncooked rice grains inside with warm water and vinegar, then swirling the mixture vigorously. The rice acts as a gentle abrasive that helps lift stains.
Cleaning The Exterior And Carafe
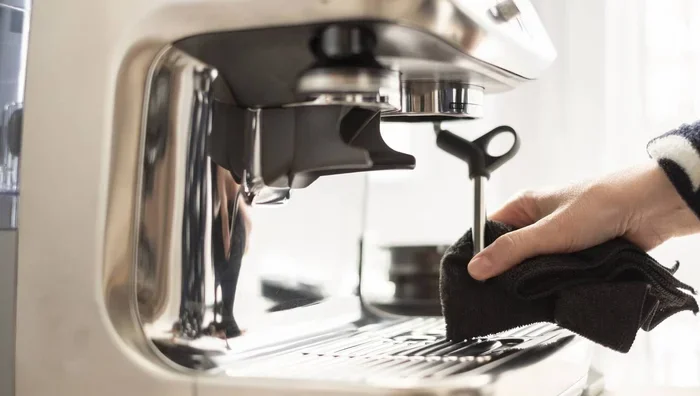
Do not forget the outside of your machine. Wipe down the exterior with a damp microfiber cloth after each use. For stubborn spots or fingerprints on the body, use a mild dish soap solution and a soft cloth. Avoid harsh chemical cleaners or abrasive scrubbers that could damage the finish or coating of your machine.
The carafe deserves special attention as part of your coffee machine upkeep. If you have glass carafe staining, fill it with warm water and add a small amount of white vinegar. Let it soak overnight, then wash it thoroughly in the morning. For plastic carafes that have become discolored, baking soda paste is your best option for restoring the original appearance.
Maintenance Tips To Keep Your Coffee Machine Clean Longer
Daily Habits That Make A Difference
A few simple daily habits can dramatically reduce the need for deep cleaning sessions. These small actions take only seconds but add up to significant protection for your machine over time:
– Rinse the carafe and filter basket after every single use. This prevents coffee oils from hardening and sticking to surfaces.
– Empty the used grounds immediately after brewing. Do not let them sit in the machine where they can grow mold or attract pests.
– Wipe down the exterior daily with a dry or slightly damp cloth to remove splashes and fingerprints.
– Leave the lid open after brewing to allow the inside to air dry. This prevents moisture buildup that leads to mold and bacteria.
– Always use fresh, cold water for each brew cycle. Stale water affects taste and can contribute to mineral deposits.
These small actions add up over time. They keep your coffee machine in better shape between deep cleaning sessions and ensure every cup tastes its best.
Weekly And Monthly Cleaning Routines
In addition to daily habits, follow this structured cleaning schedule:
Weekly tasks:
- Wash all removable parts with warm soapy water
- Wipe down the water reservoir with a damp cloth
- Check the filter and replace if it is due
- Empty and clean the drip tray
Monthly tasks:
- Run a full vinegar cleaning cycle
- Deep scrub the carafe and all internal components
- Check for any wear, cracks, or damage to parts
- Clean the exterior and control panel thoroughly
Following this routine means your machine stays in top condition at all times. It also ensures every cup of coffee tastes fresh, clean, and free from off-flavors.
Common Mistakes To Avoid When Cleaning
Using The Wrong Cleaning Products
Not all cleaning products are safe for coffee machines, and this is a mistake many people make. Avoid using bleach, abrasive scouring powders, or harsh chemical solutions. These can damage internal components, leave behind toxic residues, and seriously affect the taste of your coffee.
Stick to mild dish soap, white vinegar, and baking soda. These are safe, effective, and incredibly affordable. They are all you need for a thorough coffee maker deep clean. If you are unsure about a product, check your machine’s user manual for the manufacturer’s recommended cleaning methods.
Skipping The Rinse Cycle After Cleaning
This is one of the most common mistakes people make when cleaning their coffee machines. After running a vinegar or baking soda cycle, they immediately start brewing coffee again. The residual cleaning solution flavor can ruin the taste of the first several cups of coffee.
Always run at least two to three full rinse cycles with clean water after any cleaning solution. Taste the water that comes out after each cycle. If it does not smell or taste completely clean and neutral, keep rinsing. It is better to run one extra cycle than to brew coffee with cleaning solution still inside the machine.
Ignoring Hard Water Mineral Buildup
If you live in an area with hard water, mineral buildup is almost inevitable. Ignoring it leads to clogs, reduced water flow, inconsistent brewing temperatures, and eventually machine failure. Hard water is the enemy of any coffee brewing system.
Use filtered or distilled water in your coffee machine whenever possible. This simple change reduces mineral deposits significantly and can extend the life of your machine by years. If filtered water is not an option in your home, increase your descaling frequency to every two weeks instead of monthly. Your machine will thank you for it.
Final Thoughts On Coffee Machine Care
Taking care of your coffee machine does not have to be complicated or time-consuming. A little regular maintenance goes a long way toward keeping your brews tasting great and your machine running efficiently. When you know how to deep clean a coffee machine properly, you can tackle any buildup or staining with total confidence.
Think of coffee machine maintenance the same way you would maintain any other important kitchen appliance. Just like how you would use a brand new oven properly to get the best results and longevity, your coffee machine needs proper care and consistent attention. The effort you put in pays off in better-tasting coffee, better hygiene, and a longer-lasting machine.
Make deep cleaning a regular part of your kitchen routine rather than a dreaded chore. Set a reminder on your phone for monthly cleaning sessions. Keep your supplies stocked and ready. Your morning coffee will taste noticeably better, and your machine will serve you well for many years to come. Start today, and you will notice the difference in your very next cup.
Frequently Asked Questions
How often should I deep clean my coffee machine?
You should deep clean your coffee machine at least once a month. If you use it daily or have hard water, aim for every two weeks. Regular deep cleaning prevents buildup and keeps your coffee tasting fresh.
Can I use vinegar to clean my coffee machine?
Yes, white vinegar is one of the best and safest options for descaling and cleaning a coffee maker. Mix equal parts vinegar and water, run a brewing cycle, then rinse thoroughly with clean water two to three times.
What is the best way to remove coffee stains from the carafe?
Fill the carafe with warm water and add two tablespoons of baking soda. Let it soak for at least 30 minutes, then scrub with a soft sponge. For glass carafes, a vinegar and rice soak also works well for lifting stains.
Is it safe to use baking soda inside a coffee machine?
Yes, baking soda is safe and effective for coffee machine cleaning. It removes stains, neutralizes odors, and is gentle enough not to damage internal components. Just avoid using large amounts that could clog small openings.
Can I use lemon juice instead of vinegar for descaling?
Yes, lemon juice is a natural alternative to vinegar for descaling a coffee maker. It works similarly to break down mineral deposits and leaves a fresh citrus scent behind. Use the same method as you would with vinegar.
Why does my coffee taste weird after cleaning?
This usually means you did not rinse the machine thoroughly enough after cleaning. Run two to three additional rinse cycles with clean water until the water tastes and smells completely neutral before brewing coffee again.