How To Clean Bottom Tray Of Toaster Oven The Right Way
The bottom tray of your toaster oven collects grease, crumbs, and baked-on grime over time. Cleaning it regularly keeps your toaster oven running efficiently and prevents odors. In this guide, I’ll show you the easiest methods to clean the bottom tray of a toaster oven using common household items, so you can enjoy a spotless appliance with minimal effort.
Key Takeaways
- Regular cleaning prevents grease buildup: Wiping the tray after each use stops baked-on grime from forming.
- Household items work best: Baking soda, vinegar, and warm soapy water cut through tough stains safely.
- Soak for tough messes: A 30-minute soak loosens baked-on food residue and makes scrubbing easier.
- Use an oven liner: A reusable liner catches drips and reduces deep cleaning frequency.
- Know when to replace: Warped or heavily corroded trays lose efficiency and should be swapped out.
- Maintenance saves time: Quick daily care keeps your toaster oven smelling fresh and working well.
- Natural solutions are safe: Avoid harsh chemicals that can damage the non-stick surface of your tray.
📑 Table of Contents
Why the Bottom Tray of Your Toaster Oven Gets So Dirty
Every time you use your toaster oven, tiny crumbs and fat splatter drop to the bottom. Over days and weeks, this food residue turns into a greasy mess. The bottom tray is designed to catch everything that falls through the cooking rack. Without regular toaster oven cleaning, this tray becomes a sticky, smelly disaster. Grease and baked-on grime can even smoke during your next cooking session. Understanding why it gets dirty helps you tackle the job faster.
The Role of the Crumb Tray and Drip Pan
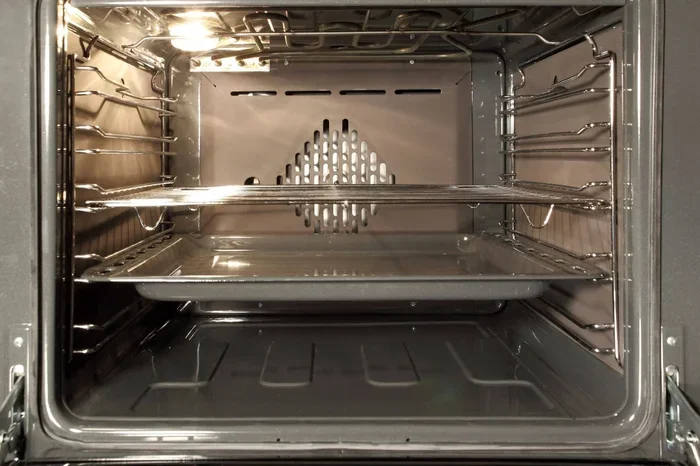
Most toaster ovens have a removable crumb tray at the very bottom. This small pan catches loose bread crumbs and small food bits. Directly above it sits the drip pan or main bottom tray. The drip pan handles larger spills, melted cheese, and cooking oils. Together, these parts keep your oven interior cleaner. But they also need your attention. When grease piles up, it blocks airflow and affects cooking performance. A clean spill tray ensures your meals cook evenly.
Common Culprits Like Grease and Food Residue
Bacon fat, cheese drips, and oily marinades are the worst offenders. They bake onto the tray and turn into a hard, dark crust. Even toast crumbs can mix with grease to form a stubborn paste. Baked-on grime is tough to remove with just a wipe. This is why deep clean routines matter. The good news is that most of this mess responds well to simple soaking and scrubbing. You do not need expensive degreaser products to get the job done.
What You’ll Need for a Deep Clean
Before you start, gather a few simple items. You do not need special toaster oven cleaning tools. Most of what you need is already in your kitchen. Having everything ready makes the process smooth and quick. Here is a short list of supplies that work wonders for easy cleaning.
Household Cleaning Supplies
- Warm water – The base for most cleaning solutions.
- Dish soap – Cuts through grease effectively.
- Baking soda – A gentle abrasive that lifts stains.
- White vinegar – Cuts grease and removes odors.
- Non-abrasive sponge or cloth – Safe for non-stick surfaces.
Tools for Scrubbing
- Soft scrub brush – Helps remove stuck-on bits without scratching.
- Old toothbrush – Perfect for corners and small grooves.
- Plastic scraper – Loosens baked-on grime gently.
- Paper towels or clean rags – For wiping and drying.
Keep a bowl of warm soapy water nearby. This will be your go-to solution for most messes. If you prefer natural oven liner methods, you will also want some aluminum foil. These simple tools make cleaning the bottom tray a breeze.
How to Clean the Bottom Tray of a Toaster Oven Step by Step
Now that you have your supplies, let’s get to work. Follow these steps to give your bottom tray a thorough deep clean. This method works for both light grease and tough baked-on food. Always unplug your toaster oven before you start. Safety first makes the job worry-free.
Removing the Tray Safely
Slide out the bottom tray carefully. Most trays pull straight out from the front. Hold it over the sink or a trash can to catch any loose crumbs. If the tray is very greasy, place it on a folded towel to catch drips. Check for any large food chunks and scrape them off with a plastic scraper. Do not use metal tools, as they can scratch the non-stick surface. Removing loose debris first makes the soak much more effective.
Soaking and Scrubbing
Fill your sink or a large basin with warm soapy water. Submerge the tray completely. Let it soak for at least 20 to 30 minutes. This softens the baked-on grease and food residue. After soaking, put on a pair of rubber gloves. Use a soft scrub brush or non-abrasive sponge to wipe the tray. Work in small circles. The grease should lift off easily. For stubborn spots, sprinkle a little baking soda directly on the area and scrub gently. Rinse the tray with clean water and check your progress.
Dealing with Baked-On Grime
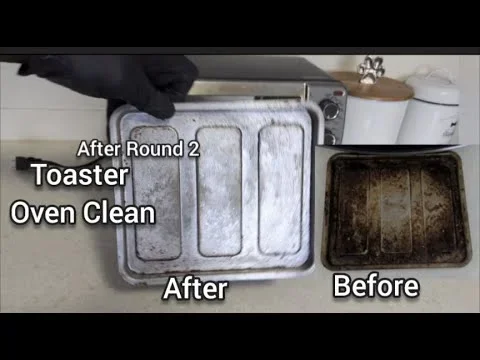
If the tray still has dark, crusty patches, it is time for a stronger approach. Make a paste of three parts baking soda to one part water. Spread it over the tough spots and let it sit for 15 minutes. The paste will break down the baked-on grime naturally. Then, use an old toothbrush to scrub the corners. For extra cutting power, spray a mix of equal parts white vinegar and water over the baking soda paste. It will fizz and help lift the residue. Wipe clean with a damp cloth and rinse thoroughly. This method delivers excellent toaster oven cleaning results without harsh chemicals.
Natural Cleaning Solutions That Really Work
Many commercial degreaser sprays contain strong fumes. Natural alternatives are safer for your home and the environment. They also cost pennies. The baking soda and vinegar method is a favorite among those who love easy cleaning. Here are two reliable solutions you can try right away.
Baking Soda and Vinegar Method
This fizzy reaction is perfect for cutting through baked-on grease. Start by making a thick baking soda paste with water. Spread it over the entire bottom tray. Let it sit for 10 minutes. Then, pour a small amount of white vinegar into a spray bottle and mist the paste. The mixture will bubble and loosen the grime. Wait another five minutes, then scrub with a soft sponge. Rinse with warm water and dry with a clean rag. This solution leaves your tray fresh and grease-free.
Dish Soap and Warm Water
For routine maintenance, a simple dish soap and warm water soak is often enough. Add a few drops of dish soap to a basin of warm water. Submerge the tray and let it sit for 15 minutes. The warm water softens the grease, and the soap breaks it down. Use a non-abrasive sponge to wipe the surface clean. This method is ideal for light to moderate grease. It works great as part of a weekly cleaning routine that keeps your toaster oven in top shape.
Preventing Future Buildup
Cleaning the bottom tray is easier when you stop messes from building up in the first place. A few simple habits can cut down on deep clean sessions. Prevention is the best form of toaster oven cleaning. These tips will help you maintain a fresh, odor-free appliance.
Using an Oven Liner
A reusable oven liner sits on the bottom of the oven, just above the heating elements. It catches crumbs, drips, and spills before they reach the bottom tray. Liners are usually made of silicone or fiberglass. They are easy to wipe clean or wash in the sink. Place a new liner every few months or when it gets stained. This simple tool makes cleaning the bottom tray faster and less frequent.
Regular Maintenance Tips
- Wipe after each use: Use a damp cloth to catch fresh crumbs and grease.
- Check the crumb tray weekly: Empty it to prevent smoke and odors.
- Line the tray with foil: A loose sheet of aluminum foil catches drips. Just remember to replace it often.
- Avoid over-oiling food: Use a light touch with cooking sprays and oils.
- Run a steam clean: Place a bowl of hot water inside the oven for 10 minutes to loosen grime before wiping.
These small steps add up. They keep your toaster oven running smoothly and extend the life of the bottom tray. Consistent maintenance means you spend less time scrubbing and more time cooking.
Conclusion
Cleaning the bottom tray of your toaster oven does not have to be a chore. With the right tools and a little patience, you can remove even the worst baked-on grease. The methods above work for all types of trays, whether they are coated with a non-stick surface or made of plain aluminum. Stick to natural solutions like baking soda and white vinegar for the safest results. Regular maintenance and a quick wipe after each use will keep your oven fresh and efficient. Now you know exactly how to clean the bottom tray of a toaster oven the right way. Try these steps today and enjoy a sparkling, grease-free appliance every time you cook.
Frequently Asked Questions
Can I put the bottom tray in the dishwasher?
Most toaster oven trays are dishwasher safe, but check your manual first. Hand washing with warm soapy water is often gentler and helps preserve the non-stick coating. It also lets you spot-clean stubborn spots more effectively.
What is the best homemade degreaser for toaster oven trays?
A paste of baking soda and water works wonders. For extra degreasing power, add a few drops of dish soap. Spray with white vinegar after applying the paste to lift baked-on grease naturally.
How often should I clean the bottom tray of my toaster oven?
Wipe the tray after every few uses to prevent buildup. A deeper clean with soaking should happen at least once a month, or more often if you cook greasy foods frequently.
Is it safe to use oven cleaner on the bottom tray?
It is best to avoid harsh oven cleaners on removable trays. These chemicals can damage the non-stick surface and leave behind fumes. Stick to natural cleaners like baking soda and vinegar for safe, effective results.
Why does my toaster oven bottom tray smell bad?
Burnt food residue and trapped grease cause unpleasant odors. Regular cleaning with warm soapy water or a baking soda soak removes the source of the smell and keeps your appliance fresh.
Can I use steel wool to scrub the bottom tray?
No, steel wool can scratch and ruin the non-stick coating. Use a soft scrub brush, old toothbrush, or non-abrasive sponge instead to protect the tray surface while removing grime.