How To Make Natural Coffee From Scratch At Your Home
Making natural coffee from scratch at home is simpler than you think. This guide walks you through everything from choosing raw green beans to brewing the perfect cup. You will learn roasting techniques, grinding methods, and brewing tips that transform ordinary beans into extraordinary coffee.
There is something truly special about making natural coffee from the very beginning. When you start with raw beans and roast them yourself, every sip tells a story. You control the roast level, the grind size, and the brewing method. The result is a cup of coffee that tastes completely different from anything you can buy off a shelf.
If you have ever wondered how to make natural coffee at home, you are in the right place. This guide covers everything you need to know. From selecting the right beans to the final pour, we will walk you through each step. Whether you are a complete beginner or a coffee lover looking to level up, this article has something valuable for you.
Natural coffee means coffee that is grown, processed, and prepared without artificial chemicals or additives. The beans are cultivated using organic methods, and the roasting happens in your own kitchen. This approach gives you full transparency over what goes into your cup. It also means you get to enjoy the purest, most authentic coffee flavor possible.
Making coffee from scratch might sound intimidating. But trust us, it is much easier than most people think. With a few simple tools and some basic knowledge, you can produce café-quality coffee right at your kitchen counter. Let us dive into the process step by step.
Key Takeaways
- Start With Green Beans: Raw green coffee beans are the foundation of natural coffee and offer the freshest flavor possible.
- Roast At Home: You can roast beans in your oven or a skillet for full control over the flavor profile.
- Grind Fresh: Grinding beans just before brewing unlocks the best aroma and taste.
- Choose Your Brew Method: Pour over, French press, and drip brewing each bring out unique qualities in natural coffee.
- Store Properly: Keeping roasted beans in an airtight container preserves freshness for up to two weeks.
- Avoid Common Mistakes: Over-roasting, grinding too fine, and using wrong water temperature can ruin your cup.
📑 Table of Contents
- What Is Natural Coffee And Why Should You Make It At Home?
- What You Need To Get Started
- How To Roast Green Coffee Beans At Home
- Grinding Your Coffee Beans The Right Way
- Brewing Methods For The Best Natural Coffee
- Storing Your Fresh Natural Coffee
- Common Mistakes To Avoid When Making Natural Coffee
- Quick Tips For Perfect Natural Coffee Every Time
- Expert Insights On Natural Coffee
What Is Natural Coffee And Why Should You Make It At Home?
Natural coffee refers to coffee beans that are grown without synthetic pesticides or fertilizers. The processing method also avoids artificial chemicals. When you make it at home, you take complete charge of the entire journey. From bean to cup, every decision is yours.
There are several reasons people choose to make homemade natural coffee. First, you know exactly what is in your coffee. No mystery flavors, no hidden additives. Second, freshly roasted beans taste dramatically better than pre-ground store-bought coffee. Third, it is surprisingly affordable once you get the hang of it.
Making coffee from scratch also gives you creative freedom. You can experiment with different roast levels, grind sizes, and brewing techniques. Some people love a light roast with bright, fruity notes. Others prefer a dark roast with deep, bold flavors. When you make your own, you get to decide.
The environmental impact matters too. Organic coffee farming supports sustainable agriculture. By choosing natural beans and making them yourself, you are making a choice that is better for the planet. Every cup you brew carries that positive impact forward.
What You Need To Get Started
Before you begin, gather a few essential tools. You do not need expensive equipment to make excellent natural coffee. Here is what you will need to get started:
- Green coffee beans: These are unroasted beans that you can buy online or from specialty stores. Look for organic, high-quality sources.
- A coffee grinder: A burr grinder works best for consistent grind size. A hand grinder is a great budget-friendly option.
- An oven or skillet: You can roast beans in a regular oven or on a stovetop skillet. Both methods work wonderfully.
- A baking sheet: For spreading beans evenly during roasting.
- An airtight container: For storing roasted beans once they cool down.
- Fresh, filtered water: Good water makes a huge difference in coffee taste.
- A brewing device: A pour over dripper, French press, or drip machine all work great.
You might already have most of these items in your kitchen. The only thing you may need to purchase is green coffee beans and a grinder. Everything else you likely own already. This makes getting started incredibly easy and affordable.
Choosing The Right Green Coffee Beans
Not all green beans are created equal. Look for beans that are uniform in color and free of defects. The origin of the bean matters a lot too. Beans from different regions have distinct flavor profiles.
For example, Ethiopian beans often have fruity and floral notes. Colombian beans tend to be smooth and nutty. Kenyan beans can be bright and wine-like. When you are starting out, try a small batch from a single origin. This helps you understand the unique character of different beans.
Buy beans in small quantities, especially when you are first learning. Fresh green beans stay viable for several months, but roasted beans are best used within two weeks. Starting with a small bag lets you experiment without wasting anything.
How To Roast Green Coffee Beans At Home
Roasting is the heart of making natural coffee from scratch. This is where raw green beans transform into aromatic, flavorful coffee. The process uses heat to develop the sugars and acids inside each bean. The result is the rich, complex flavor you love in your morning cup.
There are several ways to roast coffee beans at home. Each method gives you different levels of control and convenience. Let us explore the most popular approaches.
Oven Roasting Method
Using your oven is one of the most accessible ways to roast beans at home. Start by preheating your oven to 450°F. While it heats up, spread your green beans in a single layer on a baking sheet.
Place the tray in the oven and set a timer for about 15 minutes. During roasting, the beans will go through several visible changes. They will turn yellow, then brown, and eventually develop an oily sheen. You will also hear cracking sounds, similar to popcorn popping.
Stir the beans every few minutes for even roasting. The first crack usually happens around 10 to 12 minutes. If you want a light roast, pull the beans out here. For a medium roast, wait until the second crack. A dark roast requires going even longer, but watch carefully to avoid burning.
Once roasting is done, remove the tray and let the beans cool on a flat surface. You can also use a colander to cool them faster. The beans will continue to release carbon dioxide for the next 12 to 24 hours. This is called degassing, and it is an important part of the process.
After degassing, transfer the beans to an airtight container. Store them at room temperature away from direct sunlight. Your home-roasted natural coffee will taste best within two weeks of roasting.
Skillet Roasting Method
If you do not want to use the oven, a skillet works just as well. Heat a cast iron skillet over medium-high heat. Add your green beans and stir continuously with a wooden spoon.
Skillet roasting takes about 10 to 15 minutes. The beans will progress through the same color changes as oven roasting. Keep the heat steady and never stop stirring. Uneven heat can cause some beans to burn while others stay under-roasted.
This method gives you more direct control over the roast. You can feel the beans through the spoon and listen for the cracks. Many experienced home roasters prefer the skillet method for this hands-on approach.
Using A Home Coffee Roaster
If you plan to roast coffee regularly, consider investing in a dedicated home roaster. These machines offer precise temperature control and even roasting. They take the guesswork out of the process and produce consistently excellent results.
Home roasters range from simple popcorn poppers to advanced drum machines. A basic hot-air popper can work as a starter roaster. It is inexpensive and surprisingly effective. As you grow more confident, you can upgrade to a more specialized machine.
Grinding Your Coffee Beans The Right Way
Once your beans are roasted and cooled, the next step is grinding. Grinding just before brewing is one of the most important rules of making great natural coffee. Pre-ground coffee loses its flavor quickly, often within hours of being ground.
The grind size you choose depends on your brewing method. Here is a simple guide to help you decide:
- Extra coarse: Best for cold brew coffee. The grounds look like rough sea salt.
- Coarse: Ideal for French press. The texture is similar to kosher salt.
- Medium-coarse: Works well for pour over drippers and Chemex brewers.
- Medium: The standard grind for drip coffee makers and most machines.
- Fine: Best for espresso machines. The texture resembles table salt.
- Extra fine: Used for Turkish coffee. Almost powdery in consistency.
A burr grinder is the best choice for consistent results. Blade grinders chop beans unevenly, which leads to inconsistent extraction. With a burr grinder, you get uniform particles that brew evenly. This makes a noticeable difference in the taste of your cup.
If you are on a budget, a hand grinder works just as well. Many quality hand grinders cost under $30. They are portable, quiet, and produce a surprisingly even grind. For anyone serious about natural coffee, a hand grinder is a worthwhile investment.
Always grind only the amount you plan to brew right away. This preserves the maximum flavor and aroma. If you must store ground coffee, keep it in a sealed container away from heat and light. However, even the best storage cannot match the taste of freshly ground beans.
Brewing Methods For The Best Natural Coffee
Brewing is where all your hard work comes together. The method you choose shapes the final flavor of your coffee. Each technique brings out different characteristics in your beans. Here are the most popular methods for making natural coffee at home.
Pour Over Brewing
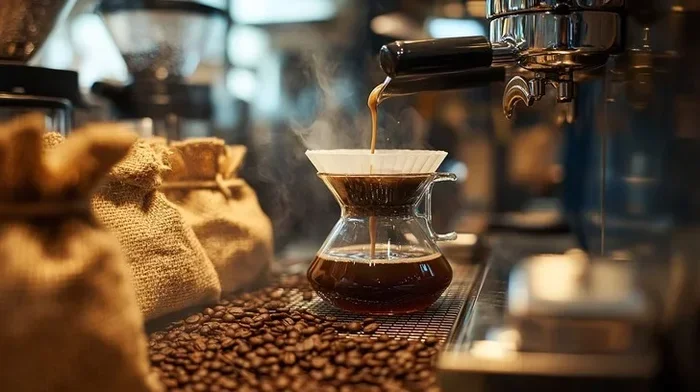
Pour over brewing is one of the cleanest and most precise methods. It uses a filter and a dripper to slowly pass hot water through coffee grounds. The result is a bright, clean cup that highlights the subtle flavors of your beans.
To brew with the pour over method, place a filter in your dripper and add ground coffee. Heat water to between 195°F and 205°F. Pour a small amount of water over the grounds first and let them bloom for 30 seconds. Then pour the remaining water slowly in circular motions.
The entire process takes about 3 to 4 minutes. The slow extraction pulls out complex flavors without bitterness. Pour over coffee is perfect for light and medium roasts, where you want to taste the full character of the bean.
French Press Method
The French press is one of the simplest and most satisfying ways to brew coffee. It produces a rich, full-bodied cup with a heavier mouthfeel than pour over coffee. The metal filter allows more oils to pass through, giving you a bolder flavor.
Add coarse ground coffee to the French press. Pour hot water over the grounds and stir gently. Let the coffee steep for 4 minutes, then press the plunger down slowly. Pour immediately to avoid over-extraction.
French press coffee works beautifully with medium and dark roasts. The bold, robust flavors of these roasts shine through in this brewing method.
Drip Coffee Maker
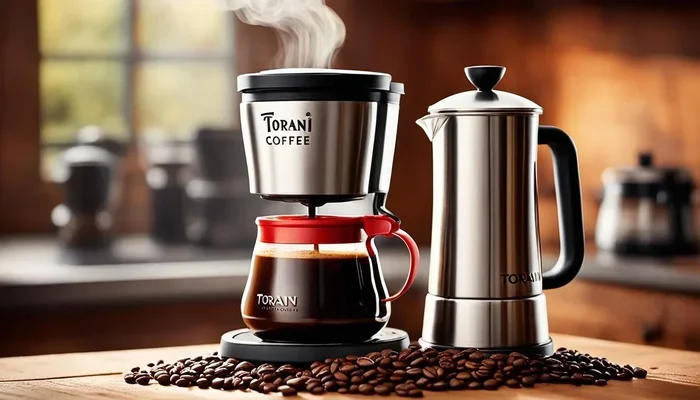
If you prefer convenience, a drip coffee maker gets the job done well. Most machines produce consistent results with minimal effort. Use medium ground coffee and fresh filtered water for the best outcome.
Drip machines heat water and distribute it evenly over the coffee grounds. The water passes through a paper filter and drips into your carafe. This method is fast and produces a clean, familiar cup of coffee that many people enjoy every morning.
Storing Your Fresh Natural Coffee
Proper storage makes a real difference in how long your coffee stays fresh. Roasted beans begin to lose flavor almost immediately after roasting. But with the right storage method, you can preserve their quality for up to two weeks.
Store roasted beans in an airtight container at room temperature. Avoid clear glass jars that let light in. Opaque containers with a tight seal work best. Keep the container away from your stove, oven, or any heat source.
Never store coffee beans in the refrigerator or freezer. The moisture and odors in these environments can ruin the flavor. Room temperature storage in a dark, cool pantry is the best approach for home-roasted natural coffee.
If you buy green beans in bulk, store them in a cool, dry place. Green beans can last for several months without losing quality. Once roasted, however, they are best consumed within 14 days for the richest flavor.
Common Mistakes To Avoid When Making Natural Coffee
Even with the best beans and equipment, small mistakes can hurt your final cup. Here are the most common pitfalls and how to avoid them.
- Over-roasting your beans: This is the number one mistake beginners make. Dark does not always mean better. Over-roasted beans taste bitter and burnt. Pull your beans off the heat at the right time for your preferred roast level.
- Using stale beans: Roasted beans lose their freshness quickly. Always buy green beans and roast small batches. Do not let roasted beans sit for weeks before grinding and brewing.
- Grinding too fine or too coarse: The wrong grind size leads to over-extraction or under-extraction. Match your grind size to your brewing method for the best results.
- Using the wrong water temperature: Water that is too hot will scorch your grounds and create bitterness. Water that is too cool will under-extract and produce weak, sour coffee. Aim for 195°F to 205°F.
- Skipping the bloom: When you pour water over coffee grounds, they release gas from the roasting process. Letting them bloom for 30 seconds before full brewing leads to a better extraction and more flavorful cup.
- Using tap water with chlorine: The quality of your water directly affects the taste of your coffee. Use filtered water for the cleanest, most accurate flavor profile.
Avoiding these mistakes will immediately improve your natural coffee. Even small adjustments can make a big difference. Pay attention to each step, and you will notice the quality of your cup improving with every batch.
Quick Tips For Perfect Natural Coffee Every Time
Here are some bonus tips to help you get the most out of your homemade natural coffee:
- Always weigh your coffee and water for consistency. A simple kitchen scale makes a huge difference.
- Use a 1:16 coffee-to-water ratio as your starting point. Adjust to taste from there.
- Clean your equipment after every use. Residual oils can go rancid and affect flavor.
- Experiment with different bean origins and roast levels. Keep notes so you can recreate your favorites.
- Let roasted beans degas for at least 12 hours before grinding. This improves extraction and flavor.
- If you are using an oven for roasting, make sure it is clean and preheated properly before you begin.
- Dried herbs like basil can be roasted alongside coffee beans to add subtle flavor notes, though this works best when you already know how to dry basil in oven at low temperatures.
Expert Insights On Natural Coffee
Professional roasters and baristas agree that freshness is the single most important factor in coffee quality. When you roast your own beans, you are getting coffee at peak freshness. No commercial coffee can match that level of freshness, no matter how premium the brand.
Many coffee experts recommend starting with a light roast when learning to roast at home. Light roasts preserve the most origin characteristics. They let you taste the true personality of each bean. As you gain experience, you can experiment with medium and dark roasts to discover your personal preferences.
The water you use also plays a critical role. Coffee is about 98% water. If your water tastes bad, your coffee will taste bad. Invest in a simple water filter and use it every time you brew. Your taste buds will thank you.
Remember that making natural coffee is a journey, not a destination. Every batch teaches you something new. You will develop your palate, refine your technique, and find your perfect cup over time. Enjoy the process and savor every step along the way.
Making natural coffee from scratch connects you to the craft in a meaningful way. It is more than just a morning routine. It is a creative, rewarding practice that puts you in control of something you enjoy every single day. Whether you are sipping a light Ethiopian roast or a bold dark Brazilian bean, the satisfaction of making it yourself is unmatched.
Start small, stay curious, and keep experimenting. With each cup you brew, you will grow more confident and more skilled. Before long, making natural coffee at home will feel like second nature. And your morning cup will taste better than anything you have ever bought from a store.
The beauty of this process is that it does not require perfection. Even imperfect batches produce enjoyable coffee. Every mistake is a learning opportunity. Every batch is a step forward. Embrace the journey and enjoy every sip of your homemade natural coffee.
Frequently Asked Questions
Can I use any green coffee beans to make natural coffee?
Yes, you can use any green coffee beans, but organic, high-quality beans produce the best results. Look for beans that are uniform in size and color. Buying from reputable specialty roasters or online suppliers ensures you get fresh, well-sourced green beans for your homemade natural coffee.
How long does it take to roast coffee beans at home?
Home roasting typically takes 10 to 20 minutes depending on the method and roast level you want. Oven roasting usually takes about 15 minutes, while skillet roasting takes a similar amount of time. Always listen for the cracking sounds and watch the color changes to know when your beans are done.
Do I need a special grinder for natural coffee?
A burr grinder is highly recommended for the most consistent results, but a hand grinder works just as well for beginners. Blade grinders chop unevenly and create a mix of fine and coarse particles. A burr or hand grinder gives you uniform grounds that brew more evenly and taste better.
Can I store roasted coffee beans in the freezer?
It is best to store roasted beans at room temperature in an airtight container. Freezing can introduce moisture and odors that degrade the flavor. Room temperature storage in a dark, cool pantry keeps your natural coffee fresh for up to two weeks.
What is the best water temperature for brewing natural coffee?
The ideal water temperature for brewing coffee is between 195°F and 205°F. Water that is too hot will over-extract and create bitterness, while water that is too cool will under-extract and produce a weak, sour cup. Using a simple kitchen thermometer helps you hit the sweet spot every time.
Is making natural coffee at home expensive?
Not at all. Green coffee beans are quite affordable, especially when bought in small quantities. A basic burr or hand grinder costs under $30, and most people already own a baking sheet or skillet for roasting. Once you have the basic setup, the cost per cup drops significantly compared to buying specialty coffee from cafes.
=== CONCLUSION ===
Making natural coffee from scratch at home is one of the most rewarding things you can do for your morning routine. You get complete control over every aspect of the process. From selecting raw green beans to the final brew, each step shapes the flavor of your cup. The result is coffee that is fresher, cleaner, and more delicious than anything you can buy pre-packaged.
The process is simpler than most people imagine. With just a few basic tools and some practice, you can roast, grind, and brew exceptional natural coffee in your own kitchen. Start with a small batch, experiment with different methods, and trust your taste buds to guide you. Every cup you make is a step toward mastering this timeless craft.
Remember that the journey matters as much as the destination. Enjoy the aroma of roasting beans, the ritual of grinding, and the quiet satisfaction of pouring your first cup. Natural coffee made from scratch is more than a beverage. It is a daily act of care for yourself and a celebration of pure, authentic flavor. So go ahead, give it a try, and discover just how good coffee can be when you make it yourself.