How To Toast A Subway Sandwich In The Oven Like A Pro
Want to recreate that iconic Subway oven-toasted sandwich at home? You can! This guide shows you exactly how to toast a Subway sandwich in the oven using simple steps and the right temperature settings. You will learn pro techniques for perfectly crispy bread, melted cheese, and hot fillings every time.
There is something magical about a warm, crispy, perfectly toasted sandwich. The kind where the bread has that golden crunch on the outside but stays soft on the inside. The cheese is melted right into every layer. The fillings are hot and full of flavor. Subway has mastered the art of the oven-toasted sub for decades. But did you know you can make one right in your own kitchen?
Learning how to toast a Subway sandwich in the oven is easier than you might think. You do not need a fancy sandwich toaster or a Subway franchise next door. All you need is a regular home oven, some aluminum foil, and your favorite ingredients. In this guide, we walk you through every step. You will get pro-level results that rival the real thing.
Whether you are a Subway fan who misses that toasty flavor or someone who just loves a good hot sandwich, this article is for you. We cover temperatures, timing, ingredient tips, and common mistakes to avoid. By the end, you will be making oven-toasted subs like a seasoned pro. Let us dive in.
Key Takeaways
- Right Temperature Matters: Setting your oven to 375°F gives you the perfect toast without burning the bread.
- Use Foil or a Baking Sheet: Both methods work great, but foil helps trap heat for a more Subway-like finish.
- Timing Is Key: 5 to 8 minutes is the sweet spot for a crispy yet soft toasted sub.
- Add Cheese at the Right Time: Placing cheese on top halfway through ensures it melts perfectly.
- Customize Your Ingredients: The beauty of a home Subway-style sandwich is that you control every layer.
- Broiler Trick Works Wonders: A quick broiler pass at the end adds that signature golden finish.
- Rest Before Eating: Letting the sandwich sit for one minute helps the heat distribute evenly.
📑 Table of Contents
- Why Toast A Sandwich In The Oven?
- How To Toast A Subway Sandwich In The Oven: Step By Step
- Oven Temperature And Timing Guide
- The Broiler Trick For Subway-Level Results
- Best Breads For Oven-Toasted Sandwiches
- Common Mistakes To Avoid
- Quick Tips For The Perfect Oven-Toasted Sub
- Expert Insights: How Subway Actually Toasts Their Sandwiches
- How To Customize Your Subway-Style Oven Sandwich
- How To Store And Reheat Leftover Toasted Subs
- Conclusion
Why Toast A Sandwich In The Oven?
You might be wondering why bother using an oven instead of a toaster or microwave. Fair question. But the truth is, an oven gives you something no other appliance can match when it comes to a Subway-style sandwich.
Even Heat Distribution
A microwave heats food unevenly. It makes bread rubbery and cheese weirdly chewy. A toaster only toasts the outside of bread slices. An oven, on the other hand, surrounds the sandwich with gentle, consistent heat. This means every part of your sandwich gets warmed through evenly.
That Perfect Subway Crunch
The signature Subway toasted sub has a specific texture. The bread is crispy and lightly browned on the outside. But it is still pillowy soft on the inside. The cheese is melted and gooey. The fillings are heated all the way through. An oven replicates this texture better than any other kitchen tool.
Versatility With Ingredients
When you toast a sandwich in the oven, you are not limited. You can add meats, veggies, sauces, and cheeses that would not work in a toaster. A full foot-long sub? No problem. Loaded with peppers, onions, and melted provolone? Absolutely. The oven gives you total freedom to build your dream sandwich.
How To Toast A Subway Sandwich In The Oven: Step By Step
Here is the core of this guide. Follow these steps carefully and you will nail the Subway oven toast every single time. This process works for any sub sandwich, whether you are using store-bought bread or a pre-made sub from the grocery store.
Step 1: Gather Your Ingredients
Before you turn on the oven, have everything ready. Here is what you need:
- Sub roll or bread: A hoagie roll works best. Italian bread is the closest match to Subway-style bread.
- Meat and cheese: Turkey, ham, roast beef, or pepperoni. Provolone, American, or mozzarella cheese.
- Veggies: Lettuce, tomato, onion, pickles, peppers, and olives.
- Sauces: Mustard, mayo, Italian dressing, or Subway-style sweet onion sauce.
- Optional extras: Bacon, avocado, jalapenos, or banana peppers.
Step 2: Preheat Your Oven
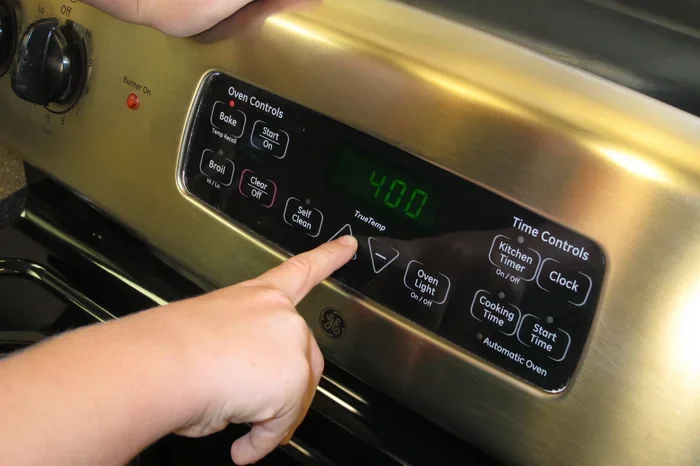
Set your oven to 375°F. This is the magic temperature for a Subway-style toast. It is hot enough to crisp the bread and melt the cheese. But it is not so hot that it burns the outside before the inside warms up.
If you like a lighter toast, go with 350°F. If you want a deeper golden crunch, try 400°F. But 375°F is the sweet spot for most people.
Step 3: Build Your Sandwich
Assemble your sandwich on a piece of foil or parchment paper. Layer the meats and cheese first. Then add the veggies. Keep the sauces on the side for now. We will get to those in a moment.
Pro tip: Place the cheese on top of the meats. The cheese acts as a glue that holds everything together. It also melts directly onto the meat, creating that rich Subway flavor.
Step 4: Wrap The Sandwich
Fold the foil around the sandwich loosely. You want to create a little pouch. This traps the heat and helps the bread toast evenly. Do not wrap it too tightly. You need some air circulation for that crispy texture.
If you prefer not to use foil, a baking sheet lined with parchment paper works just as well. Just place the sandwich directly on the sheet.
Step 5: Toast In The Oven
Place the wrapped sandwich on the middle rack of your oven. Set a timer for 5 minutes. After 5 minutes, open the oven and check the progress. The cheese should be starting to melt. The bread should look lightly golden.
If you want more toast, close the oven and add 2 to 3 more minutes. Most Subway-style subs need about 7 to 8 minutes total. But every oven is different, so keep an eye on it.
Step 6: Add Sauces And Serve
Once the sandwich is toasted, take it out of the oven. Open the foil carefully. The steam inside will be hot, so be gentle.
Now add your sauces. Mustard, mayo, or Italian dressing go directly on the bread. This prevents the fillings from getting soggy. Add any cold toppings like lettuce and tomato at this stage too.
Let the sandwich rest for about one minute. This lets the heat settle and the cheese set slightly. Then slice it in half and enjoy.
Oven Temperature And Timing Guide
Not all sandwiches are the same. Thicker subs need more time. Thinner wraps need less. Here is a quick reference guide to help you get it right every time.
| Sandwich Type | Oven Temp | Time | Result |
|---|---|---|---|
| Thin Sub (6 inch) | 375°F | 4-5 minutes | Light toast, warm fillings |
| Standard Sub (12 inch) | 375°F | 7-8 minutes | Golden toast, melted cheese |
| Thick Loaded Sub | 375°F | 8-10 minutes | Deep toast, fully heated |
| Vegetarian Sub | 350°F | 6-7 minutes | Gentle toast, crisp veggies |
| Meat-Heavy Sub | 400°F | 6-7 minutes | Extra crispy, bubbly cheese |
These times assume you are using a standard home oven. If you have a convection oven, reduce the temperature by 25°F and check a minute or two earlier. Convection ovens circulate hot air, so they toast faster.
The Broiler Trick For Subway-Level Results
Here is a pro secret that Subway workers use. After you toast your sandwich in the oven at 375°F for 5 to 7 minutes, switch the oven to broil. Move the sandwich to the top rack. Let it broil for 1 to 2 minutes.
This gives the top of the bread an extra golden, slightly charred finish. It mimics the intense heat of a Subway oven perfectly. The cheese gets bubbly and slightly browned on top. The result is absolutely incredible.
But be careful. The broiler works fast. Do not walk away from the oven during this step. You do not want to end up with a burnt sandwich. Watch it like a hawk and pull it out the moment it looks right.
Best Breads For Oven-Toasted Sandwiches
The bread makes or breaks your Subway-style toast. Not all breads behave the same way in an oven. Here are the best options to use.
Italian Hoagie Roll
This is the closest thing to Subway bread. It has a crispy outer crust and a soft, airy inside. It toasts beautifully in the oven without getting too hard. Look for rolls that are slightly longer than your sandwich filling. This gives you room to wrap and toast without spilling.
French Baguette
A baguette makes an excellent toasted sub. It has a natural crust that becomes extra crispy in the oven. The inside stays light and fluffy. Slice the baguette lengthwise and fill it like a sub. The result is rustic and delicious.
Sourdough Bread
Sourdough adds a tangy flavor that pairs well with meats and cheeses. It toasts up nicely and holds its structure. A sourdough sub has a slightly different taste than a Subway classic, but it is absolutely worth trying.
Whole Wheat Or Multigrain
If you want a healthier option, whole wheat bread works fine in the oven. It may toast a bit faster than white bread, so watch it closely. The nutty flavor of whole wheat adds a nice depth to your sandwich.
Avoid These Breads
Not all breads are oven-friendly. Avoid thin sandwich bread. It will dry out and crumble. Also skip very soft hamburger buns. They will fall apart under the heat and moisture of the fillings. Stick with hearty, crusty rolls and breads for the best results.
Common Mistakes To Avoid
Even with the best recipe, mistakes can happen. Here are the most common errors people make when toasting a Subway sandwich in the oven. Avoid these and your results will improve dramatically.
Using The Wrong Temperature
Too hot and the bread burns before the cheese melts. Too low and the sandwich stays cold in the middle. Always start at 375°F. Adjust slightly based on your oven and the thickness of your sandwich.
Overloading The Sandwich
It is tempting to pile on every ingredient you have. But an overstuffed sandwich does not toast well. The heat cannot reach the center. The bread gets soggy from the vegetables releasing moisture. Keep your fillings moderate for the best toast.
Adding Sauces Too Early
Never add sauces before putting the sandwich in the oven. The heat will cause them to leak out and make the bread wet. Always add sauces after toasting. This keeps the bread crispy and the flavors fresh.
Skipping The Wrap
Some people skip the foil or parchment paper step. This is a mistake. Without the wrap, the toppings can fall out and the bread toasts unevenly. The foil pouch method is simple and makes a huge difference in the final result.
Cutting The Sandwich Immediately
We know it is tempting. That warm, cheesy sandwich is calling your name. But cutting it right away lets all the steam escape. The cheese gets runny and the bread loses its crispness. Wait one minute. Trust the process.
Quick Tips For The Perfect Oven-Toasted Sub
Want to take your Subway-style sandwich to the next level? Here are some quick tips that make a big difference.
- Butter the outside of the bread before toasting for an extra crispy, golden finish.
- Use a meat thermometer to make sure fillings reach 165°F for food safety.
- Toast the bread alone for 2 minutes before adding fillings for an extra crunchy base.
- Layer ingredients strategically. Put wet ingredients like tomatoes in the middle to prevent soggy bread.
- Preheat your foil pouch by placing it in the oven for one minute before adding the sandwich.
- Experiment with seasoning. A light sprinkle of garlic powder or Italian herbs on the bread before toasting adds amazing flavor.
- Make multiple sandwiches at once. The oven can handle two or three subs at the same time. Just space them out on the baking sheet.
Expert Insights: How Subway Actually Toasts Their Sandwiches
Subway uses a specialized oven called a Subway oven or a toast oven. These ovens blow superheated air at around 400°F directly onto the wrapped sandwich. The process takes about 10 to 15 seconds per sandwich. The high heat and air circulation create that signature toasted texture.
At home, you cannot replicate that exact speed. But you can get remarkably close. The key is understanding the principles behind Subway’s method. High heat. Enclosed environment. Even air circulation. When you wrap your sandwich in foil and toast it at 375°F, you are essentially recreating the same conditions on a smaller scale.
The broiler trick mentioned earlier is the closest you can get to that blast of intense Subway heat. It gives you that final burst of crispiness that makes the sandwich taste authentic.
How To Customize Your Subway-Style Oven Sandwich
One of the best things about making Subway-style sandwiches at home is the customization. You control every single ingredient. Here are some popular Subway-inspired combinations to try.
The Classic Italian
Salami, capicola, ham, and provolone cheese. Add lettuce, tomato, onion, and Italian dressing. This is Subway’s most popular sub for a reason. The combination of meats and tangy dressing is unbeatable.
The Turkey Breast
Sliced turkey breast, American cheese, lettuce, tomato, and mayo. This is Subway’s lightest and cleanest option. It toasts up beautifully in the oven because the lean turkey does not release excess grease.
The Meatball Marinara
Spicy meatballs, marinara sauce, and melted mozzarella. This is a hearty, flavor-packed sub. Add the marinara sauce after toasting to keep the bread from getting too wet.
The Veggie Delight
Avocados, lettuce, tomatoes, onions, peppers, and Italian dressing on a bed of provolone cheese. This vegetarian option is fresh, crunchy, and satisfying. It toasts well because the vegetables hold their shape in the oven.
How To Store And Reheat Leftover Toasted Subs
Got leftovers? A toasted sub can be reheated, but you need to be careful. Never reheat a toasted sub in the microwave. It will turn the bread rubbery and ruin the texture.
Instead, wrap the leftover sub in foil and place it in a 350°F oven for 3 to 4 minutes. This restores the crispness and warms the fillings evenly. Add any fresh ingredients like lettuce and tomato after reheating. They taste best when they are not heated a second time.
Conclusion
Now you know exactly how to toast a Subway sandwich in the oven like a pro. From preheating to the final broiler pass, every step matters. The 375°F temperature, the foil wrapping method, the 7 to 8 minute timing, and the sauce-after-toasting rule all come together to create something truly special.
You do not need to visit a Subway restaurant to enjoy that perfect toasted sub. With a little practice and the right technique, you can make Subway-quality sandwiches in your own kitchen. The best part is you get to customize every ingredient to your liking.
So grab your hoagie roll, pile on your favorite fillings, and give it a try. Once you taste a homemade oven-toasted sub, you will never go back to cold sandwiches again. Happy toasting!
Frequently Asked Questions
Can I use any type of bread to toast a Subway sandwich in the oven?
Italian hoagie rolls work best and give you the closest result to Subway. French baguettes and sourdough are also great options. Avoid thin sandwich bread or soft hamburger buns because they do not hold up well in the oven.
How long should I toast a Subway sandwich in the oven?
A standard 12-inch sub takes about 7 to 8 minutes at 375°F. Thinner subs need 4 to 5 minutes. Thicker loaded subs may need 8 to 10 minutes. Always check the sandwich at the 5-minute mark to see how it is progressing.
Can I add the sauce before putting the sandwich in the oven?
No. Always add sauces after toasting. The heat causes sauces to leak and make the bread soggy. Adding sauce after keeps the bread crispy and the flavors fresh.
Is aluminum foil necessary for toasting a sandwich in the oven?
Foil is not strictly necessary, but it helps a lot. It traps heat and keeps the sandwich together. If you do not use foil, place the sandwich on a parchment-lined baking sheet instead. You may need to toast it a minute or two longer.
Can I toast a Subway sandwich in the oven without cheese?
Absolutely. Cheese is optional. Without cheese, reduce the toasting time by one minute since cheese takes longer to melt. The bread will still toast perfectly and the fillings will heat through evenly.
What is the difference between using a regular oven and a convection oven for toasting?
A convection oven circulates hot air more efficiently, so it toasts faster. Reduce the temperature by 25°F and check the sandwich a minute or two earlier. The results are similar, but convection ovens give a slightly more even toast.