Simple Steps On How To Set Black Decker Coffee Maker
Setting up your Black Decker coffee maker is easier than you think. This guide walks you through every step, from unboxing to brewing your first perfect cup. You will learn how to set the clock, program brew times, and choose the right settings for your taste.
There is nothing quite like waking up to the smell of fresh coffee brewing in the kitchen. A Black Decker coffee maker makes that moment possible every single morning. But if you just unboxed your new machine, you might be wondering where to start. Setting up a coffee maker for the first time can feel a little confusing. There are buttons, settings, and parts that all seem to need attention.
This guide will walk you through the entire process of how to set Black Decker coffee maker step by step. We keep things simple and easy to follow. You do not need any special skills or tools. By the end, you will feel confident and ready to brew your first cup. Let us get started.
Key Takeaways
- Unboxing and Setup: Learn the proper way to unpack and prepare your Black Decker coffee maker for first use.
- Clock and Timer Settings: Master the clock and programmable timer to have fresh coffee ready when you wake up.
- Brew Strength and Size: Understand how to adjust brew strength and cup size for the perfect cup every time.
- Filter and Water Tips: Get the best results with the right filter placement and water reservoir management.
- Maintenance and Cleaning: Keep your coffee maker running smoothly with simple regular cleaning steps.
- Common Mistakes to Avoid: Skip the errors that new users often make when setting up their machine.
📑 Table of Contents
- Unboxing and Preparing Your Black Decker Coffee Maker
- Setting the Clock on Your Black Decker Coffee Maker
- Programming the Auto Brew Timer
- Choosing the Right Brew Settings
- Proper Filter and Water Setup
- Running Your First Brew Cycle
- Cleaning and Maintenance Tips
- Common Mistakes to Avoid When Setting Up Your Coffee Maker
- Expert Tips for the Best Coffee Experience
- Troubleshooting Common Setup Issues
- Final Thoughts
Unboxing and Preparing Your Black Decker Coffee Maker
Before you do anything else, take a moment to look at everything that came in the box. Most Black Decker coffee makers include the main unit, a glass or thermal carafe, a filter basket, a reusable filter (or paper filter), a measuring spoon, and a user manual. Lay everything out on a clean, dry surface.
Check All Parts Are Present
Go through the checklist in the manual. Make sure nothing is missing or damaged. If something looks broken, contact Black Decker customer service right away. It is much easier to sort out problems before you start setting things up.
Wash All Removable Parts
Even though new coffee makers look clean, it is smart to wash all removable parts with warm water and mild dish soap. This removes any dust or manufacturing residue. Wash the carafe, the filter basket, and the lid. Dry everything thoroughly before moving on.
Place the Coffee Maker on a Stable Surface
Set your Black Decker coffee maker on a flat, heat-resistant surface near an outlet. Make sure there is enough space around the machine for air to flow. Keep it away from the edge of the counter where it could be knocked over. A stable setup means safer brewing and better performance.
Just like when you use a brand new oven for the first time, taking a few extra minutes to prepare your new appliance pays off in the long run.
Setting the Clock on Your Black Decker Coffee Maker
The clock is the heart of your programmable coffee maker. Without the correct time, the auto-brew feature will not work properly. Setting the clock is one of the most important steps in the whole setup process.
Finding the Clock Button
Look for the clock button on the control panel. On most Black Decker models, it is labeled “Clock” or has a clock icon. Press it once to enter the clock-setting mode. You will usually see the hours blinking on the display.
Setting the Hours
Use the hour button to set the correct time. Press and hold it or press it repeatedly until the display shows the right hour. Most Black Decker coffee makers use a 12-hour format with AM and PM indicators. Make sure you get this right or your morning brew will come at the wrong time.
Setting the Minutes
Once the hours are set, press the clock button again to move to the minutes. Use the minute button to adjust. When the minutes are correct, press the clock button one more time to save your settings. The display should stop blinking and show the current time.
Quick Tips for Clock Setting
- Always set the clock before programming a brew time.
- If the display goes blank, the clock may need to be reset after a power outage.
- Some models beep when the clock is successfully set. Listen for that confirmation sound.
Programming the Auto Brew Timer
The auto brew timer is the feature that makes Black Decker coffee makers so popular. It lets you wake up to fresh coffee without having to stand at the machine. Programming this timer is simple once you understand the basic steps.
How to Set the Brew Time
First, make sure the clock is set correctly. Then, find the program or auto button on the control panel. Press it to enter programming mode. The display will show the current time, and you can set the future brew time using the hour and minute buttons.
Adding Coffee and Water
Before you confirm the program, add your coffee grounds and water to the machine. The coffee maker will brew at the set time, so make sure everything is ready. Use the recommended ratio of about two tablespoons of coffee grounds per six ounces of water.
Confirming the Program
Once you have set the desired brew time, press the program button again to save it. Most models will show a confirmation light or beep. Your Black Decker coffee maker is now set to brew automatically at the time you chose.
This is similar to how you might set a timer to warm food in the oven ahead of time. The idea is the same: prepare now, enjoy later.
Choosing the Right Brew Settings
Black Decker coffee makers come with several brew settings that let you customize your coffee. Understanding these options helps you get the best flavor every time.
Brew Strength Control
Many Black Decker models have a brew strength selector, usually marked as regular or bold. The regular setting uses a standard brew cycle. The bold setting slows down the water flow, allowing more flavor to extract from the grounds. If you like strong coffee, choose the bold option.
Cup Size Options
Some models let you choose how many cups you want to brew. This is helpful if you are only making one or two cups instead of a full pot. Selecting the right cup size ensures the right amount of water passes through the grounds, preventing weak or overly strong coffee.
Brew Pause Feature
The brew pause feature lets you remove the carafe mid-brew to pour a cup. Most Black Decker coffee makers have a pause-and-serve function. Simply lift the carafe slightly, and the brewing stops. Replace the carafe, and brewing resumes automatically.
Hot Water Dispense
Some Black Decker models include a hot water dispense feature separate from the coffee brewing. This is handy for making tea, hot chocolate, or instant oatmeal. Check your model to see if this feature is available.
Proper Filter and Water Setup
Getting the filter and water right makes a huge difference in the taste of your coffee. Small mistakes here can lead to big problems in flavor.
Choosing the Right Filter
Black Decker coffee makers work with both paper filters and reusable mesh filters. Paper filters are disposable and produce a cleaner cup. Reusable filters are more eco-friendly and save money over time. Choose whichever fits your lifestyle and preference.
Placing the Filter Correctly
Open the filter basket and place your filter inside. If using a paper filter, fold the seams flat against the basket walls. If using a reusable filter, make sure it sits securely in the basket. Improper placement can cause coffee grounds to leak into your cup.
Filling the Water Reservoir
Open the lid on top of the coffee maker and fill the water reservoir. Use cold, filtered water for the best taste. Do not overfill past the maximum line. The water level should match the number of cups you plan to brew.
Measuring Coffee Grounds
Use the measuring scoop that came with your coffee maker. A general rule is one to two scoops per cup. Adjust based on your taste preferences. Too much coffee can make the brew bitter, while too little makes it weak.
Running Your First Brew Cycle
Now that everything is set up, it is time to brew your first cup. This is the exciting part where all your preparation comes together.
Steps for the First Brew
- Make sure the carafe is seated properly on the warming plate.
- Fill the water reservoir with cold water.
- Add coffee grounds to the filter basket.
- Close the lid and make sure the carafe lid is on.
- Press the brew button.
- Wait for the brewing cycle to complete.
- Pour and enjoy your first cup of coffee.
Your first brew might take a little longer than usual. This is normal for a new coffee maker. The machine is flushing out any remaining dust or residue from the manufacturing process.
What to Expect
You may notice a slight plastic or metallic smell during the first few brews. This is normal and should go away after two or three cycles. Run a full cycle with just water (no coffee grounds) to help clean out any remaining residue.
Cleaning and Maintenance Tips
Keeping your Black Decker coffee maker clean ensures great-tasting coffee for years. Regular maintenance also prevents mineral buildup and mold growth.
Daily Cleaning Routine
After each use, throw away the used coffee grounds and rinse the filter basket. Wash the carafe with warm soapy water and dry it thoroughly. Wipe down the outside of the machine with a damp cloth.
Monthly Descaling
Mineral deposits from water can build up inside your coffee maker over time. Descale the machine once a month using a vinegar and water solution. Fill the reservoir with equal parts white vinegar and water, run a brew cycle, then run two cycles with plain water to rinse.
Replacing Filters
If you use a reusable mesh filter, replace it every three to six months. Paper filters should be replaced with each brew. A worn filter can affect the taste and flow of your coffee.
Just as you would clean the bottom tray of a toaster oven to keep it working well, regular cleaning keeps your coffee maker in top shape.
Common Mistakes to Avoid When Setting Up Your Coffee Maker
Even with simple instructions, new coffee maker owners sometimes make mistakes. Here are the most common ones to watch out for.
- Skipping the first rinse cycle: Always run at least one cycle with just water before brewing real coffee. This removes any dust or residue from inside the machine.
- Using the wrong grind size: Too fine a grind can clog the filter and cause overflow. Use a medium grind for the best results with drip coffee makers.
- Overfilling the water reservoir: Never fill past the maximum line. Overflowing water can damage the machine and create a mess.
- Forgetting to set the clock: If you want to use the auto brew feature, the clock must be set correctly. Otherwise, your coffee will brew at the wrong time.
- Leaving the carafe off during brewing: Some models will not brew if the carafe is not properly seated. Always make sure it clicks into place.
- Using hot water in the reservoir: Always use cold water. Hot water can damage the internal components and affect the brewing temperature.
Expert Tips for the Best Coffee Experience
Want to take your coffee game to the next level? Here are some expert tips that make a real difference.
- Store your coffee beans properly: Keep beans in an airtight container away from light and heat. Fresh beans make the best coffee.
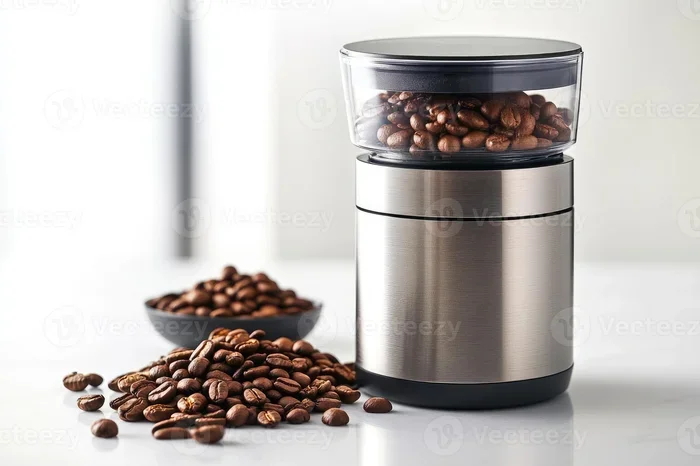
- Grind your beans just before brewing: Pre-ground coffee loses flavor quickly. If you can, grind beans right before you brew.
- Use filtered water: The taste of your coffee depends heavily on the water. Filtered water removes chlorine and other impurities that can affect flavor.
- Clean the warming plate regularly: Coffee residue can build up on the warming plate and affect its performance. Wipe it down after each use.
- Descale more often if you have hard water: Hard water causes faster mineral buildup. If you live in an area with hard water, descale every two weeks instead of monthly.
If you also enjoy reheating leftovers, you might find it helpful to know how to warm mashed potatoes in the oven or other foods while you wait for your morning brew.
Troubleshooting Common Setup Issues
Sometimes things do not go as planned during setup. Here are solutions to the most common problems.
The Coffee Maker Will Not Turn On
Check that the machine is properly plugged into a working outlet. Make sure the carafe is seated on the warming plate. Some models have a safety feature that prevents brewing if the carafe is not in place.
The Clock Resets After a Power Outage
This is normal for most programmable coffee makers. Simply reset the clock following the steps in the setup section above. You may also need to reprogram your brew timer.
Coffee Tastes Weak or Bitter
Weak coffee usually means too little ground coffee or too much water. Bitter coffee often results from too much ground coffee or a grind that is too fine. Adjust your ratios and try again.
Water Leaks from the Machine
Check that the water reservoir is seated correctly and not overfilled. Also make sure the filter basket is properly inserted. A misaligned carafe can also cause water to spill during brewing.
Final Thoughts
Setting up your Black Decker coffee maker does not have to be complicated. With the right steps and a little patience, you will be enjoying fresh coffee in no time. Start by unboxing and cleaning all parts, then set the clock, program your brew timer, and choose your preferred settings.
Remember that regular cleaning and proper maintenance keep your machine running smoothly for years. Avoid the common mistakes outlined in this guide, and follow the expert tips to get the best possible flavor from every cup.
Once you master the basics of how to set Black Decker coffee maker, you can experiment with different settings and find your perfect brew. Whether you like it strong and bold or mild and smooth, your Black Decker machine is designed to deliver. Now go ahead, press that brew button, and enjoy the perfect morning cup of coffee.
Frequently Asked Questions
How long does it take to set up a Black Decker coffee maker?
Setting up a new Black Decker coffee maker takes about 15 to 20 minutes. This includes washing all parts, placing the machine, filling the water reservoir, and setting the clock. The first brew cycle may take a few extra minutes as the machine flushes out any residue.
Can I use my Black Decker coffee maker without a filter?
Yes, you can use a reusable mesh filter instead of a paper filter. Just make sure it fits securely in the filter basket. Using no filter at all is not recommended, as grounds will end up in your coffee cup.
Why does my Black Decker coffee maker keep resetting the clock?
If the clock keeps resetting, it may be due to a power outage or a loose connection. Try plugging the machine into a different outlet. If the problem persists, check the user manual for reset instructions specific to your model.
How often should I descale my Black Decker coffee maker?
Descale your coffee maker at least once a month. If you live in an area with hard water, you may need to descale every two weeks. Regular descaling prevents mineral buildup and keeps your coffee tasting fresh.
What type of coffee grind works best with a Black Decker drip coffee maker?
A medium grind works best for drip coffee makers. It allows water to flow through the grounds at the right speed, extracting the optimal amount of flavor. Avoid using very fine or very coarse grinds, as they can cause clogging or weak coffee.
Can I program my Black Decker coffee maker the night before?
Yes, you can program the auto brew timer the night before. Make sure the clock is set correctly, add water and coffee grounds, and set the desired brew time. Your coffee maker will automatically start brewing at the programmed time.
=== CONCLUSION ===
Learning how to set Black Decker coffee maker is a simple process that anyone can master. From unboxing and cleaning to setting the clock, programming the brew timer, and choosing your favorite settings, each step brings you closer to the perfect morning routine. Take your time with the setup, follow the tips in this guide, and you will enjoy great-tasting coffee every single day.
Keep your machine clean, use fresh grounds and filtered water, and do not be afraid to experiment with the different settings. Your Black Decker coffee maker is built to last and designed to make your life easier. Now that you know how to set it up properly, you are ready to start brewing. Happy coffee making!