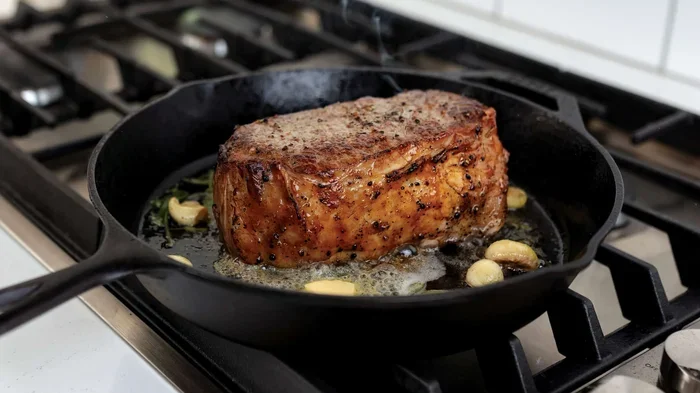
How To Make Chicken Quarters In The Oven Perfectly
Making chicken quarters in the oven is one of the easiest and most satisfying meals you can prepare at home. This guide walks you through every step from choosing the right chicken to getting that perfect golden-brown finish. You will learn the ideal oven temperature, seasoning tricks, and baking times for crispy skin and juicy meat. Whether you are a beginner or a seasoned cook, this method guarantees delicious results every single time.
There is something truly special about chicken quarters in the oven. The skin gets crispy, the meat stays tender, and your kitchen smells incredible while it cooks. Unlike frying, baking lets you enjoy all that flavor without a lot of extra grease or fuss.
Bone-in chicken quarters are one of the most affordable and versatile cuts you can buy. They are perfect for weeknight dinners, Sunday roasts, or meal prep for the whole week ahead. And the best part? You do not need any fancy equipment to make them shine.
This guide covers everything you need to know about making chicken quarters in the oven. From picking the right pieces to seasoning them just right, you will find all the details here. By the end, you will feel confident enough to make this dish again and again.
Key Takeaways
- Bone-in chicken quarters cook best at 425°F for crispy skin and juicy meat.
- Proper seasoning with herbs, spices, and oil makes a huge flavor difference.
- Resting the chicken after baking keeps the juices locked in.
- Internal temperature of 165°F is the key to safe and perfectly cooked chicken.
- Simple prep steps like patting dry and using a wire rack help achieve even cooking.
- Meal prep friendly — this recipe stores well and reheats beautifully.
- Pair with roasted vegetables for a complete and balanced dinner.
📑 Table of Contents
- Why Chicken Quarters Are Perfect for Oven Baking
- Choosing the Right Chicken Quarters
- Essential Equipment and Prep Work
- The Best Seasoning for Chicken Quarters
- Perfect Oven Temperature and Baking Time
- Pro Tips for the Best Results
- Serving Suggestions and Side Dishes
- Common Mistakes to Avoid
- Frequently Asked Questions
- Final Thoughts
Why Chicken Quarters Are Perfect for Oven Baking
Chicken quarters are a cut above the rest when it comes to oven baking. They include both the thigh and the drumstick, which means more dark meat and more flavor. Dark meat is naturally juicier than white meat, so it holds up beautifully in a hot oven.
Unlike chicken breasts that can dry out quickly, bone-in quarters have a layer of fat that keeps them moist throughout the cooking process. The bone also adds extra flavor to the meat as it bakes. This is why so many home cooks swear by this cut for simple, delicious meals.
Bone-In vs. Boneless: What Works Best
When you are making chicken quarters in the oven, bone-in pieces are the clear winner. The bone acts as a natural insulator, which means the meat cooks more evenly. It also adds richness to the flavor that you simply cannot get from boneless cuts.
Boneless chicken thighs can work in a pinch, but they tend to cook faster and can become dry if you are not careful. If you go boneless, keep a close eye on the internal temperature. For the best results, stick with bone-in quarters every time.
Choosing the Right Chicken Quarters
Not all chicken quarters are created equal. The quality of your chicken makes a big difference in the final result. Here is what to look for when you are shopping.
Fresh vs. Frozen
Fresh chicken quarters are always ideal. They have better texture and more natural flavor. However, frozen quarters work just fine too, as long as you thaw them properly before cooking. Never cook chicken quarters straight from frozen because they will cook unevenly.
To thaw frozen chicken safely, place it in the refrigerator the night before you plan to cook. This slow thaw keeps the meat at a safe temperature and preserves its quality. You can also thaw chicken in cold water if you are short on time.
What to Look for at the Store
When buying chicken quarters, look for pieces that have a pinkish color and firm texture. Avoid any that look gray or have a strong odor. The skin should be smooth and intact. If you are buying from a butcher, ask them to show you the freshest batch available.
Organic and free-range chicken quarters often have a richer flavor, but they come at a higher price. Regular store-bought quarters work just as well for oven baking. The seasoning and cooking method matter far more than the label on the package.
Essential Equipment and Prep Work
Making chicken quarters in the oven does not require a lot of tools. A few basic items will set you up for success every time.
What You Will Need
- A sturdy baking sheet or roasting pan
- A wire rack (optional but highly recommended)
- Parchment paper or aluminum foil for easy cleanup
- A meat thermometer for checking doneness
- A sharp knife and cutting board for prep
- A mixing bowl for your seasoning blend
The Importance of Patting Dry
One of the most important steps in getting crispy skin is patting the chicken quarters completely dry with paper towels. Moisture on the surface is the enemy of crispy skin. The drier the surface, the crispier the result.
Take each piece and press it firmly with paper towels on all sides. Do this right before you season the chicken. If you pat it too early, the moisture will return, and you will be back to square one.
The Best Seasoning for Chicken Quarters
Seasoning is where you can really make chicken quarters in the oven your own. A simple blend of salt, pepper, garlic, and herbs creates a flavor profile that everyone loves. But you can get creative too.
A Simple All-Purpose Seasoning Blend
Here is a basic seasoning mix that works beautifully on oven-baked chicken quarters:
- 1 teaspoon salt
- ½ teaspoon black pepper
- 1 teaspoon garlic powder
- 1 teaspoon paprika
- ½ teaspoon onion powder
- ½ teaspoon dried thyme or oregano
- 1 tablespoon olive oil
Mix all the dry ingredients together and then drizzle in the olive oil. Rub the mixture all over each chicken quarter, making sure to get under the skin as well. This extra step helps the seasoning penetrate deeper into the meat.
Flavor Variations You Will Love
Once you master the basic recipe, you can experiment with different flavors. Here are some popular variations for chicken quarters in the oven:
- Lemon Herb: Add lemon zest and extra rosemary for a fresh, bright taste.
- Spicy Southwest: Use chili powder, cumin, and a pinch of cayenne pepper.
- Asian-Inspired: Mix soy sauce, ginger, and sesame oil into your marinade.
- Mediterranean: Add oregano, basil, and a drizzle of balsamic vinegar.
Perfect Oven Temperature and Baking Time
Getting the oven temperature right is the key to perfectly cooked chicken quarters in the oven. Too low and the skin will not crisp up. Too high and the outside will burn before the inside is done.
Recommended Temperature: 425°F
425°F is the sweet spot for baking chicken quarters. This high temperature helps render the fat under the skin and creates that satisfying crunch. It also cooks the meat through without drying it out.
Preheat your oven to 425°F before you put the chicken in. This ensures the oven is fully hot when the chicken goes in, which leads to more even cooking and better browning.
How Long to Bake Chicken Quarters
At 425°F, bone-in chicken quarters typically need about 35 to 45 minutes. The exact time depends on the size of the pieces and your oven. Here is a general guide:
- Small quarters: 30 to 35 minutes
- Medium quarters: 35 to 40 minutes
- Large quarters: 40 to 45 minutes
The most reliable way to check doneness is with a meat thermometer. Insert it into the thickest part of the thigh, making sure it does not touch the bone. The internal temperature should read 165°F for safe and perfectly cooked chicken.
Using a Wire Rack for Even Crisping
Placing your chicken quarters on a wire rack set over a baking sheet is a game-changer. The rack allows hot air to circulate around the entire piece of chicken, which means the skin gets crispy on all sides. Without a rack, the bottom side sits in its own juices and can become soggy.
If you do not have a wire rack, you can flip the quarters halfway through cooking. This helps the skin brown evenly on both sides. But a wire rack really is the best tool for the job.
Pro Tips for the Best Results
Even a simple recipe can be elevated with a few pro tricks. Here are the tips that separate good chicken quarters in the oven from absolutely amazing ones.
Let the Chicken Come to Room Temperature
Take your seasoned chicken quarters out of the refrigerator about 20 to 30 minutes before baking. Letting them sit at room temperature helps them cook more evenly. Cold chicken going into a hot oven can lead to uneven cooking, with the outside done before the inside is ready.
Do Not Crowd the Pan
Give each chicken quarter enough space on the baking sheet. If you crowd them too close together, the steam gets trapped and the skin will not crisp up properly. Use two baking sheets if you need more room. The extra dish is worth it for that perfect crunch.
Baste for Extra Juiciness
About halfway through cooking, open the oven and baste the chicken with the pan juices or a little melted butter. This adds moisture and flavor to the surface. It also helps the skin turn a beautiful golden brown color.
Rest the Chicken After Baking
Once your chicken quarters in the oven are done, let them rest for at least 5 minutes before serving. This allows the juices to redistribute throughout the meat. If you cut into them right away, the juices will run out, and the chicken will be less moist.
Cover the chicken loosely with foil during resting. This keeps it warm without trapping too much steam, which could soften the crispy skin.
Serving Suggestions and Side Dishes
Chicken quarters in the oven pair wonderfully with a wide variety of sides. Here are some ideas to build a complete meal around your roasted chicken.
Best Side Dishes
- Roasted vegetables: Carrots, potatoes, and broccoli all roast beautifully alongside chicken.
- Rice or grains: Fluffy white rice, brown rice, or quinoa soak up the juices perfectly.
- Fresh salad: A light green salad with a tangy vinaigrette balances the richness of the chicken.
- Mashed potatoes: Creamy mashed potatoes are a classic pairing that never disappoints.
- Cornbread: Warm cornbread with butter is a comforting match for oven-baked chicken.
Meal Prep and Storage
Chicken quarters in the oven make excellent meal prep food. They store well in the refrigerator for up to 4 days. Simply let the cooked chicken cool, then place it in an airtight container.
To reheat, use the oven or a toaster oven at 350°F for about 10 to 15 minutes. Avoid microwaving if you want to keep the skin crispy. The oven reheats the chicken gently and helps maintain that great texture.
You can also freeze cooked chicken quarters for up to 3 months. Wrap each piece tightly in plastic wrap and then place them in a freezer bag. Thaw in the refrigerator overnight before reheating.
Common Mistakes to Avoid
Even experienced cooks can make mistakes when baking chicken quarters. Here are the most common ones and how to avoid them.
Skipping the Preheat
Never put chicken into a cold oven. Preheating ensures the cooking temperature is consistent from the start. This leads to better browning and more even cooking throughout.
Overseasoning or Underseasoning
Salt is the backbone of good seasoning. Do not be afraid to use enough salt, but also do not go overboard. A light hand with strong flavors like cayenne or garlic powder works better than heavy-handed salting.
Opening the Oven Too Often
Every time you open the oven door, the temperature drops. This can extend the cooking time and prevent the skin from crisping up. Resist the urge to peek too often. Check the chicken only once or twice during the baking process.
Ignoring the Internal Temperature
Guessing whether chicken is done is a risky game. Always use a meat thermometer to check that the internal temperature reaches 165°F. This is the only reliable way to ensure your chicken is both safe and perfectly cooked.
Frequently Asked Questions
Can I bake chicken quarters at a lower temperature?
Yes, you can bake chicken quarters in the oven at 375°F, but it will take longer — about 50 to 60 minutes. The lower temperature produces less crispy skin, so 425°F is recommended for the best texture and flavor.
How do I know if chicken quarters are done without a thermometer?
Pierce the thickest part of the thigh with a knife. If the juices run clear and not pink, the chicken is done. However, a meat thermometer is the most accurate and reliable method for checking doneness.
Can I use chicken quarters with the skin on?
Absolutely. The skin is what gets crispy and delicious in the oven. Leaving the skin on also helps keep the meat moist during baking. If you prefer less fat, you can remove the skin after cooking.
What is the best way to marinate chicken quarters for the oven?
A simple marinade of olive oil, lemon juice, garlic, and herbs works wonderfully. Marinate for at least 30 minutes or up to overnight in the refrigerator. The longer the marination, the deeper the flavor will be.
Can I cook chicken quarters on a sheet pan without a rack?
Yes, you can cook them directly on a sheet pan lined with parchment paper or foil. Just flip them halfway through to get even browning. Using a wire rack is still the better option for the crispiest results.
How long do cooked chicken quarters last in the fridge?
Cooked chicken quarters in the oven can be stored in the refrigerator for up to 4 days. Make sure they are stored in an airtight container to maintain freshness and prevent drying out.
Final Thoughts
Making chicken quarters in the oven is one of the simplest and most rewarding things you can do in the kitchen. With the right temperature, a little seasoning, and some patience, you will create a dish that is crispy on the outside and juicy on the inside.
This recipe is forgiving, flexible, and perfect for any skill level. Whether you are cooking for yourself, your family, or a dinner party, oven-baked chicken quarters never disappoint. Once you try this method, you will wonder why you ever settled for anything less.
So fire up your oven, grab some bone-in chicken quarters, and give this recipe a try. You will be amazed at how something so simple can taste so incredible. Happy cooking!