How To Turn On A Keurig Coffee Machine Step By Step
This guide shows you exactly how to turn on a Keurig coffee machine step by step. You’ll learn the simple power button location, how to add water, and what to do if your machine won’t start. We’ll also cover quick cleaning tips and common mistakes to avoid. By the end, you’ll brew your first cup like a pro.
Key Takeaways
- Always fill the water reservoir before powering on: This prevents the machine from running dry and damaging the internal pump.
- Run a water-only cycle first: Just like you would when you use a brand new oven, flushing the system removes dust and residue.
- Locate the power button on the top or side panel: Most models have a large button with a power icon near the brew handle.
- Use a grounded outlet for safe operation: A direct wall connection prevents electrical issues and voltage drops.
- Descale regularly to maintain performance: Keeping your machine clean is as simple as knowing how to self-clean a gas oven.
- Check for error lights if the machine won’t start: A blinking light often indicates a simple fix like an empty reservoir or a misaligned pod holder.
📑 Table of Contents
- What You’ll Need Before Turning On Your Keurig
- Step-by-Step Instructions to Power On Your Keurig
- Troubleshooting: What To Do If Your Keurig Won’t Turn On
- Tips for Maintaining Your Keurig After First Use
- Common Mistakes When Starting a Keurig Coffee Machine
- Comparison: Keurig Models and Their Power Buttons
- Final Thoughts on How To Turn On A Keurig Coffee Machine
What You’ll Need Before Turning On Your Keurig
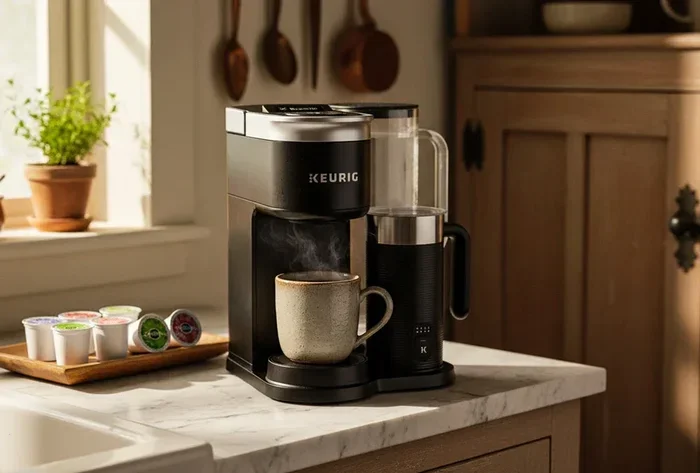
Before you learn how to turn on a Keurig coffee machine, gather a few essentials. You’ll need your Keurig unit, a clean mug, a water reservoir, and a K-Cup pod of your choice. Make sure you have a grounded electrical outlet nearby. The machine should sit on a flat, dry surface. If you just bought it, remove all packaging materials. Check that the water reservoir is free of any stickers or protective films. Having everything ready makes the process smooth and fast.
It’s also a good idea to read the quick-start guide that came with your coffee maker. Different models have slight variations. Some Keurigs have a removable reservoir, while others are fixed. Knowing your specific model helps you avoid confusion later. You’ll want to understand the parts before you press any buttons. The main parts include the reservoir, the pod holder, the drip tray, and the power base.
Checking the Power Connection
Plug the power cord into a grounded outlet. You should see a small light on the machine if it’s receiving power. If the outlet is controlled by a switch, make sure it’s turned on. Some users hide cords behind furniture, which can accidentally turn them off. Always plug the Keurig directly into the wall. Avoid using extension cords, as they can cause voltage drops. A direct connection ensures the machine gets the right amount of power for the heating element to work properly.
Filling the Water Reservoir
Lift the top lid and remove the water reservoir. Fill it with fresh, cold water up to the maximum line. Do not overfill, or water may spill during brewing. If your reservoir has a filter, make sure it’s properly seated. Reinsert the reservoir firmly until it clicks into place. The machine needs water to start the brewing system. Without water, the internal pump can run dry and burn out. Always use cold water, even if you want hot coffee. The machine heats the water internally to the perfect temperature.
Step-by-Step Instructions to Power On Your Keurig
Now that your Keurig is ready, it’s time to turn it on. The process is simple and takes less than a minute. Follow these steps carefully for the best results. Whether you have a Keurig Classic or a newer Keurig K-Supreme, the basic steps are the same.
Step 1: Locate the Power Button
Find the power button on your machine. On most models, it’s located on the top right side or the front panel. The button usually has a universal power icon, which looks like a circle with a vertical line. Press it firmly once. You’ll hear a gentle click or see a light turn on. The machine is now awake and ready to brew. If your model has a digital display, it will light up and show the default brew size.
Step 2: Run the First Water-Only Cycle
Before you insert a coffee pod, run a full cycle with just water. Place a large mug on the drip tray. Select the largest cup size if your model has buttons. Press the brew button. The machine will heat the water and push it through the K-Cup holder. This first flush removes any dust or manufacturing residue. It’s similar to how you’d run a brand new oven empty before cooking. You can discard the hot water or use it to warm up a kettle. This step is especially important if the machine has been sitting in a warehouse or store for weeks.
Step 3: Insert Your Coffee Pod
Lift the handle on the top of the machine. Place a coffee pod into the pod holder, with the foil side up. Close the handle gently until you feel it latch. Make sure the pod is centered. If the pod is misaligned, the machine may not pierce it correctly. Once the pod is secure, select your desired brew size. The options usually include 6 oz, 8 oz, and 10 oz cups. Some models also have a mug size or strong brew option. Choose the size that matches your mug.
Step 4: Press Brew and Wait
Press the brew button for your chosen size. The machine will heat the water and pump it through the pod. You’ll hear a gurgling sound as the coffee drips into your mug. The entire process takes about 1 to 2 minutes. Once the brewing stops, the machine will automatically shut off the flow. Carefully remove your mug and enjoy your fresh coffee. The pod holder will have a small amount of liquid left, which is normal.
Troubleshooting: What To Do If Your Keurig Won’t Turn On
Sometimes the machine doesn’t respond when you press the power button. Don’t worry. Most issues are easy to fix. Here are common problems and their solutions. A little patience goes a long way.
Check the Power Outlet
First, verify that the outlet is working. Plug in another device, like a phone charger, to test it. If the outlet is controlled by a wall switch, flip it on. You can also try a different outlet in another room. A tripped circuit breaker can also cut power. Check your home’s electrical panel and reset any tripped breakers. This simple step often solves the problem instantly. Never use a damaged outlet.
Inspect the Power Cord
Unplug the machine and examine the power cord for damage. Look for fraying, cuts, or exposed wires. If the cord is damaged, do not use the machine. Contact Keurig customer service for a replacement cord. A damaged cord is a safety hazard. Never attempt to repair it yourself with tape. Always replace the cord with an OEM part designed for your model.
Reset the Machine
Many Keurig models have a reset function. Unplug the machine from the wall. Wait at least 30 seconds. Plug it back in and press the power button. This clears any minor electronic glitches. If the machine still won’t turn on, check the water reservoir. Some models won’t power on if the reservoir is empty or improperly seated. Reinstall the reservoir firmly and try again. A full reset often brings the machine back to life.
Look for Error Lights
If your Keurig has a display or indicator lights, pay attention to them. A blinking light often signals a specific issue. For example, a blinking “add water” light means the reservoir is empty. A solid light might indicate a need for descaling. Consult your user manual to decode the lights. The manual will tell you exactly what to do next. Most error lights are easy to fix with a simple reset or a water refill.
Tips for Maintaining Your Keurig After First Use
Keeping your Keurig clean ensures great-tasting coffee every day. Regular maintenance also extends the life of your machine. A clean coffee maker brews better coffee. Here’s how to care for it properly.
Descaling Regularly
Mineral buildup from tap water can clog the internal tubing. Use a descaling solution or white vinegar to clean the system. Fill the reservoir with a 1:1 mixture of water and vinegar or the descaling solution. Run a full brew cycle without a pod. Repeat with fresh water until the reservoir is empty. This process removes calcium and lime scale. You should descale your machine every 3 to 6 months, depending on your water hardness. If you live in a hard water area, you may need to descale more often. Clean water means better flavor.
Cleaning the Exterior and Drip Tray
Wipe the exterior with a damp cloth after each use. This removes coffee splashes and dust. Remove the drip tray and rinse it under warm water. The tray can accumulate coffee grounds and residue. Wash it with mild dish soap and dry it thoroughly before reinserting. Also, clean the pod holder and the needle area. A clogged needle can slow brewing or cause leaks. Use a paperclip to gently clear any debris from the needle. A clean machine looks better and works better.
Replacing the Water Filter
If your Keurig has a water filter, replace it every 2 months. The filter removes chlorine and impurities that affect taste. You’ll find replacement filters at most grocery stores. Soaking the new filter in water for 5 minutes before installing it helps it activate faster. A fresh filter keeps your coffee tasting clean and smooth. Without a filter, your coffee may have a slightly metallic taste. Replacing the filter is one of the easiest ways to improve your daily cup.
Common Mistakes When Starting a Keurig Coffee Machine
Avoid these common errors to keep your machine running smoothly. Even experienced users sometimes make these slip-ups. A few small changes can make a big difference.
Skipping the Water Rinse
Many people skip the first water-only cycle. This is a mistake. New machines have internal residues from manufacturing. Running plain water through the system flushes those particles out. Skipping this step can lead to a funny taste in your first few cups. Always do the rinse before brewing your first real coffee. It only takes one extra minute.
Overfilling the Reservoir
It’s tempting to fill the reservoir to the brim. But overfilling causes water to spill into the machine’s base. This can damage the electronics. Always stay below the maximum fill line. If you’re making multiple cups, refill the reservoir between brews instead of filling it all at once. Spilled water can also cause the machine to slip off the counter. Keep the area dry and safe.
Using Hot Water from the Tap
Some users fill the reservoir with hot tap water to save time. This is not recommended. Hot water can damage the internal pump and heating element. Always use cold, fresh water. The machine heats it to the perfect brewing temperature on its own. Cold water also helps the machine’s thermostat work correctly. Trust the machine to heat the water properly. It’s designed to do that job perfectly.
Ignoring the Docking Station
If your Keurig has a docking station or base, make sure it’s properly aligned. The reservoir sits on a magnetic docking station. If it’s off-center, the machine may not recognize it. This can cause error messages or prevent brewing. Always press the reservoir down until you hear a click. Proper alignment ensures a secure connection. A misaligned reservoir is one of the most common reasons a Keurig won’t start.
Comparison: Keurig Models and Their Power Buttons
Different Keurig models have slightly different power button designs. Knowing where to look saves time. Here’s a quick comparison of popular models.
| Model | Power Button Location | Special Features |
|---|---|---|
| Keurig Classic | Top right side, large round button | Simple design, 4 brew sizes |
| Keurig Plus | Front panel, digital touchscreen | Stronger brew option, temperature control |
| Keurig K-Supreme | Top front, slim button with LED ring | Smart Start, multiple brew strengths |
| Keurig K-Mini | Side button, minimal design | Compact size, single cup only |
No matter which model you own, the basic power-on process is the same. Fill the reservoir, press the button, and brew. If you’re unsure about your specific model, check the user manual. The manual will show the exact button location and any special startup steps. Having the right knowledge makes operating your coffee maker effortless.
If you’re also planning to bake cupcakes in a toaster oven later, you’ll appreciate how precise temperature control is on a Keurig. While the Keurig doesn’t have a temperature dial, it maintains a consistent brewing temperature. This ensures every cup tastes the same. Just like how a toaster oven needs preheating for perfect cupcakes, your Keurig needs a clean water cycle for perfect coffee. Consistency is key in both cases.
Keeping your machine in good shape is just as important as knowing how to turn it on. Regular descaling is similar to how you’d maintain a gas oven. If you’ve ever wondered how to self-clean a gas oven, you know it’s about removing buildup. Your Keurig needs the same care. A clean machine brews better coffee and lasts longer. Treat your coffee maker well, and it will treat you right.
Final Thoughts on How To Turn On A Keurig Coffee Machine
Turning on a Keurig coffee machine is simple once you know the steps. Fill the reservoir, press the power button, and run a water rinse. Troubleshoot any issues by checking the outlet and resetting the machine. Regular cleaning keeps your coffee tasting fresh. With these tips, you’ll be a Keurig pro in no time. Enjoy your perfect cup every morning.
Frequently Asked Questions
How long does it take to turn on a Keurig?
Pressing the power button takes just a few seconds. The machine will light up or make a soft click. The first water-only cycle adds about 2 to 3 minutes. After that, a full brew cycle takes 1 to 2 minutes. So the total time from cold start to your first sip is under 5 minutes.
What should I do if my Keurig won’t power on?
First, check that the power cord is plugged into a working outlet. Try a different outlet if needed. Unplug the machine for 30 seconds and plug it back in. If the lights don’t come on, the power cord may be damaged. Contact Keurig support for a replacement.
Can I turn on a Keurig without water?
No, you should never run the machine without water. The heating element needs water to transfer heat safely. Running dry can damage the pump and the internal tubing. Always fill the reservoir before you press the power button.
How often should I descale my Keurig?
Descale every 3 to 6 months for most users. If you have hard water, you may need to descale more often. Signs that descaling is needed include slow brewing or a vinegar smell. Use a descaling solution or white vinegar and water.
Is it safe to leave a Keurig plugged in all the time?
Yes, it’s safe. Keurig machines have built-in safety features. They automatically shut off after brewing. The power light uses very little energy. However, if you won’t use the machine for several days, unplugging it saves a small amount of electricity and adds extra safety.
What’s the difference between turning on a Keurig and brewing?
Turning on simply powers up the machine and lights it up. Brewing is the process of heating water and pushing it through a coffee pod. You can turn on the machine without brewing by just pressing the power button. Brewing requires you to add a pod and press the brew button.