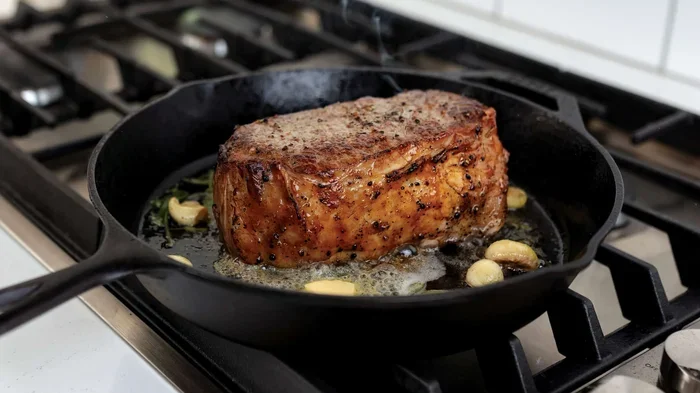
How To Cook Steak With Cast Iron And Oven Like A Pro
Cooking steak with cast iron and oven is the best way to get a restaurant-quality meal at home. This method combines even oven heat with a blistering hot skillet for a perfect steak crust and ideal steak doneness every time. You will learn the reverse sear method, how to choose the right cut, and how to rest your steak properly. Cast iron cooking gives you unmatched heat retention and a beautiful sear that other pans simply cannot match. Follow this guide and you will never overcook a steak again.
There is something deeply satisfying about cooking a steak in a cast iron skillet and finishing it in the oven. It is one of the most reliable ways to get a perfect steak every single time. Whether you are a beginner or a seasoned home cook, learning how to cook steak with cast iron and oven will change the way you prepare meat forever.
The beauty of this method lies in its simplicity. You do not need fancy equipment. You do not need a professional kitchen. All you need is a good cast iron skillet, a hot oven, and a quality cut of beef. In this guide, we walk you through every step of the process. You will learn about the best steak cuts, the science behind the sear, and the exact temperatures to aim for. By the end, you will feel confident enough to cook steak like a pro.
We have tested dozens of methods over the years. The oven and cast iron combo consistently produces the best results. The oven gently brings the steak up to temperature, while the cast iron skillet delivers a golden-brown crust that locks in flavor. This approach is called the reverse sear method, and it has become the go-to technique for steak lovers everywhere. Let us dive in.
Key Takeaways
- Cast iron is the ultimate steak pan: It holds heat evenly and creates a restaurant-quality crust.
- The reverse sear method works wonders: Start in the oven, finish on the stovetop for perfect results.
- Resting your steak matters: Always let it rest 5-10 minutes to lock in the juices.
- Choose the right cut: Ribeye, filet mignon, and New York strip all work beautifully with this method.
- Temperature control is key: Use a meat thermometer to hit your exact level of steak doneness.
- Season simply but well: Quality salt, pepper, and garlic go a long way with cast iron steak cooking.
- Patience pays off: Rushing the process leads to uneven cooking and a disappointing meal.
📑 Table of Contents
- Why Cast Iron Is The Best Pan For Steak
- Choosing The Right Steak Cut
- How To Prep Your Steak Like A Pro
- The Reverse Sear Method: Oven Then Cast Iron
- Getting The Perfect Crust In A Cast Iron Skillet
- Resting And Serving Your Steak
- Common Mistakes People Make When Cooking Steak With Cast Iron And Oven
- Final Thoughts On Cooking Steak With Cast Iron And Oven
Why Cast Iron Is The Best Pan For Steak
Not all pans are created equal when it comes to cooking steak. Cast iron stands in a league of its own. Here is why it is the best choice for cooking steak with cast iron and oven.
Superior Heat Retention
Cast iron is incredibly dense. It absorbs heat slowly but holds it tightly. When you place a steak on a hot cast iron skillet, the heat transfers evenly across the entire surface. This means no cold spots and no uneven cooking. Other pans, especially thin nonstick ones, lose heat the moment you place cold meat on them. Cast iron stays hot. That is what creates the perfect steak crust.
The Maillard Reaction
When a hot steak meets a hot pan, something magical happens. The Maillard reaction kicks in. This is a chemical process where the proteins and sugars on the surface of the meat react and create hundreds of new flavor compounds. The result is that deep, rich, brown crust that makes steak so irresistible. Cast iron gets hot enough to trigger this reaction reliably, which is why pan seared steak tastes so much better than other methods.
Oven-Safe and Versatile
Unlike many pans, cast iron goes from stovetop to oven without any issues. You do not need to transfer your steak to a different dish. You can start on the burner and finish in the oven seamlessly. This makes the reverse sear method incredibly easy. One pan, one process, amazing results.
Durability and Longevity
A good cast iron skillet lasts a lifetime. It does not warp. It does not scratch. It actually gets better with use as it develops a natural nonstick seasoning layer. Taking care of your cast iron skillet is one of the best investments you can make for your kitchen.
Choosing The Right Steak Cut
Not all steaks are the same. The cut you choose affects the flavor, texture, and cooking time. Here are the best options for cast iron cooking.
Ribeye Steak
The ribeye is the crowd favorite for a reason. It has beautiful marbling, which means intramuscular fat runs through the meat. This fat melts during cooking and keeps the steak incredibly juicy. A bone-in ribeye also adds extra flavor. This cut works wonderfully with the oven and cast iron method because the fat renders slowly and evenly.
Filet Mignon
If you prefer a leaner steak, filet mignon is an excellent choice. It is tender and mild in flavor. However, because it has less fat, it can dry out faster. Keep a close eye on the steak internal temp when cooking filet mignon. Pull it off the heat a few degrees early and let it rest.
New York Strip
The New York strip offers a great balance of flavor and tenderness. It has a firmer texture than ribeye but still plenty of beefy taste. It is a forgiving cut that works well for beginners learning how to cook steak with cast iron and oven.
Comparison Table: Best Steak Cuts for Cast Iron and Oven
| Steak Cut | Fat Content | Best For | Cooking Time (1.5 inch) |
|---|---|---|---|
| Ribeye | High | Flavor and juiciness | 12-15 min oven, 2 min sear |
| Filet Mignon | Low | Tenderness | 10-12 min oven, 2 min sear |
| New York Strip | Medium | Balance of flavor and texture | 11-14 min oven, 2 min sear |
| T-Bone | Medium-High | Best of both worlds | 12-16 min oven, 2 min sear |
Thickness Matters
For the best results, choose steaks that are at least 1 to 1.5 inches thick. Thinner steaks tend to overcook quickly in the oven. Thicker steaks give you more room for error and allow the reverse sear method to work its magic. If you buy thin steaks, consider skipping the oven step and just doing a quick stovetop sear instead.
How To Prep Your Steak Like A Pro
Preparation is where most people go wrong. Taking the time to prep your steak properly makes a huge difference in the final result.
Bring the Steak to Room Temperature
Remove your steak from the refrigerator 30-45 minutes before cooking. This allows the meat to warm up evenly. A cold steak hitting a hot pan will cook unevenly, with a grey outer layer and a cold center. Room temperature steak cooks more evenly and gives you better control over steak doneness.
Season Generously
Keep it simple. Coarse salt and freshly cracked black pepper are all you need for a great steak. Season both sides generously about 40 minutes before cooking. This gives the salt time to draw out moisture, which then gets reabsorbed into the meat. The result is a deeper, more seasoned flavor throughout.
Some cooks like to add garlic powder, smoked paprika, or fresh herbs to their steak seasoning blend. That is fine, but do not overcomplicate things. The quality of the beef should shine through.
Pat the Steak Dry
This is a crucial step many people skip. Use a paper towel to pat the steak dry on both sides. Moisture is the enemy of a great crust. The drier the surface of the steak, the better the Maillard reaction will be. A dry steak sears beautifully. A wet steak steams instead.
Common Mistakes to Avoid When Prepping
- Skipping the room temperature step: Cold steak leads to uneven cooking.
- Using too much seasoning: A light hand with salt works better than drowning the steak.
- Not patting the steak dry: Surface moisture prevents a proper crust from forming.
- Adding oil to the steak instead of the pan: Oil goes in the pan, not on the steak, for the best sear.
The Reverse Sear Method: Oven Then Cast Iron
The reverse sear method is the gold standard for cooking steak with cast iron and oven. Instead of searing first and finishing in the oven, you reverse the order. You cook the steak gently in the oven first, then finish with a quick, intense sear in the cast iron skillet. This gives you incredible control over the steak internal temp and produces a uniform pink interior with a stunning crust.
Step-by-Step Reverse Sear Process
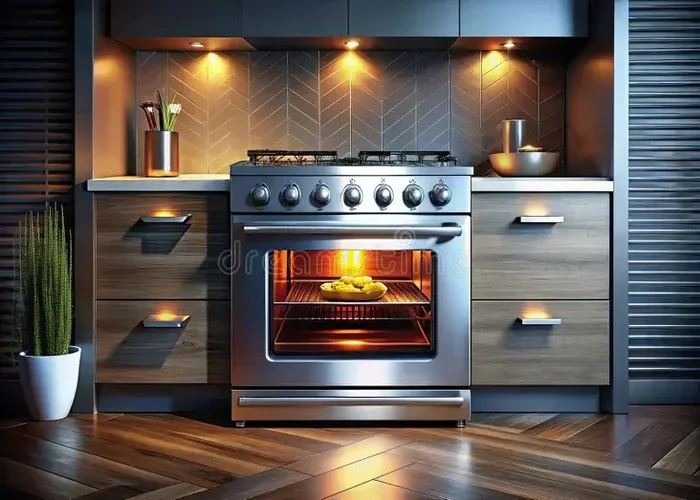
- Preheat your oven to 250°F (120°C). This low temperature gently brings the steak up to the desired internal temperature without overcooking the edges.
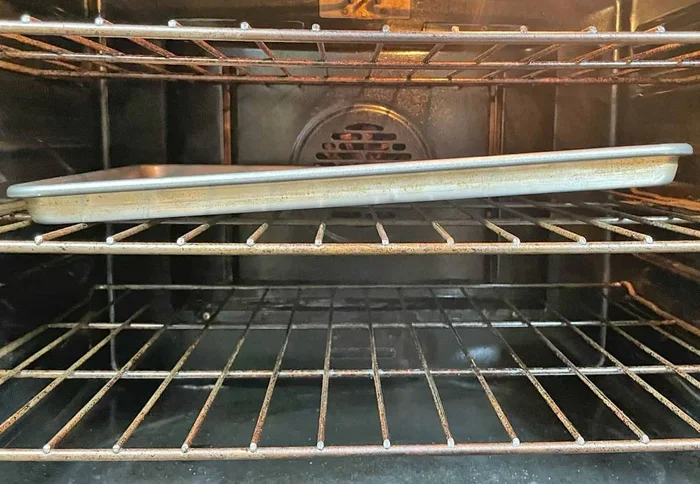
- Place the steak on a wire rack set over a baking sheet. The wire rack allows air to circulate around the steak, ensuring even cooking. Do not place the steak directly on the baking sheet, or the bottom will steam instead of roast.
- Insert a meat thermometer into the thickest part of the steak. This is your best tool for precision. You want to pull the steak out of the oven when it is 10-15 degrees below your target temperature.
- Cook until the internal temp reaches: 115°F for rare, 125°F for medium-rare, 135°F for medium, 145°F for medium-well.
- Remove from the oven and let it rest for 5 minutes while you heat the cast iron skillet.
- Place the cast iron skillet over high heat for 2-3 minutes until it is smoking hot.
- Add a high smoke-point oil and sear the steak for 60-90 seconds per side.
- Add butter, garlic, and thyme to the pan and baste the steak for an extra 30 seconds.
- Transfer to a cutting board and let it rest for 5-10 minutes before slicing.
Why the Reverse Sear Works So Well
The reverse sear method eliminates the guesswork. Traditional searing can leave you with a grey band of overcooked meat just below the crust. The reverse sear avoids this entirely. The oven does the slow, gentle work of bringing the steak up to temperature evenly. Then the cast iron skillet adds the crust in a matter of minutes. The result is a steak with a perfect gradient from edge to center.
This method also gives you more time to focus on the sear. Since the steak is already at temperature, you only need a brief, intense sear to develop the crust. There is no risk of overcooking the interior while you work on the outside.
Getting The Perfect Crust In A Cast Iron Skillet
The sear is the moment that transforms a good steak into a great one. Here is how to get it right every time.
Heat the Pan Properly
Place your cast iron skillet on the stove over high heat for at least 3-5 minutes. You want the pan to be ripping hot. A good test is to hold your hand a few inches above the pan. If you can feel the heat immediately, it is ready. Add your oil once the pan is hot. The oil should shimmer and almost smoke immediately.
Do Not Move the Steak
Once you place the steak in the pan, leave it alone. Resist the urge to peek or flip too early. Let it sear undisturbed for 60-90 seconds. You will see the edges turn brown and the steak will naturally release from the pan when the crust is ready. If it sticks, it is not ready to flip yet.
Baste for Extra Flavor
After flipping the steak, add a tablespoon of butter, a few crushed garlic cloves, and fresh thyme to the pan. Tilt the skillet slightly and use a spoon to scoop up the hot butter and pour it over the steak repeatedly. This basting technique adds richness and flavor to the surface of the steak. It is a restaurant trick that works beautifully at home.
How Long Should You Sear Each Side?
For a 1.5-inch steak, 60-90 seconds per side is usually sufficient. Thicker steaks may need a bit longer. Thinner steaks need less. The goal is a deep brown crust without overcooking the interior. Since the steak is already at temperature from the oven, the sear time is brief but impactful.
Resting And Serving Your Steak
Resting is the final and most overlooked step in cooking steak with cast iron and oven. It might seem like a small detail, but it makes a massive difference in the final result.
Why Resting Matters
When a steak cooks, the juices inside get pushed toward the center by the heat. If you cut into it immediately, those juices will flood out onto the cutting board, leaving you with a dry steak. Resting allows the juices to redistribute evenly throughout the meat. The result is a steak that is moist and tender with every bite.
How Long to Rest
Rest your steak for at least 5 minutes and up to 10 minutes. Place it on a warm cutting board or a plate. Tent it loosely with aluminum foil if you want to keep it warm, but do not wrap it tightly. A tight wrap will trap steam and soften the crust you just worked so hard to create.
Slicing Against the Grain
When you are ready to serve, look at the meat fibers and slice perpendicular to them. This is called cutting against the grain. It shortens the muscle fibers and makes the steak much more tender and easier to chew. Slicing with the grain, on the other hand, can make even a perfectly cooked steak feel tough.
Common Mistakes People Make When Cooking Steak With Cast Iron And Oven
Even experienced cooks make mistakes. Here are the most common ones and how to avoid them.
Starting With a Cold Pan
A cold cast iron skillet will not sear properly. Always preheat your pan before adding the steak. Give it at least 3-5 minutes on high heat. A properly preheated pan should make a sizzling sound the moment the steak touches the surface.
Overcooking in the Oven
The oven step is gentle but not hands-off forever. Use a meat thermometer and pull the steak out when it is 10-15 degrees below your target steak doneness. The steak will continue to rise in temperature during resting. This carryover cooking can add 5-10 degrees to the internal temp.
Using the Wrong Oil
Not all oils can handle the high heat of cast iron cooking. Avoid olive oil for searing, as it has a low smoke point and will burn. Use avocado oil, grapeseed oil, or clarified butter instead. These oils can handle the high temperatures without smoking or burning.
Skipping the Rest
We cannot stress this enough. Cutting into your steak immediately after cooking is one of the biggest mistakes you can make. The juices need time to settle. Patience here pays off in a juicier, more flavorful steak.
Neglecting Cast Iron Maintenance
Your cast iron skillet needs proper care to perform at its best. After cooking, clean it with warm water and a stiff brush. Dry it completely to prevent rust. Apply a thin layer of oil after washing to maintain the seasoning. A well-maintained cast iron skillet will perform better and last longer.
Final Thoughts On Cooking Steak With Cast Iron And Oven
How to cook steak with cast iron and oven is a skill that anyone can learn. It does not require expensive equipment or years of experience. With a good cast iron skillet, a quality cut of beef, and a little patience, you can achieve restaurant-quality results in your own kitchen.
The reverse sear method gives you unmatched control over steak doneness. The cast iron skillet delivers a crust that is second to none. And the oven ensures even, gentle cooking from edge to edge. Together, these two tools create the perfect steak cooking setup.
Start with a ribeye or New York strip if you are new to this method. Follow the steps in this guide carefully. Use a meat thermometer. Do not rush the process. And most importantly, enjoy the experience. Cooking a great steak is one of life’s simple pleasures, and there is nothing quite like the sound of a sizzling steak hitting a hot cast iron skillet.
Practice this method a few times, and you will develop your own instincts. You will know exactly when the pan is hot enough, when the steak is ready to flip, and when the crust is perfect. Cast iron cooking becomes second nature with time. And once you master this technique, you will never go back to any other way of cooking steak.
So grab your cast iron skillet, pick out a great cut of beef, and give it a try. Your taste buds will thank you.
Frequently Asked Questions
What is the best steak cut for cooking with cast iron and oven?
Ribeye is the top choice for most people because of its rich marbling and beefy flavor. Filet mignon works well if you prefer a leaner, more tender steak. New York strip is a great all-around option that balances flavor and tenderness perfectly.
How long should I cook steak in the oven before searing?
For a 1.5-inch thick steak, cook it in a 250°F oven for about 10-15 minutes. Use a meat thermometer and pull the steak out when it reaches 10-15 degrees below your target internal temperature. This is the key to the reverse sear method working correctly.
Do I need to season my cast iron skillet before cooking steak?
Yes. A well-seasoned cast iron skillet creates a natural nonstick surface and helps develop a better crust. If your skillet is new or needs refreshing, rub it with a thin layer of oil and bake it upside down in the oven at 450°F for one hour before your first use.
Can I use butter instead of oil for searing steak in cast iron?
Butter has a lower smoke point than most cooking oils, so it can burn at the high temperatures needed for searing. A better approach is to use a high smoke-point oil like avocado oil for the initial sear, then add butter, garlic, and herbs for basting after you flip the steak.
What internal temperature should my steak reach for medium-rare?
Pull your steak out of the oven when it reaches 115°F. After resting for 5-10 minutes, the temperature will rise to 125-130°F, which is the perfect medium-rare range. Always use a reliable meat thermometer for the best results with cast iron steak cooking.
How do I clean my cast iron skillet after cooking steak?
Rinse the skillet with warm water and use a stiff brush to remove any food residue. Avoid using soap, as it can strip the seasoning. Dry the skillet completely over low heat on the stove, then rub a thin layer of vegetable oil inside to protect the surface and prevent rust.