
How To Self Clean A Gas Oven And Remove Grease Fast
Learning how to self clean a gas oven is easier than you think. This guide walks you through every step to remove grease, baked-on food, and stubborn stains quickly. You will discover the self-clean cycle, prep tips, and natural cleaning solutions that work wonders. Keeping your gas oven clean improves cooking performance and safety. Follow our practical advice and enjoy a grease-free oven in under an hour.
Every home cook knows the frustration of opening the oven door and seeing layers of baked-on grease staring back. Food spills, grease buildup, and carbon residue can make your oven look terrible and even affect how your food cooks. The good news is that how to self clean a gas oven is something anyone can learn. You do not need expensive products or hours of scrubbing. With the right approach, you can have a sparkling oven in no time.
Whether you have a modern oven with a built-in self-clean feature or an older model, this guide covers everything you need. We will walk you through the self-clean cycle, natural cleaning methods, and simple habits that keep grease away. By the end, you will feel confident tackling even the toughest kitchen messes. Self cleaning a gas oven is one of the easiest ways to keep your kitchen fresh and your appliance running smoothly.
Key Takeaways
- Self-cleaning saves time: The pyrolytic cycle burns off grease at high heat, leaving only ash behind.
- Preparation is key: Removing racks and wiping loose debris before starting prevents smoke and odors.
- Natural solutions work great: Baking soda and vinegar tackle stubborn grease without harsh chemicals.
- Regular maintenance keeps it easy: Cleaning spills quickly prevents buildup and makes future cleaning effortless.
- Safety matters: Always ventilate your kitchen and avoid using chemical cleaners during the self-clean cycle.
- Grease removal is faster with steam: A simple steam method softens baked-on grime for quick wiping.
📑 Table of Contents
- Why Self Cleaning Your Gas Oven Matters
- How The Self-Clean Cycle Works On Gas Ovens
- Step-By-Step Guide To Self Cleaning A Gas Oven
- How To Remove Grease And Stubborn Stains Fast
- Maintaining A Clean Gas Oven After Self-Cleaning
- Common Mistakes To Avoid When Self-Cleaning
- Expert Tips For A Sparkling Gas Oven
- Conclusion
Why Self Cleaning Your Gas Oven Matters
Many people put off cleaning their oven until the smell of burnt food fills the kitchen. That is a mistake. Regular oven cleaning does more than just make your appliance look good. It plays a big role in how well your oven performs and how safe it is to use.
Grease and food residue build up over time. This grease buildup can create smoke when you cook at high temperatures. Smoke affects the taste of your food and can even set off your smoke detector. A dirty oven also distributes odors throughout your entire kitchen, which nobody wants.
Beyond aesthetics and smell, a clean oven heats more evenly. Layers of burnt food on the oven floor act as insulation. They can throw off your oven temperature and lead to uneven cooking. This means your meals might not turn out the way you intended. Gas oven maintenance through regular self-cleaning helps avoid all of these problems.
Another important reason is health. Old food particles and grease can harbor bacteria and pests. Cockroaches and rodents are attracted to the residue inside a dirty oven. Keeping your oven clean reduces these risks and creates a healthier cooking environment for your family.
The Benefits Of Regular Oven Cleaning
- Better cooking performance: A clean oven heats evenly and responds faster to temperature changes.
- Fewer odors: No more burnt smells when you bake or roast.
- Improved safety: Less grease means less smoke and lower fire risk.
- Longer appliance life: Regular care extends the lifespan of your oven.
- Easier meal prep: A clean oven makes every cooking session more enjoyable.
How The Self-Clean Cycle Works On Gas Ovens
Most modern gas ovens come with a self-clean cycle feature. This function uses very high heat to burn off food residue and grease. The temperature inside the oven can reach 900 degrees Fahrenheit or higher during this cycle. At that heat, organic matter turns into ash, which you can easily wipe away afterward.
The process is called pyrolytic cleaning. It relies on heat alone, so you do not need any chemical cleaners. The oven locks itself during the cycle for safety. This prevents you from opening the door and exposing yourself to extreme heat or smoke.
Not all gas ovens have this feature, though. Older models or budget-friendly options may not include it. If your oven lacks a self-clean function, do not worry. There are plenty of effective manual methods we will cover later. But if your oven does have the feature, it is one of the easiest ways to handle grease removal.
What Happens During The Self-Clean Cycle
The self-clean cycle typically takes between two and four hours. Here is a simple breakdown of what happens:
- The oven heats up to extremely high temperatures.
- All food spills, grease, and organic residue begin to burn away.
- The cycle continues until everything is reduced to white or gray ash.
- The oven cools down automatically before the lock releases.
During the cycle, you might see some smoke. This is completely normal. It comes from the burning residue. Ventilating your kitchen by opening a window or turning on the range hood helps manage any odors. Some people notice a slight smell at the start, which is just the burning of old food particles.
Step-By-Step Guide To Self Cleaning A Gas Oven
Now that you understand why cleaning matters and how the self-clean cycle works, let us get into the practical steps. Following this process ensures a thorough and safe oven cleaning experience every time.
Step One: Remove The Oven Racks
Before you start the self-clean cycle, pull out all oven racks. The extreme heat can warp or discolor metal racks over time. Most racks are fine to clean separately, either by hand or in the dishwasher. Removing them also gives you better access to the oven interior.
Set the racks aside in your sink or bathtub. You will clean them later using a different method. This step is quick but very important for protecting your oven and getting the best results.
Step Two: Clear Out Loose Debris
Take a damp cloth or paper towel and wipe down the inside of the oven. Remove any loose food particles, crumbs, or grease spots you can reach. This step reduces the amount of smoke produced during the self-clean cycle.
Pay special attention to the bottom of the oven, near the grease trap or drip pan. These areas collect the most residue. A quick wipe-down now saves you from dealing with excessive smoke later.
Step Three: Set Up Your Kitchen For Ventilation
Open a window and turn on your range hood or exhaust fan. The self-clean cycle produces smoke and some odors. Good ventilation keeps your kitchen comfortable and helps the process go smoothly.
If you have pets, consider keeping them out of the kitchen during the cycle. The smoke and smell can be irritating to animals. A little preparation goes a long way in making the experience pleasant.
Step Four: Start The Self-Clean Cycle
Close the oven door firmly. Most ovens have a lock mechanism that engages automatically during the self-clean cycle. Select the self-clean setting on your oven controls and set the time if prompted.
Some ovens let you choose between a short cycle and a long cycle. The short cycle works well for light cleaning. Use the long cycle if your oven has heavy grease buildup or stubborn stains. Let the oven do its work without opening the door.
Step Five: Let The Oven Cool Completely
Once the cycle finishes, the oven will begin to cool down. The door lock will release once the interior temperature drops to a safe level. This can take anywhere from 30 minutes to a couple of hours depending on your model.
Do not try to open the door early. Forcing it open while the oven is still hot can damage the lock mechanism. Be patient and let the cooling process finish naturally.
Step Six: Wipe Away The Ash
When the oven is completely cool, open the door and take a damp cloth. Wipe away all the white or gray ash from the oven walls, floor, and ceiling. A microfiber cloth works great for this because it picks up fine particles without scratching the surface.
If you notice any remaining grease spots or stubborn residue, use a mild oven cleaning solution or a paste made from baking soda and water. Gently scrub the area and wipe clean. The ash should come away easily, and any remaining spots will loosen with a little extra effort.
Step Seven: Clean The Racks And Reinsert Them
Now it is time to tackle those oven racks you set aside earlier. Soak them in hot soapy water for 20 to 30 minutes. Scrub off any grease or food residue with a non-abrasive sponge. Rinse them thoroughly and dry them completely before sliding them back into the oven.
For especially dirty racks, you can place them in a large garbage bag with a cup of ammonia and seal it tightly. Let them sit overnight. The ammonia fumes break down the grease, making the next morning’s cleaning much easier. Always rinse and ventilate well after using this method.
How To Remove Grease And Stubborn Stains Fast
Sometimes the self-clean cycle does not remove everything on its own. Older ovens or those that have not been cleaned in a long time may still have stubborn grease stains and baked-on residue. Fortunately, several effective methods can handle even the toughest messes.
The Baking Soda Paste Method
Baking soda is one of the best natural cleaning agents for ovens. It is gentle, affordable, and incredibly effective at cutting through grease. Here is how to use it:
- Mix three parts baking soda with one part water to form a thick paste.
- Spread the paste evenly over the greasy areas inside your oven.
- Let it sit for at least 12 hours or overnight.
- The next morning, wipe away the paste with a damp cloth.
- Spray any remaining residue with a mixture of vinegar and water.
- The vinegar will fizz, helping to lift the last bits of grime.
- Wipe clean with a fresh damp cloth and dry thoroughly.
This method works beautifully for stubborn grease that the self-clean cycle missed. It is safe for all oven surfaces and does not produce harsh fumes.
The Steam Cleaning Method
Steam cleaning is a fantastic way to soften baked-on food and grease quickly. This method is especially useful for regular maintenance and light cleaning.
Fill a small oven-safe dish with water and add a splash of white vinegar. Place the dish on the lowest oven rack and heat the oven to 250 degrees Fahrenheit. Let it run for about 15 to 20 minutes. The steam will loosen the grime on the oven walls and floor.
After the steam cycle, simply wipe everything down with a damp cloth. The grease and food particles should come off with very little effort. This method is perfect for weekly or bi-weekly oven cleaning between deeper cleanings.
Using Commercial Oven Cleaners
For really heavy grease buildup, a commercial oven cleaner spray can be effective. Look for products specifically designed for gas ovens and always follow the manufacturer instructions.
Spray the cleaner on the interior surfaces, avoiding the heating elements. Let it sit for the recommended time, then wipe away the residue with a damp cloth. Make sure to rinse the oven thoroughly afterward to remove any chemical traces. Never use commercial cleaners during the self-clean cycle, as they can produce toxic fumes at high temperatures.
Cleaning The Oven Door Glass
The oven door glass often accumulates a thick layer of grease and food splatter. This makes it hard to see what is cooking inside. Cleaning the glass is straightforward:
- Mix baking soda and water into a paste and apply it to the glass.
- Let it sit for 15 to 20 minutes.
- Scrub gently with a non-abrasive sponge.
- Wipe clean with a damp cloth.
- For tough spots, use a razor scraper at a shallow angle.
Regular cleaning of the door glass keeps your oven looking great and makes it easier to monitor your food while it cooks.
Maintaining A Clean Gas Oven After Self-Cleaning
The secret to an always-clean oven is prevention. Once you have put in the effort to self clean a gas oven, you want to keep it that way. Simple daily habits make a huge difference in reducing grease buildup and food residue.
Clean Spills Immediately
Whenever food spills or grease splatters inside your oven, wipe it up as soon as the oven cools down. Do not let spills sit and bake onto the surfaces. A quick wipe after each use keeps your oven in great shape and makes deep cleaning much less frequent.
Use Oven Liners
Oven liners are a fantastic tool for catching drips and crumbs before they become baked-on mess. Place a liner on the bottom rack beneath your cooking dish. After each use, simply remove the liner and shake off the debris. This one simple habit dramatically reduces the amount of cleaning you need to do.
Cover Your Dishes
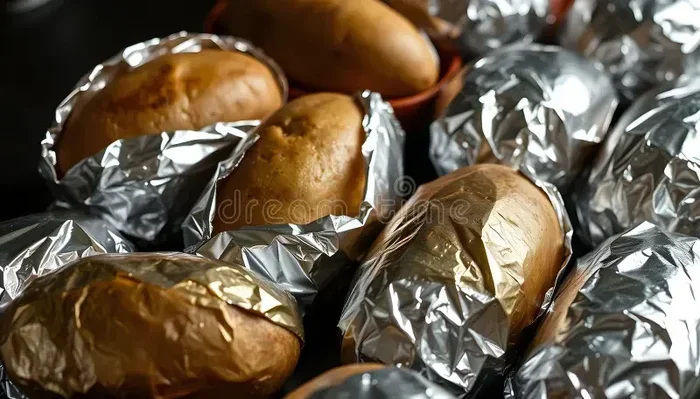
When you bake or roast, covering your dishes with aluminum foil or a lid prevents food from bubbling over and spilling onto the oven walls. This small step saves a lot of cleanup time and keeps your oven interior looking clean.
Schedule Monthly Maintenance
Set a reminder to do a quick oven cleaning once a month. A short steam cleaning session and a wipe-down of the interior takes only 20 minutes. This routine prevents heavy grease buildup and keeps your oven performing at its best.
Check And Clean The Grease Filter
If your oven has a grease filter or drip tray, check it regularly. Remove it and wash it with warm soapy water. A clogged grease filter can cause smoke and odors during cooking. Keeping it clean is an essential part of gas oven maintenance.
Common Mistakes To Avoid When Self-Cleaning
Even with the best intentions, people often make mistakes when cleaning their gas ovens. Avoiding these common errors saves time, protects your appliance, and ensures better results.
Using Chemical Cleaners During The Self-Clean Cycle
This is one of the most dangerous mistakes. Never spray oven cleaner inside the oven before running the self-clean cycle. The extreme heat can cause chemicals to produce toxic fumes that are harmful to your health. Always remove any chemical residue before starting the cycle.
Forgetting To Remove The Racks
As mentioned earlier, leaving racks inside during the self-clean cycle can cause them to warp or discolor. The metal expands under extreme heat and may not fit properly back into the oven. Always remove racks before starting the cycle.
Skipping Ventilation
The self-clean cycle produces smoke and odors. Skipping ventilation leads to a smoky kitchen, set-off smoke alarms, and lingering smells. Always open windows and turn on the exhaust fan before you begin.
Opening The Door Too Early
The oven lock engages during the self-clean cycle for a reason. Opening the door while the oven is still hot can release a burst of smoke and heat. It can also damage the locking mechanism over time. Wait for the oven to cool completely before opening the door.
Ignoring Small Spills
Small spills seem harmless, but they bake on over time and become much harder to remove. A quick wipe after each use prevents this buildup and makes your oven easier to maintain. Consistent care is the best approach to grease removal and long-term oven health.
Expert Tips For A Sparkling Gas Oven
Professional cleaners and experienced home cooks share a few extra tricks that take your oven cleaning to the next level. These tips are simple but surprisingly effective.
Use lemon water for a fresh scent. Place a bowl of water with sliced lemons inside the oven and heat it to 200 degrees Fahrenheit for 10 minutes. The steam loosens light grime and leaves a pleasant citrus smell behind.
Keep an oven thermometer inside. This helps you monitor your oven temperature accurately. A clean oven with a reliable thermometer ensures your food cooks evenly every time.
Wipe the oven after every use. This habit might sound excessive, but even a 30-second wipe after cooking prevents the buildup that leads to tough stains. It is the single best thing you can do for long-term oven cleanliness.
Replace the oven light bulb regularly. A bright, clear bulb makes it easier to spot spills and residue early. Catching messes early means less scrubbing later.
Deep clean your oven every three months. Even with regular maintenance, a thorough deep cleaning every few months keeps your oven in top shape. Use the self-clean cycle or a baking soda method and you will be amazed at the results.
Conclusion
How to self clean a gas oven is a skill every home cook should have. It saves time, improves cooking performance, and keeps your kitchen safe and fresh. Whether you use the self-clean cycle, natural baking soda methods, or steam cleaning, the key is consistency. Regular care prevents heavy grease buildup and makes each cleaning session faster and easier.
Remember to remove racks before the self-clean cycle, ventilate your kitchen, and never use chemical cleaners during high-heat cycles. For stubborn stains, the baking soda paste and steam methods work wonders. And for ongoing maintenance, simple habits like wiping spills immediately and using oven liners make all the difference.
A clean gas oven is a happy gas oven. It heats evenly, smells fresh, and makes every meal taste better. Start applying these tips today and enjoy the benefits of a spotless, grease-free oven every time you cook. Your kitchen and your food will thank you.
Frequently Asked Questions
How long does the self-clean cycle take on a gas oven?
Most self-clean cycles take between two and four hours to complete. The exact time depends on your oven model and the level of grease buildup. Always check your oven manual for the recommended cycle duration.
Is it safe to use the self-clean feature on a gas oven?
Yes, it is safe when you follow the manufacturer instructions. Make sure to remove racks, ventilate your kitchen, and never use chemical cleaners before starting the cycle. The oven locks itself automatically during the process for added safety.
Can I use baking soda and vinegar to clean my gas oven?
Absolutely. Baking soda and vinegar are two of the most effective natural cleaning agents for ovens. The baking soda cuts through grease while the vinegar helps lift residue. This combination is safe, affordable, and works great for regular maintenance.
How often should I self clean my gas oven?
It is best to self clean your gas oven every three to four months for regular maintenance. If you cook frequently or notice heavy grease buildup, you may need to clean it more often. A quick wipe after each use also helps reduce the need for deep cleaning.
Why does my oven smoke during the self-clean cycle?
Smoke during the self-clean cycle is completely normal. It comes from the burning of food residue and grease inside the oven. Opening a window and turning on the range hood helps manage the smoke and odors. If the smoke is excessive, make sure there are no chemical cleaners left inside.
What is the best way to remove baked-on grease from oven racks?
The best method is to soak the racks in hot soapy water for 30 minutes, then scrub with a non-abrasive sponge. For tough grease, place the racks in a garbage bag with ammonia overnight. Rinse thoroughly and dry before reinserting them into the oven.
=== CONCLUSION ===
Self cleaning a gas oven does not have to be a dreaded chore. With the right methods and a little consistency, you can keep your oven sparkling clean all year round. The self-clean cycle handles heavy grease effortlessly, while natural solutions like baking soda and steam tackle everyday messes with ease.
Start with the steps outlined in this guide. Remove your racks, prep the oven interior, and run the self-clean cycle. Follow up with spot treatments for stubborn stains and build a simple maintenance routine. You will be surprised at how quickly a clean oven becomes second nature.
Take action today. Your gas oven will thank you with better performance, safer cooking, and a fresh-smelling kitchen. Happy cleaning!

2 Comments