How Long Does It Take To Cook 1Lb Chicken Breast In Oven
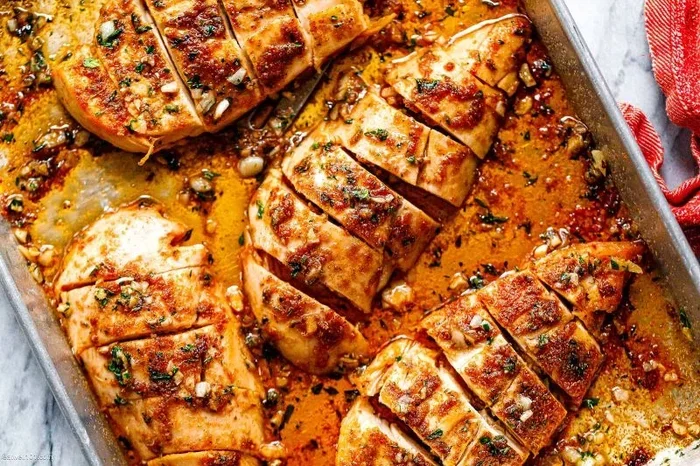
Cooking a 1lb chicken breast in the oven typically takes 20 to 25 minutes at 425 degrees Fahrenheit. The exact time depends on whether the chicken is boneless or bone-in, and whether you prefer it juicy or crispy. Always use a meat thermometer to ensure the internal temperature reaches 165 degrees Fahrenheit for safe eating.
Cooking a 1lb chicken breast in the oven is one of the easiest meals you can make at home. Whether you are meal prepping for the week or cooking dinner for your family, knowing the right time and temperature makes all the difference. This guide covers everything you need to know about baking chicken breast in the oven.
The short answer is simple. At 425 degrees Fahrenheit, a 1lb chicken breast bakes in about 20 to 25 minutes. But there is more to it than just time. The thickness of the meat, whether it has bones, and how you season it all play a role. Let us walk through every detail so you get perfect results every single time.
Oven-baked chicken breast is a staple in many kitchens. It is healthy, versatile, and incredibly easy to customize with different flavors. Once you master this basic recipe, you can add it to salads, wraps, pasta dishes, or eat it on its own. The key is understanding how long to cook 1lb chicken breast in oven conditions and getting the temperature just right.
Key Takeaways
- Standard Bake Time: A 1lb chicken breast takes about 20 to 25 minutes at 425°F in the oven.
- Temperature Matters: Always cook chicken breast to an internal temperature of 165°F for food safety.
- Boneless vs Bone-In: Boneless breasts cook faster, usually in 20 minutes, while bone-in cuts may need 25 to 30 minutes.
- Resting Is Key: Let your chicken breast rest for 5 to 10 minutes after baking for maximum juiciness.
- Seasoning Boosts Flavor: Simple seasonings like olive oil, garlic, and herbs make oven-baked chicken breast taste restaurant-quality.
- Avoid Overcooking: Overcooked chicken dries out quickly, so timing and temperature monitoring are essential.
📑 Table of Contents
- How Long Does It Take To Cook 1Lb Chicken Breast In Oven?
- What Temperature Should You Bake Chicken Breast At?
- Step-by-Step Guide To Baking Chicken Breast
- Tips For Juicy And Tender Chicken Breast
- Common Mistakes To Avoid When Cooking Chicken Breast
- How To Know When Chicken Breast Is Done
- How To Store and Reheat Leftover Baked Chicken Breast
- Frequently Asked Questions
- Conclusion
How Long Does It Take To Cook 1Lb Chicken Breast In Oven?
The bake time for a 1lb chicken breast varies based on a few factors. The standard cooking time at 425°F is 20 to 25 minutes for boneless breasts. If you are cooking bone-in chicken breast, add about 5 to 10 extra minutes. The goal is always to reach a safe internal temperature of 165°F at the thickest part of the meat.
Here is a quick breakdown of typical bake times based on oven temperature:
- 400°F: 22 to 28 minutes for boneless, 28 to 35 minutes for bone-in.
- 425°F: 20 to 25 minutes for boneless, 25 to 30 minutes for bone-in.
- 375°F: 25 to 30 minutes for boneless, 30 to 38 minutes for bone-in.
- 350°F: 30 to 35 minutes for boneless, 35 to 42 minutes for bone-in.
Higher temperatures like 425°F are the most popular choice. They cook the chicken faster and help create a slightly crispy exterior while keeping the inside moist. Lower temperatures take longer but can produce a more even cook if you are not careful about thickness.
Does Thickness Affect Cooking Time?
Absolutely. A thin chicken breast that is about half an inch thick will cook much faster than a thick piece that is one inch or more. If your 1lb chicken breast is not uniform in thickness, consider pounding it to an even size. This ensures even cooking throughout and prevents the thinner parts from drying out while the thicker center finishes baking.
When you pound chicken breast to a consistent thickness, you also reduce the overall bake time. This is a simple trick that many home cooks overlook. It works especially well for oven-baked chicken breast because it promotes even heat distribution across the entire piece of meat.
Boneless vs Bone-In Chicken Breast Bake Time
Boneless chicken breast cooks significantly faster than bone-in cuts. The bone acts as an insulator, which means the meat around the bone takes longer to heat through. If you are short on time, boneless is the way to go. But bone-in chicken breast has more flavor and stays juicier during baking.
Here is a side-by-side comparison of boneless and bone-in bake times for a 1lb chicken breast:
- Boneless at 425°F: 20 to 25 minutes
- Bone-in at 425°F: 25 to 30 minutes
- Boneless at 400°F: 22 to 28 minutes
- Bone-in at 400°F: 28 to 35 minutes
Always let the chicken rest after removing it from the oven. The resting period allows the juices to redistribute throughout the meat. Skipping this step can result in dry chicken breast even if you cooked it perfectly.
What Temperature Should You Bake Chicken Breast At?
The best oven temperature for baking chicken breast is 425°F. This high heat cooks the chicken quickly while sealing in moisture. It also gives you a nice golden-brown color on the outside without overcooking the inside. Most recipes for oven-baked chicken breast recommend this temperature as the sweet spot.
Some cooks prefer 400°F because it is slightly gentler. This works well if your chicken breast is very thick or if you want a more gradual cook. The lower temperature gives you a bit more buffer time if you tend to forget about the meat while it bakes.
Why 425°F Works So Well
At 425°F, the surface of the chicken breast reaches a high enough temperature to trigger the Maillard reaction. This is the chemical process that creates browning and adds complex flavor. The inside cooks through quickly because the overall bake time is short, which means less moisture escapes from the meat.
If you set your oven too low, the chicken spends too much time in the heat. This causes the juices to evaporate, leaving you with dry, tough chicken. If you set it too high, the outside burns before the inside reaches the safe temperature of 165°F. That is why 425°F hits the perfect balance for most 1lb chicken breast pieces.
Can You Cook Chicken Breast At 350°F?
Yes, you can cook chicken breast at 350°F. It just takes longer. At this lower temperature, a 1lb boneless chicken breast needs about 30 to 35 minutes. The benefit is that the slower cook can be more forgiving for thicker cuts. The downside is that the chicken may lose more moisture over the extended bake time.
Many traditional recipes use 350°F because it was the standard for older ovens. Modern ovens work well at higher temperatures, so 425°F is generally the better choice for juicy, flavorful chicken breast. But if your oven runs hot or you are baking other dishes at the same time, 350°F is a perfectly fine alternative.
Step-by-Step Guide To Baking Chicken Breast
Follow these simple steps to bake a perfect 1lb chicken breast in your oven. This method works for both boneless and bone-in cuts and guarantees delicious results every time.
Step 1: Prep the Chicken
Remove the chicken breast from the refrigerator about 15 to 20 minutes before baking. Letting it come to room temperature helps it cook more evenly. Pat the meat dry with paper towels. This step is crucial because surface moisture creates steam, which prevents browning.
Season the chicken generously with salt, pepper, olive oil, and any herbs or spices you enjoy. Popular choices include garlic powder, paprika, dried oregano, and rosemary. The oil helps the seasonings stick to the surface and promotes crispy skin.
Step 2: Preheat the Oven
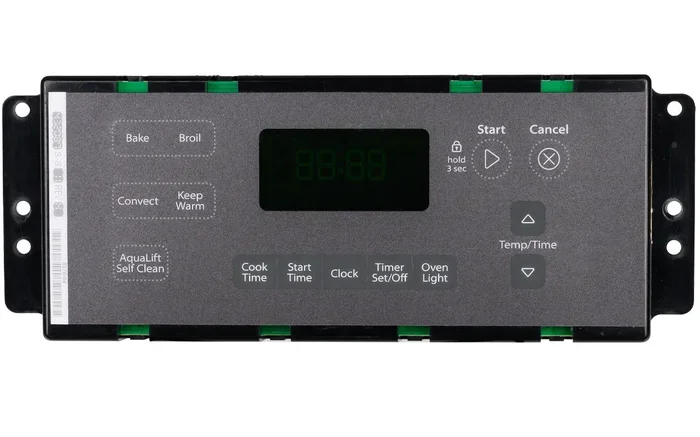
Preheat your oven to 425°F. Give it at least 10 to 15 minutes to reach the target temperature. A properly preheated oven ensures the chicken starts cooking immediately when it goes in. This is important for achieving that perfect golden-brown exterior and juicy interior.
If you are using a convection oven, you can reduce the temperature by about 25 degrees. Convection fans circulate hot air more efficiently, so the chicken bakes faster and more evenly. Just keep an eye on it a few minutes earlier than you normally would.
Step 3: Choose the Right Pan
Place the chicken breast on a lined baking sheet or in an oven-safe dish. A wire rack set over a baking sheet works wonders because it allows hot air to circulate underneath the meat. This promotes even browning on both sides and prevents the bottom from becoming soggy.
If you do not have a wire rack, a parchment-lined baking sheet works just fine. Avoid using deep pans because they trap steam around the chicken. Steam is the enemy of crispy chicken skin and can lead to uneven cooking.
Step 4: Bake and Monitor
Place the chicken in the center of the oven and set a timer for 20 minutes. At the 20-minute mark, check the internal temperature with a meat thermometer. The reading should be at least 165°F at the thickest point. If it is not there yet, continue baking in 2 to 3-minute increments.
Do not rely solely on the clock. Every oven is different, and chicken breast thickness varies from piece to piece. A meat thermometer is the only reliable way to know your chicken is done. This small tool takes the guesswork out of baking chicken breast and prevents both undercooking and overcooking.
Step 5: Rest and Serve
Once the chicken reaches 165°F, remove it from the oven. Let it rest on the pan for 5 to 10 minutes before cutting. This resting period is non-negotiable. During rest, the internal temperature continues to rise slightly, and the juices settle back into the meat fibers.
After resting, slice against the grain for maximum tenderness. Serve immediately with your favorite sides. Leftover baked chicken breast stores well in the refrigerator for up to four days and makes a great addition to lunches and salads throughout the week.
Tips For Juicy And Tender Chicken Breast
Getting juicy chicken breast from the oven is all about technique. Even a perfectly timed bake can turn dry if you skip a few key steps. Here are the best tips to ensure tender, flavorful results every time you cook chicken breast in the oven.
Brine or Marinate for Extra Moisture
Brining is one of the best-kept secrets for juicy chicken. A simple brine of water, salt, and sugar works wonders. Submerge the chicken breast for 30 minutes to 2 hours before baking. The salt helps the meat retain moisture during cooking, resulting in a noticeably juicier final product.
If you do not have time to brine, a simple marinade works well too. Olive oil, lemon juice, garlic, and herbs create a flavorful barrier that locks in moisture. Just do not marinate for too long if you are using acidic ingredients like lemon or vinegar. More than two hours can break down the protein and change the texture of the chicken.
Pound to Even Thickness
Uneven chicken breasts are the number one cause of dry edges and raw centers. Use a meat mallet or a rolling pin to pound the thickest parts down to an even half-inch to three-quarter-inch thickness. This simple step dramatically improves both the cook time and the final texture.
Pounding also tenderizes the meat by breaking down the muscle fibers. The result is a more tender bite that feels almost restaurant-quality. It takes just a minute or two and makes a huge difference in your oven-baked chicken breast.
Do Not Overcook
Overcooking is the biggest enemy of juicy chicken breast. Once the internal temperature reaches 165°F, pull the chicken out immediately. The carryover cooking effect will raise the temperature another 5 to 10 degrees during the resting period. Removing the chicken too late is the most common reason home cooks end up with dry meat.
If you are unsure, always err on the side of slightly underdone rather than overdone. You can always put it back for a couple more minutes. But you cannot undo a dried-out chicken breast. Trust your meat thermometer and be precise with your timing.
Use a Wire Rack
A wire rack elevates the chicken above the baking sheet, allowing hot air to flow all around the meat. This creates a crispy exterior on all sides, not just the bottom. The result is a more evenly cooked and better-textured chicken breast compared to placing it directly on a pan.
If you want crispy skin on bone-in chicken breast, the wire rack is essential. It prevents the skin from steaming against the pan and turning soggy. This one simple upgrade can take your oven-roasted chicken from good to great.
Common Mistakes To Avoid When Cooking Chicken Breast
Even experienced home cooks make mistakes when baking chicken breast. Being aware of these common errors helps you avoid them and achieve better results every time you cook chicken in the oven.
Skipping the Resting Period
Cutting into chicken breast immediately after baking releases all the juices onto the cutting board instead of staying in the meat. The resting period allows the proteins to relax and reabsorb moisture. Five to ten minutes may seem short, but it makes a noticeable difference in the final texture.
Not Using a Meat Thermometer
guessing whether chicken is done leads to inconsistent results. Some people cut into the meat to check, which releases juices and dries it out. Others rely on color, but chicken can look done on the outside while still being undercooked in the center. A meat thermometer removes all the guesswork and ensures food safety every time.
Crowding the Pan
If you are cooking multiple chicken breasts at once, give them space. Crowding the pan traps steam and creates uneven cooking. Each piece should have room for air to circulate freely. If your baking sheet is too small, use two sheets or bake in batches.
Starting with Cold Chicken
Putting cold chicken straight from the refrigerator into a hot oven creates uneven cooking. The outside overcooks while the inside is still cold. Letting the chicken sit at room temperature for 15 to 20 minutes before baking promotes more uniform cooking throughout the meat.
How To Know When Chicken Breast Is Done
Knowing when your chicken breast is fully cooked is essential for both taste and safety. The most reliable method is using a meat thermometer. Insert it into the thickest part of the breast, avoiding bone if present. The temperature should read 165°F for safe consumption.
Visual cues can also help. Properly baked chicken breast should look white throughout with no pink areas near the bone. The juices should run clear, not pink or cloudy. The meat should feel firm but still have a slight give when pressed.
For bone-in chicken breast, check the temperature near the bone. The bone acts as a heat conductor, and the meat closest to the bone may cook faster than the rest. Make sure you check multiple spots to confirm even doneness.
Carryover cooking is another factor to consider. The internal temperature of the chicken will rise 5 to 10 degrees after you remove it from the oven. This is why many experts recommend pulling the chicken at 160°F and letting it rest. The final temperature will reach the safe 165°F during the resting period without drying out the meat.
How To Store and Reheat Leftover Baked Chicken Breast
If you have leftovers, proper storage keeps the chicken breast safe and tasty. Let the chicken cool to room temperature within two hours of baking. Store it in an airtight container in the refrigerator for up to four days. For longer storage, wrap the chicken tightly and freeze it for up to three months.
Reheating is where many people go wrong. The microwave tends to dry out chicken breast quickly. A better method is to reheat in the oven at 325°F for 10 to 15 minutes. This gentle heat warms the chicken evenly without turning it into rubber. Adding a splash of chicken broth or a drizzle of olive oil before reheating helps maintain moisture.
You can also use leftover baked chicken breast in countless recipes. Shred it for tacos, chop it for salads, toss it into soups, or fold it into a creamy pasta. Leftover oven-baked chicken breast is one of the most versatile ingredients in the kitchen.
Frequently Asked Questions
Can you cook frozen chicken breast in the oven?
Yes, you can cook frozen chicken breast in the oven, but you need to increase the bake time by about 50 percent. A frozen 1lb chicken breast at 425°F will take approximately 30 to 40 minutes. Make sure the internal temperature reaches 165°F before serving. It is best to cook from frozen rather than partially thawing, as uneven thawing can create food safety risks.
How do you keep chicken breast moist in the oven?
Brining or marinating the chicken before baking is the best way to keep it moist. Pounding to even thickness ensures uniform cooking. Baking at 425°F for the right amount of time prevents overcooking. Always let the chicken rest for 5 to 10 minutes after baking so the juices redistribute throughout the meat.
Is it safe to eat chicken breast at 160°F?
The USDA recommends cooking chicken breast to an internal temperature of 165°F for food safety. However, if you pull the chicken at 160°F and let it rest, carryover cooking will bring it up to 165°F. This method can actually produce juicier results because you are not leaving the chicken in the oven long enough to dry out.
Can you bake chicken breast at 400°F instead of 425°F?
Yes, 400°F works well for baking chicken breast. The cook time will be slightly longer, usually 22 to 28 minutes for a 1lb boneless breast. The lower temperature produces a slightly less crispy exterior but can be more forgiving for thicker cuts. Both temperatures yield delicious results.
How long should chicken breast rest after baking?
Let chicken breast rest for 5 to 10 minutes after removing it from the oven. This resting period allows the juices to settle back into the meat fibers, resulting in a juicier and more tender bite. Cutting too soon releases those juices onto the cutting board and leaves the chicken drier than it should be.
What is the best seasoning for oven-baked chicken breast?
Simple seasonings work best for oven-baked chicken breast. Olive oil, salt, pepper, garlic powder, and paprika create a classic flavor profile. For something more vibrant, try lemon zest, dried oregano, and fresh thyme. The key is to coat the chicken evenly so every bite is flavorful.
Conclusion
Knowing how long to cook 1lb chicken breast in oven is the foundation of a great meal. At 425°F, you are looking at 20 to 25 minutes for boneless breasts and 25 to 30 minutes for bone-in cuts. The most important tool in your kitchen is a meat thermometer. It takes the guesswork out of baking chicken breast and ensures perfect results every time.
Remember to let the chicken rest, season it well, and avoid the common mistakes that lead to dry meat. With these tips and techniques, your oven-baked chicken breast will be juicy, flavorful, and tender every single time. Whether you are cooking for one or feeding a family, this simple recipe never disappoints. Now go preheat that oven and put your newfound knowledge to work.