How To Use Grill Pan In Oven For Tasty Meals Every Time
Discover the easiest way to get perfect grill marks and smoky flavor using a grill pan in your oven. This guide covers everything from choosing the right grill pan to cooking temperatures, timing, and maintenance. You will learn how to use grill pan in oven like a pro and create delicious meals every single time.
Nothing beats the sizzle of food hitting a hot grill pan. Now imagine that same satisfying char and smoky flavor, but cooked inside your oven. Using a grill pan in oven is one of the best ways to get restaurant-quality results right at home.
Whether you are grilling steaks, chicken, vegetables, or even seafood, a grill pan gives you those beautiful crosshatch marks and caramelized edges. The best part? You do not need an outdoor grill to enjoy grilled food year round.
In this guide, we will walk you through everything you need to know about how to use grill pan in oven. From picking the right pan to setting the perfect temperature, you will find all the tips and tricks you need. By the end, you will feel confident enough to start oven grilling your favorite meals every single day.
Key Takeaways
- Choose the right grill pan: Go for cast iron or oven-safe non-stick grill pans for best results
- Preheat properly: Always preheat your grill pan before adding food for perfect sear marks
- Use the right temperature: Most oven grilling works best between 400 and 450 degrees Fahrenheit
- Don’t skip the grease tray: Place a drip tray underneath to catch excess fat and prevent smoke
- Flip only once: Let food develop grill marks before flipping for the best charred flavor
- Clean and season after use: Proper maintenance extends the life of your grill pan significantly
- Experiment with foods: From meats to vegetables, a grill pan in oven opens up many cooking possibilities
📑 Table of Contents
What Is a Grill Pan and Why Use It in the Oven
A grill pan is a cooking pan with raised ridges that mimic the look and taste of outdoor grilling. The ridges allow fat to drip away from your food while creating those classic grill marks everyone loves. You can use a grill pan on a stovetop, but placing it in the oven opens up a whole new world of cooking.
When you combine a grill pan with oven heat, you get the best of both worlds. The ridges sear the food directly, while the surrounding oven heat cooks the inside evenly. This method works beautifully for indoor grilling and is a fantastic alternative to traditional outdoor barbecue.
How a Grill Pan Works in an Oven
When you place a grill pan inside a hot oven, the heat surrounds the food from all sides. The raised ridges conduct heat directly to the surface of your food, creating a sear similar to what you get from a charcoal grill. The oven’s dry heat also helps cook the food evenly while the ridges let excess grease drip down into the pan.
This combination of direct heat from the ridges and surrounding heat from the oven creates a unique charred flavor that is hard to achieve with other cooking methods. The result is food that looks grilled, tastes grilled, and has that satisfying smoky depth. Many home cooks are surprised at how close oven grilling can come to the real thing.
Benefits of Oven Grilling
There are many reasons to try oven grilling with a grill pan:
- Year-round cooking: You can grill in winter, rain, or any weather without stepping outside.
- Better fat control: The ridges let grease drip away, making your meals healthier.
- Even cooking: The oven heat surrounds the food, reducing hot spots.
- Easy cleanup: Most grill pans are dishwasher safe or easy to clean by hand.
- Versatility: You can cook meats, vegetables, fish, and even fruits on a grill pan.
- Less smoke: Oven grilling produces less smoke than outdoor grilling in many cases.
Oven grilling is especially great for people who live in apartments or homes without outdoor space. You still get all the flavor benefits without the need for a backyard or balcony. It is also safer and easier to monitor than an open flame.
Choosing the Right Grill Pan for Your Oven
Not all grill pans are created equal. Choosing the right one makes a huge difference in your cooking results. Here are the key factors to consider when shopping for oven-safe cookware.
Cast Iron vs. Non-Stick Grill Pans
The two most popular types of grill pans are cast iron and non-stick. Each has its own strengths:
- Cast iron grill pan: These pans retain heat incredibly well and create excellent sear marks. They are heavy but extremely durable. Many cooks prefer cast iron for its ability to build up a natural non-stick surface over time through seasoning.
- Non-stick grill pan: These are lighter and easier to handle. Food releases easily from the surface, making cleanup a breeze. However, non-stick pans usually cannot handle as high temperatures as cast iron.
For most oven grilling tasks, a cast iron grill pan is the top choice. It handles high heat beautifully and gives you the best grill marks. If you prefer lighter cookware or cook delicate foods like fish, a non-stick grill pan works well too.
Oven-Safe Features to Look For
When buying a grill pan for oven use, check for these important features:
- Oven-safe handle: The handle must be heat-resistant up to at least 500 degrees Fahrenheit.
- Rim design: A rim on the edge helps prevent grease from dripping onto the oven floor.
- Grease tray or channel: Some grill pans come with a built-in grease tray that catches dripping fat.
- Even heat distribution: Look for pans with a thick base that spreads heat evenly across the surface.
- Size matters: Choose a pan that fits comfortably in your oven with room for air circulation around it.
Always check the manufacturer’s label to confirm the pan is oven-safe. Using a pan that is not rated for oven temperatures can damage the pan and even release harmful chemicals. When in doubt, contact the manufacturer before placing any pan in a hot oven.
Comparison: Cast Iron vs. Non-Stick Grill Pans
| Feature | Cast Iron Grill Pan | Non-Stick Grill Pan |
|---|---|---|
| Heat Retention | Excellent | Moderate |
| Max Temperature | 500°F+ | 400-450°F |
| Durability | Lasts a lifetime | 3-5 years |
| Weight | Heavy | Light |
| Grill Marks | Excellent | Good |
| Easy Cleanup | Requires more effort | Very easy |
| Price Range | $30-$80 | $20-$50 |
As you can see from the table above, each type of oven grill pan has its advantages. Cast iron is the go-to for serious cooks who want maximum heat and perfect sear marks. Non-stick is ideal for beginners or anyone who wants quick and easy cleanup.
How To Use Grill Pan In Oven: Step-by-Step Guide
Now that you have the right pan, let us walk through the actual process of how to use grill pan in oven. Follow these steps for perfect results every time you cook.
Step 1: Preheat Your Oven and Grill Pan
Preheating is the most important step in oven grilling. Start by placing your empty grill pan inside the cold oven. Then set the oven to your desired temperature, usually between 400 and 450 degrees Fahrenheit. Allow both the oven and the pan to heat up together for at least 10 to 15 minutes.
Heating the pan gradually prevents thermal shock, which can warp or crack the pan. A hot pan is essential for getting those perfect sear marks and locking in juices. Searing happens fast, so the pan needs to be ready before your food touches it.
Pro tip: If you are using a cast iron grill pan, let it heat for an extra 5 minutes. Cast iron needs more time to reach the ideal cooking temperature and hold that heat steady throughout the cooking process.
Step 2: Prepare Your Food
While the pan is heating, prepare your food. Pat your meat or vegetables dry with a paper towel. Moisture is the enemy of a good sear. Lightly brush or spray the food with oil, and season generously with salt, pepper, and any spices you enjoy.
For thicker cuts of meat, let them come to room temperature before cooking. This ensures more even cooking throughout. You can also marinate your food for extra flavor, but make sure to pat it dry before placing it on the hot pan. Excess moisture will steam the food instead of searing it.
Step 3: Place Food on the Hot Grill Pan
Once the pan is hot, carefully remove it from the oven using oven mitts. Place your food on the ridges of the grill pan. Leave space between each piece so air can circulate freely. Overcrowding the pan leads to steaming instead of searing.
For best results, place the food on the ridges at a 45-degree angle. This creates the classic crosshatch grill marks that make your food look professionally cooked. Resist the urge to move the food too soon. Let it sear for at least 3 to 4 minutes before attempting to flip or rotate it.
Step 4: Cook and Monitor the Temperature
Return the pan to the oven and let the food cook. Do not open the oven door too often, as this releases heat and can affect cooking time. Most foods need about 10 to 20 minutes depending on thickness and type.
Use a meat thermometer to check internal temperatures for meats. This is the most reliable way to ensure your food is cooked safely and to the right level of doneness. A good instant-read thermometer takes the guesswork out of cooking entirely.
Step 5: Flip and Finish Cooking
After about half the cooking time, open the oven and carefully flip each piece of food. Use tongs to turn the items, keeping them at a 45-degree angle again for crosshatch marks. Continue cooking until the food reaches the recommended internal temperature.
Once done, remove the pan from the oven and let the food rest for a few minutes before serving. Resting allows the juices to redistribute, making every bite more flavorful and tender. Cutting into meat right after cooking releases all the juices, leaving it dry and less enjoyable.
Common Mistakes When Using a Grill Pan in the Oven
Even experienced cooks make mistakes. Here are the most common ones to avoid when grill pan oven cooking:
- Skipping the preheat: A cold pan means no sear marks and steamed food instead of grilled food.
- Overcrowding the pan: Too much food at once lowers the temperature and prevents proper browning.
- Using too much oil: The ridges already help fat drip away. A light coating is all you need.
- Opening the oven too often: Every time you open the door, you lose heat and extend cooking time.
- Not resting the meat: Cutting into meat right after cooking releases all the juices, leaving it dry.
Avoiding these simple mistakes will dramatically improve your oven grilling results. Take your time, be patient, and let the heat do the work for you.
Best Foods to Cook on a Grill Pan in the Oven
One of the best things about how to use grill pan in oven is the wide variety of foods you can cook. Almost anything that benefits from grilling works beautifully in an oven with a grill pan. The dry heat and raised ridges create a texture and flavor profile that is hard to replicate with other cooking methods.
Meats and Poultry
Steaks, chicken breasts, pork chops, and lamb chops all cook wonderfully on a grill pan in the oven. The oven heat penetrates the meat evenly while the ridges create a flavorful crust on the outside. Meat grilling in the oven gives you precise control over doneness, which is especially helpful for thicker cuts.
For chicken, bone-in pieces work best because they stay juicier during cooking. For steaks, choose cuts that are at least one inch thick so they can develop a good crust without overcooking the inside. A grill pan oven combination works particularly well for ribeye, sirloin, and filet mignon.
Grill marks on steaks and chicken not only look impressive but also add a subtle smoky flavor that enhances the overall taste of the dish. The caramelization that happens on the ridges creates complex flavor compounds that make every bite more enjoyable.
Vegetables and Seafood
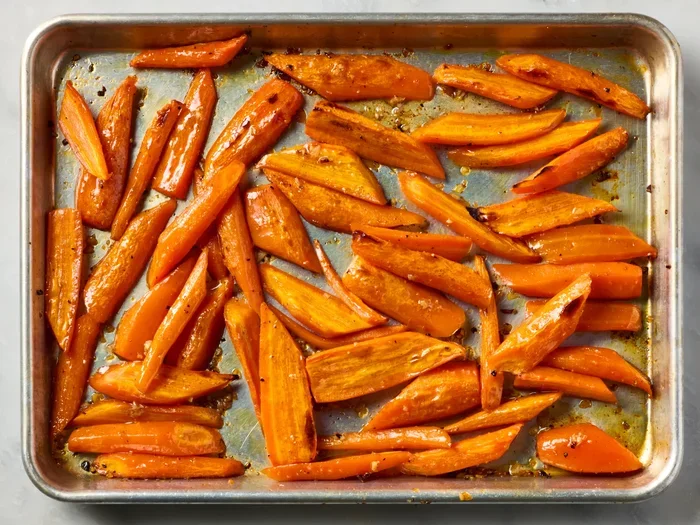
Grilling vegetables in the oven is incredibly easy and delicious. Bell peppers, zucchini, mushrooms, asparagus, and eggplant all develop a wonderful caramelized flavor when cooked on a grill pan.
Cut vegetables into uniform pieces so they cook evenly. Toss them in a little oil and seasoning before placing them on the hot pan. Most vegetables need only 8 to 12 minutes in a preheated oven. The ridges give them beautiful char marks and a slightly smoky taste.
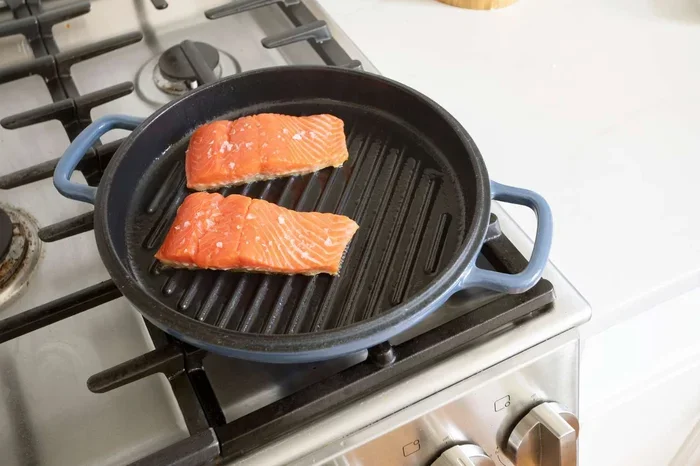
Seafood like salmon, shrimp, and scallops also benefit from oven grilling. The high heat creates a crispy exterior while keeping the inside tender and moist. Shrimp only needs about 4 to 5 minutes per side for perfect results. Salmon fillets cook beautifully at 400 degrees and develop a gorgeous golden crust.
Comparison Table: Oven Grilling Times by Food
| Food Type | Recommended Temp | Cooking Time | Best For |
|---|---|---|---|
| Steak (1 inch thick) | 425°F | 12-15 min | Medium-rare to well-done |
| Chicken Breast | 400°F | 18-22 min | Juicy, evenly cooked |
| Salmon Fillet | 400°F | 10-14 min | Flaky, moist texture |
| Mixed Vegetables | 425°F | 8-12 min | Caramelized edges |
| Shrimp | 425°F | 6-8 min | Slight char, juicy |
| Pork Chops | 400°F | 15-20 min | Tender, flavorful |
This table gives you a quick reference for oven grilling different foods. Always use a meat thermometer to check doneness, as cooking times can vary based on the thickness of your food and the specific model of your oven.
Temperature and Timing Guide for Oven Grilling
Getting the cooking temperature right is crucial for how to use grill pan in oven successfully. Too low and your food will steam instead of sear. Too high and the outside burns before the inside cooks through.
Recommended Temperatures by Food Type
Here is a general guide to oven temperatures for different foods:
- 400°F: Ideal for chicken, pork, and most vegetables. This temperature provides a good balance of browning and cooking time.
- 425°F: Perfect for steaks, salmon, shrimp, and root vegetables. The higher heat creates a deeper sear and crispier edges.
- 450°F: Best for thin cuts of meat and quick-cooking items. Use this temperature for foods that need a fast, intense sear.
Remember that oven temperatures can vary. Many ovens run hot or cold by 10 to 25 degrees. Consider using an oven thermometer to get an accurate reading of your actual cooking temperature. This small investment pays off in more consistent results every time you cook.
How Long to Cook Different Foods
Cooking time depends on the thickness of your food and your desired level of doneness. Here are some general guidelines:
- Thin cuts (less than 1/2 inch): 6 to 10 minutes, flipping once halfway through.
- Medium cuts (1/2 to 1 inch): 10 to 15 minutes, flipping once.
- Thick cuts (over 1 inch): 15 to 25 minutes, flipping once and checking internal temperature.
The meat thermometer is your best friend when oven grilling. For beef steaks, aim for 135°F for medium-rare, 145°F for medium, and 160°F for well-done. Chicken should always reach 165°F internally for food safety. Pork chops are best at 145°F for a tender and juicy result.
Mastering the Sear on Your Grill Pan
The sear is what separates great oven-grilled food from ordinary food. A good sear happens when the surface of the food reaches a high enough temperature to undergo the Maillard reaction. This chemical process creates hundreds of new flavor compounds and that beautiful golden-brown color we all love.
To achieve the perfect sear, make sure your pan is truly hot before adding food. You should see a slight shimmer on the surface of the pan. Place the food gently and resist the urge to move it. Let the ridges do their work. After a few minutes, you will see defined sear marks forming, and the food will release naturally from the pan when it is ready to be flipped.
Cleaning, Maintaining, and Getting the Most from Your Grill Pan
Proper care keeps your grill pan in top shape for years. A well-maintained cast iron grill pan can last a lifetime and actually improves with use. Here is how to clean, maintain, and get the most out of your grill pan after every oven grilling session.
Post-Cooking Cleaning Steps
Wait for the pan to cool down before cleaning. Never plunge a hot pan into cold water, as this can cause warping or cracking. Once the pan is warm but safe to handle, follow these steps:
- Remove any food particles with a wooden or silicone spatula. Avoid metal utensils that can scratch the surface.
- Rinse the pan with warm water. Use a stiff brush or chain-mail scrubber to remove stuck-on bits from between the ridges.
- For stubborn residue, add a small amount of coarse salt and scrub gently. The salt acts as a natural abrasive without damaging the pan.
- Dry the pan thoroughly with a towel immediately after washing. Leaving water on the surface can cause rust, especially on cast iron.
- Apply a thin layer of oil to the cooking surface before storing. This protects the pan and maintains its non-stick properties.
Most grill pans are not dishwasher safe. The harsh detergents and high heat of a dishwasher can strip seasoning from cast iron and damage non-stick coatings over time. Hand washing is always the best approach for long-lasting performance.
Seasoning and Storage Tips
If you use a cast iron grill pan, seasoning it regularly is essential. Here is how to do it:
- After cleaning and drying, apply a thin layer of vegetable oil or flaxseed oil to the entire pan, including the handle.
- Place the pan upside down in the oven at 350°F for one hour. This bakes the oil into the surface, creating a natural non-stick layer.
- Let the pan cool completely in the oven before removing it.
- Store the pan in a dry place. If stacking pans, place a paper towel between them to prevent scratching.
For non-stick grill pans, avoid using abrasive cleaners or steel wool. A soft sponge with mild dish soap is usually all you need. Replace non-stick pans when the coating starts to peel or flake. A well-maintained pan cooks better and lasts longer, saving you money in the long run.
Adding Smoky Flavor Without a Smoker
You can add a smoky dimension to your oven-grilled food with a few simple tricks:
- Use smoked paprika or chipotle powder: These spices add a natural smoky flavor to meats and vegetables.
- Add wood chips to a foil packet: Place soaked wood chips in a foil packet on the oven floor while grilling. The smoke will infuse your food with a subtle wood-fired flavor.
- Use a cast iron pan: Cast iron retains and radiates heat in a way that enhances the caramelization process, adding depth to the flavor.
- Brush with smoked olive oil: A light coating of smoked olive oil before cooking adds a rich, smoky aroma to your food.
These simple additions transform ordinary oven-grilled food into something that tastes like it came straight off a backyard barbecue. The smoky flavor pairs beautifully with meats, vegetables, and even fruits like peaches and pineapple. Once you try it, you will not want to go back to plain oven cooking.
How to use grill pan in oven is a simple skill that can transform your everyday cooking. With the right pan, the right temperature, and a little practice, you can create juicy steaks, perfectly grilled vegetables, and flavorful seafood right in your own kitchen. Remember to always preheat your pan, choose the right temperature for each food, and resist the urge to overcrowd the surface. Clean and maintain your grill pan after every use, and it will serve you well for many years to come. The beauty of oven grilling is that you do not need perfect weather or outdoor space. Your oven and a good grill pan are all you need to enjoy grilled meals any time of the year. Start experimenting today, and you will wonder why you ever cooked without one.
Frequently Asked Questions
Can any grill pan go in the oven?
Not all grill pans are oven-safe. Always check the manufacturer’s label for oven-safe ratings. Most cast iron and stainless steel grill pans can handle high oven temperatures, but non-stick pans may have lower limits. Look for pans rated for at least 450 degrees Fahrenheit to be safe.
What temperature should I use when grilling in the oven?
The ideal temperature depends on what you are cooking. Most foods grill well between 400 and 450 degrees Fahrenheit. Chicken and pork work great at 400°F, while steaks and seafood benefit from the higher heat of 425°F to 450°F. Always preheat your grill pan along with the oven for the best results.
Do I need to oil a grill pan for oven use?
Yes, a light coating of oil helps prevent sticking and promotes better browning. Use a high smoke-point oil like avocado oil, canola oil, or grapeseed oil. Apply it to the food rather than the pan to avoid excess smoke. The ridges on the grill pan already help fat drip away, so you need very little oil.
How do I get perfect grill marks on my food?
Perfect grill marks come from a hot pan and proper placement. Put food on the ridges at a 45-degree angle and let it sear for 3 to 4 minutes before rotating 90 degrees. Do not move the food too soon. Patting food dry before cooking also helps achieve defined, beautiful grill marks every time.
Can I use a grill pan in the oven for vegetables?
Absolutely. Oven-grilled vegetables are delicious and easy to make. Cut vegetables into uniform pieces, toss with a little oil and seasoning, and cook at 425°F for 8 to 12 minutes. The ridges create caramelized edges and a subtle smoky flavor that makes vegetables taste incredible.
How do I clean my grill pan after oven use?
Let the pan cool down, then rinse with warm water. Use a stiff brush to remove food particles from between the ridges. For stuck-on bits, add coarse salt and scrub gently. Dry the pan thoroughly and apply a thin layer of oil before storing. Never put a hot pan in cold water, as this can cause warping or cracking.